
- 16.1.1 Data Plate
- 16.1.1 N-Numbers
- 16 First Flight
- Gear doors, rudders and roll trim
- The end of a long journey…
- First Flight! (for me)
- Glide testing and V speeds
After the first flight, the first order of business was to get the flutter which was suspected of coming from the gear doors. Since I was having to head up to Illinois and pack up the remaining furniture, I had Malcolm handle those tasks.
When the plane was jacked up and the gear retracted, the nose gear doors weren’t fully closed so Malcolm adjusted those. The left main gear door was hanging down about a 1/4″ so that was adjusted as well. He checked the incidence of the wings to try and determine if that was the cause of the left roll tendency. Both wings were perfectly set. Although the right wing did have some wash-out. But if that was a factor, it would have had the opposite effect. So the roll issue was deferred (for now).
John went up for the second flight on 7/14. The flutter from the gear doors was gone. But now there’s a flutter from the right rudder. The plan was to shim out the rudders and see what that did. The roll tendency toward the left is still there. John and Scott Swing both feel that shimming a wing was overkill and that if I had roll trim it could easily be dialed out.
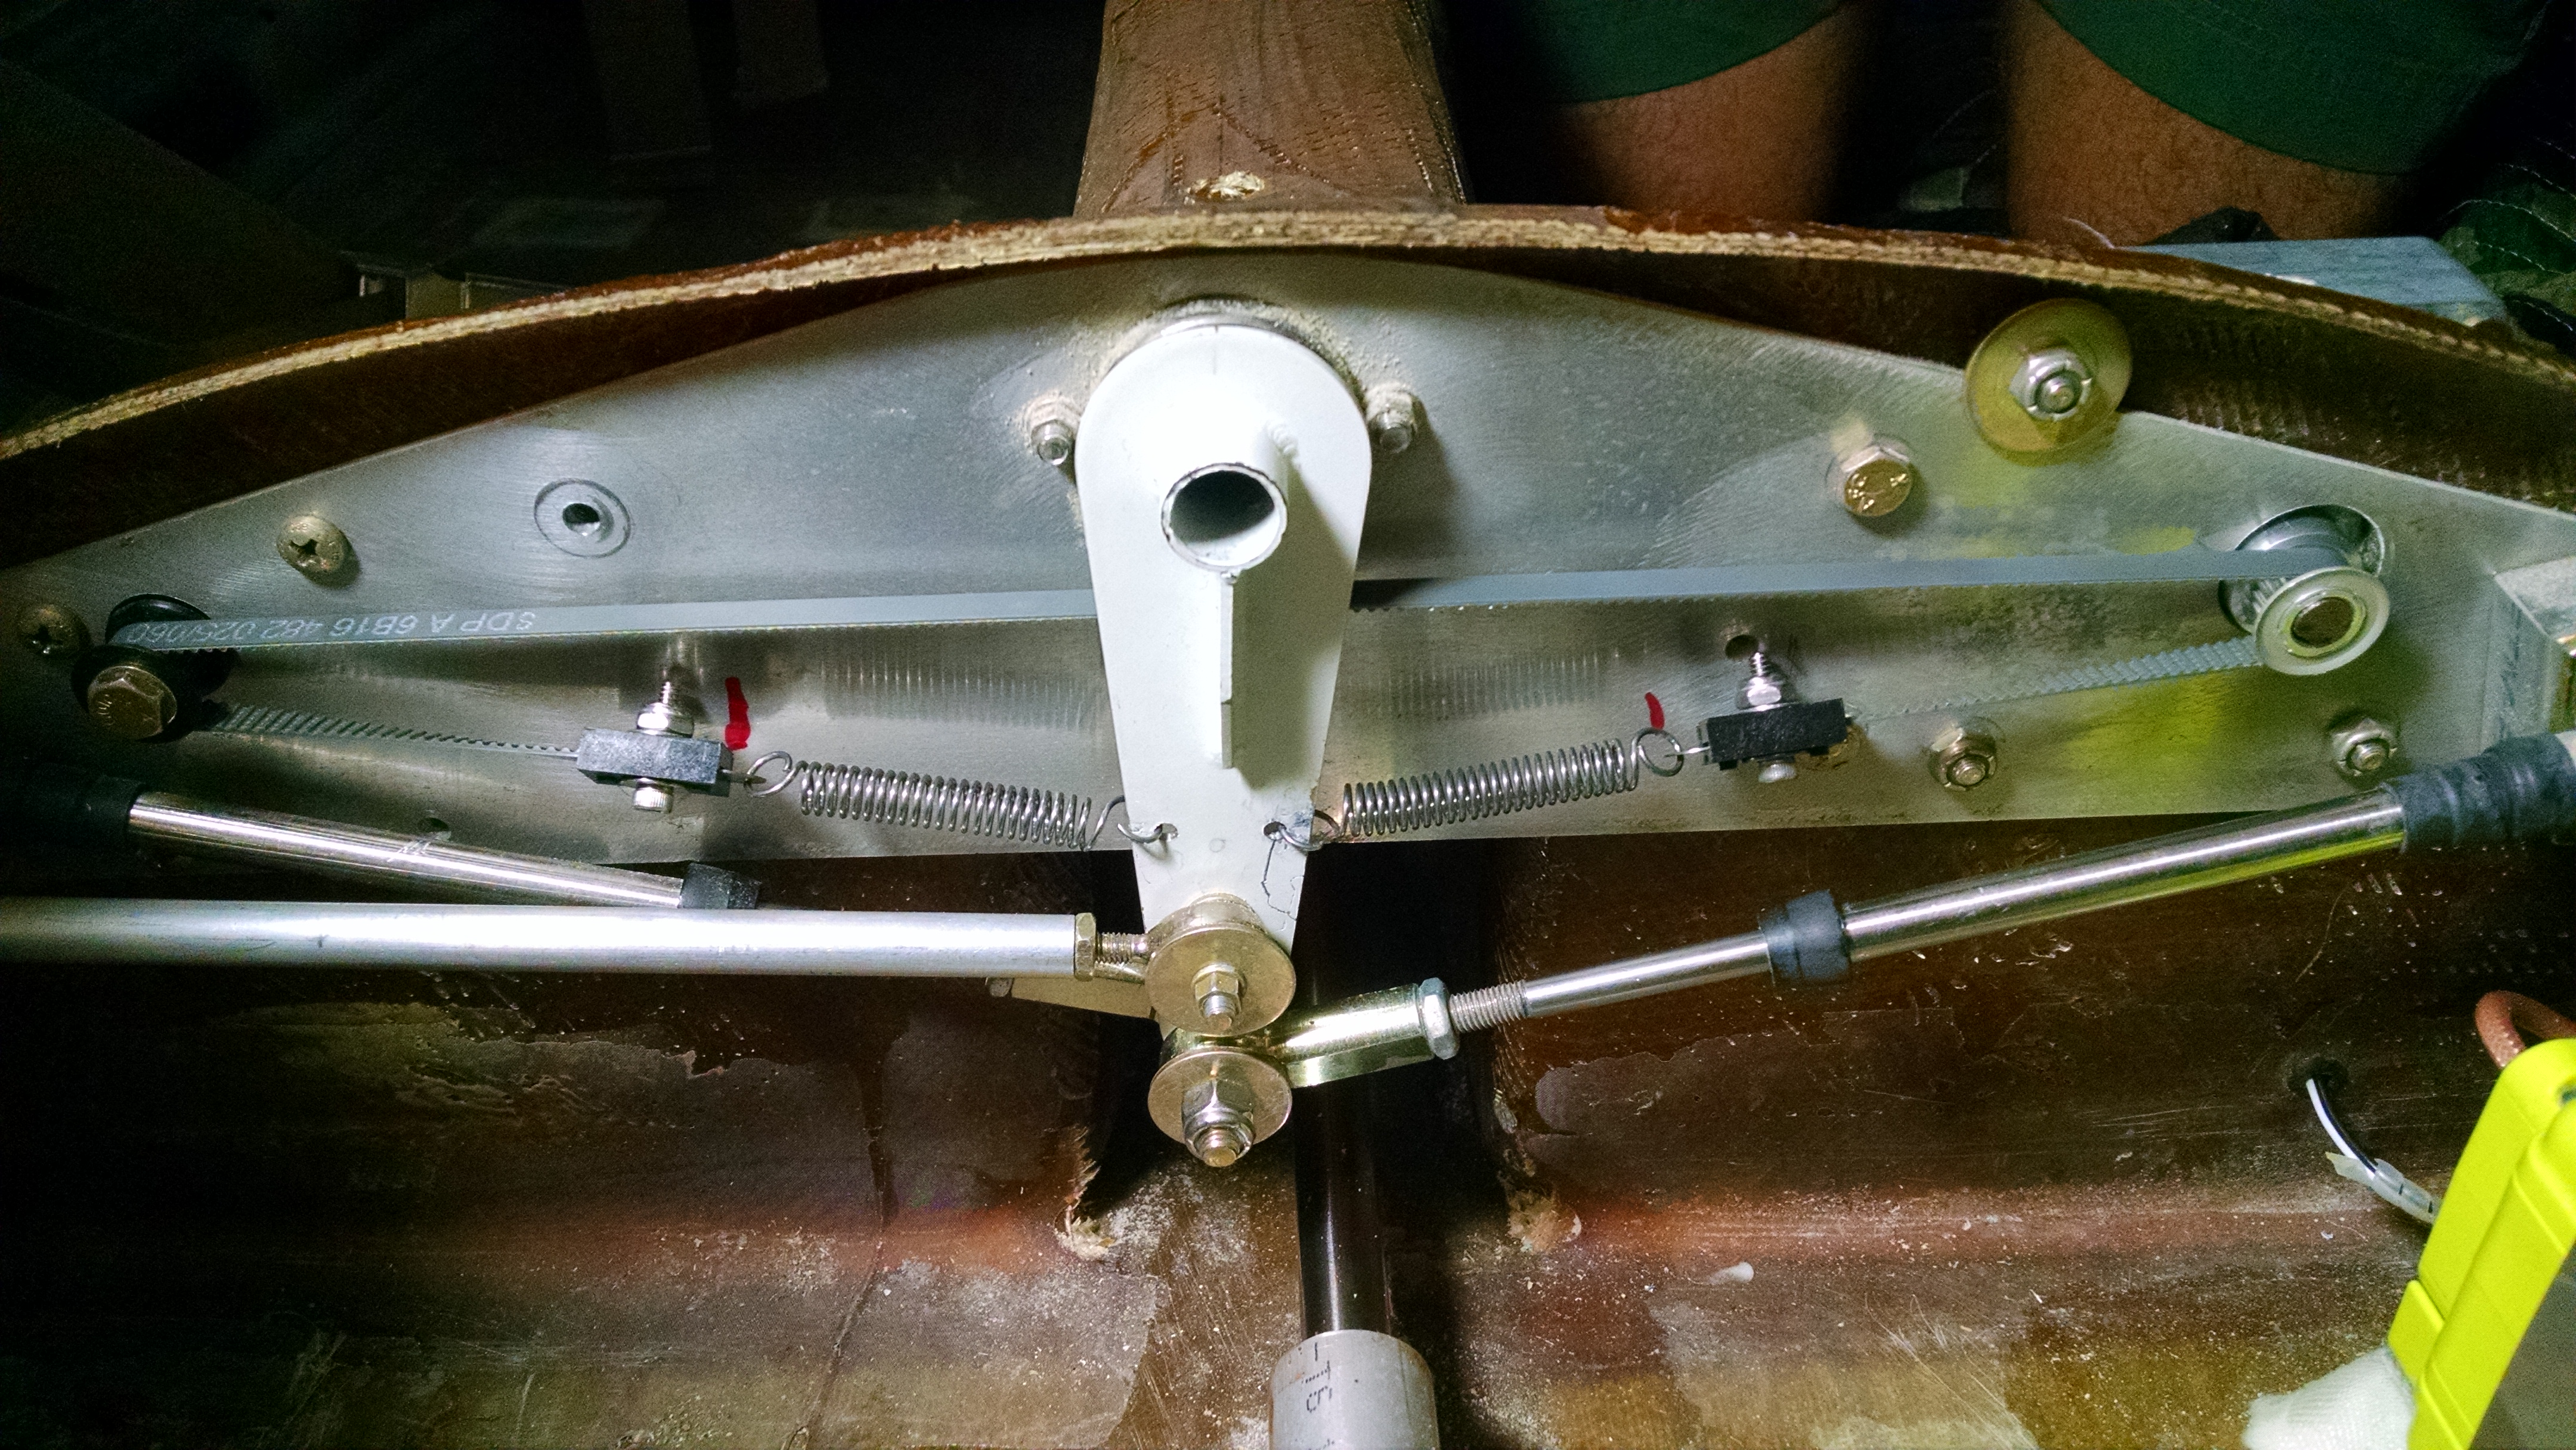
So before going any further, let’s discuss my decision to skip the roll trim mechanism. First, I wasn’t keen on the factory supplied mechanism. Basically, it was a DC motor with a string wrapped around it a few times. One end of the string attached to a spring and then to the aileron bellcrank while the other end went around an idler pulley and attached to a spring and then to the other side of the aileron bellcrank. Here’s a picture where the string/spring attaches to the bellcrank. Since the motor has continuous rotation, if it turns too far, the string will begin to slip. That slippage also allows the pilot to overcome the position should the motor or motor control fail.
Click here for a picture of a dash-5 roll trim on Jorge A. Bujanda’s build site.
Well this string idea didn’t sit well for me. Geoff Gerhardt came up with a great idea of using a cog belt. So I ordered a drive pulley for the existing motor, an idler pulley and a length of cog belt. Started making the parts and pretty soon I had a good working roll trim mechanism. As I was about to get everything wired up, I started thinking…
I’ve never flown (nor heard of) a single engine piston airplane that had roll trim. I asked around and every A&P and IA that I spoke with said the same thing. Which was, if you’re using roll trim in a light single, you’re fixing a symptom while you should be fixing the problem of why it’s not flying straight. This is what’s known as “rigging” an airplane. I had this done on the Cessna years ago. It involves adjusting the control linkages, setting the incidence of the wings and then flying it. If it doesn’t fly straight, you adjust linkages and wing incidence to get it flying straight. So I decided that this roll trim thing is just a shortcut to properly rigging the plane in the first place.
And with that, I took all the roll trim parts off and put them in a box. No plane that I built was going to have roll trim so that I don’t have to get it properly rigged!
Then I got taken to school by Ken Baker. I hadn’t considered dihedral. All those other single engine airplanes have dihedral built into the wings. Dihedral is where the wings are angled up when looking at the plane from the front (or back). With dihedral, when the plane is level, both wings a producing the same amount of lift. But if the plane rolls to one side, then the lower wing generates more lift and the higher wing generates less which causes the plane to level out… all by itself. So if one side of the plane is just a little heavier (maybe because there’s more weight on side), this dihedral will help the plane fly level.

Guess what Velocity aircraft don’t have?

That’s right, dihedral.
Which means that when they roll just a little, instead to dihedral basically self-correcting the unwanted roll, they actually roll even more. Which is why even minute weigh imbalance or a small difference in the wing shape can create a roll to the left or right.
So the roll trim box is going to have to get opened back up. But that will have to wait until I get back down to Sebastian.
Scott did the third flight. Malcolm shimmed both rudders. At around 165, the flutter developed in the right rudder and caused the entire winglet to begin oscillating. Very disturbing. When they looked at the rudders, instead of the outside surface being slightly concave (or scalloped) or even flat, they were convex (rounded out). This was causing the rudders to “hunt” for a neutral. Which means flutter. That movement transmits to the winglet causing it to start moving as well. If left unchecked it could cause the winglet to depart.
Here’s a main wing oscillation on a Hawker. (Warning: NSFW for language)
So it looks like my rudders were not properly constructed.
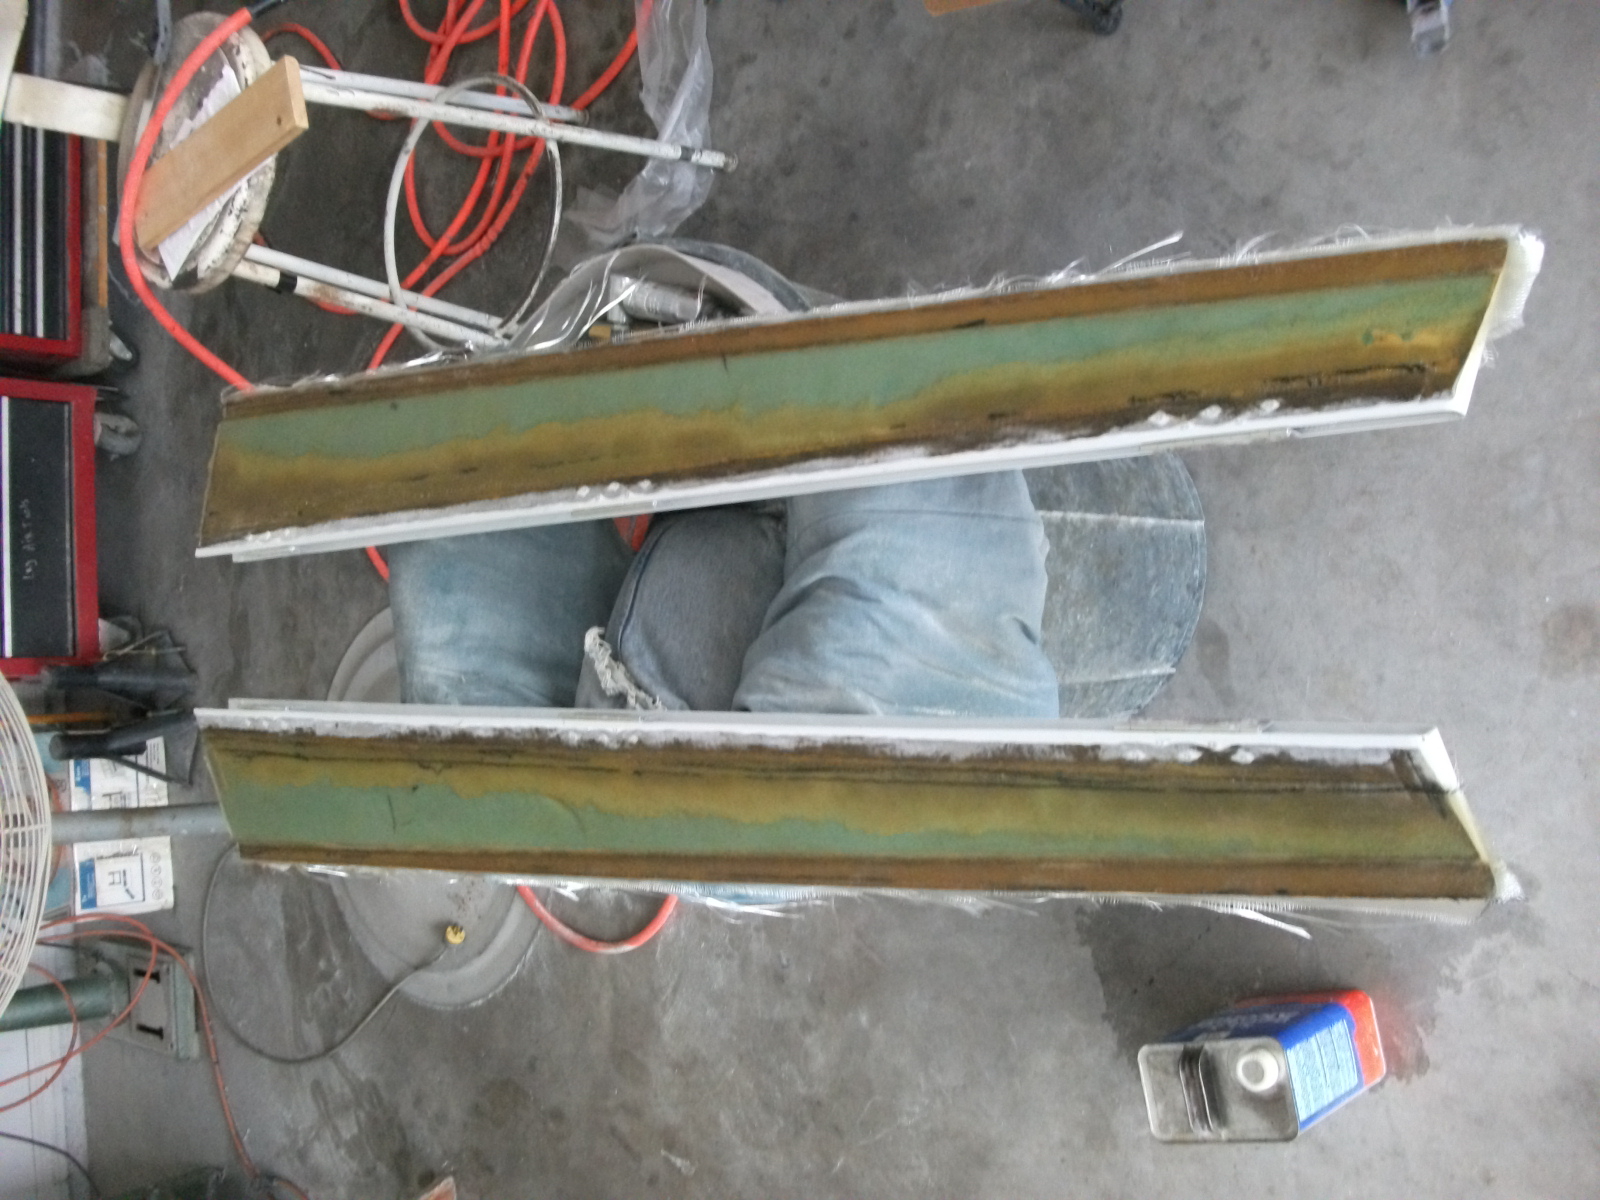
Malcolm removed them and began making them right.
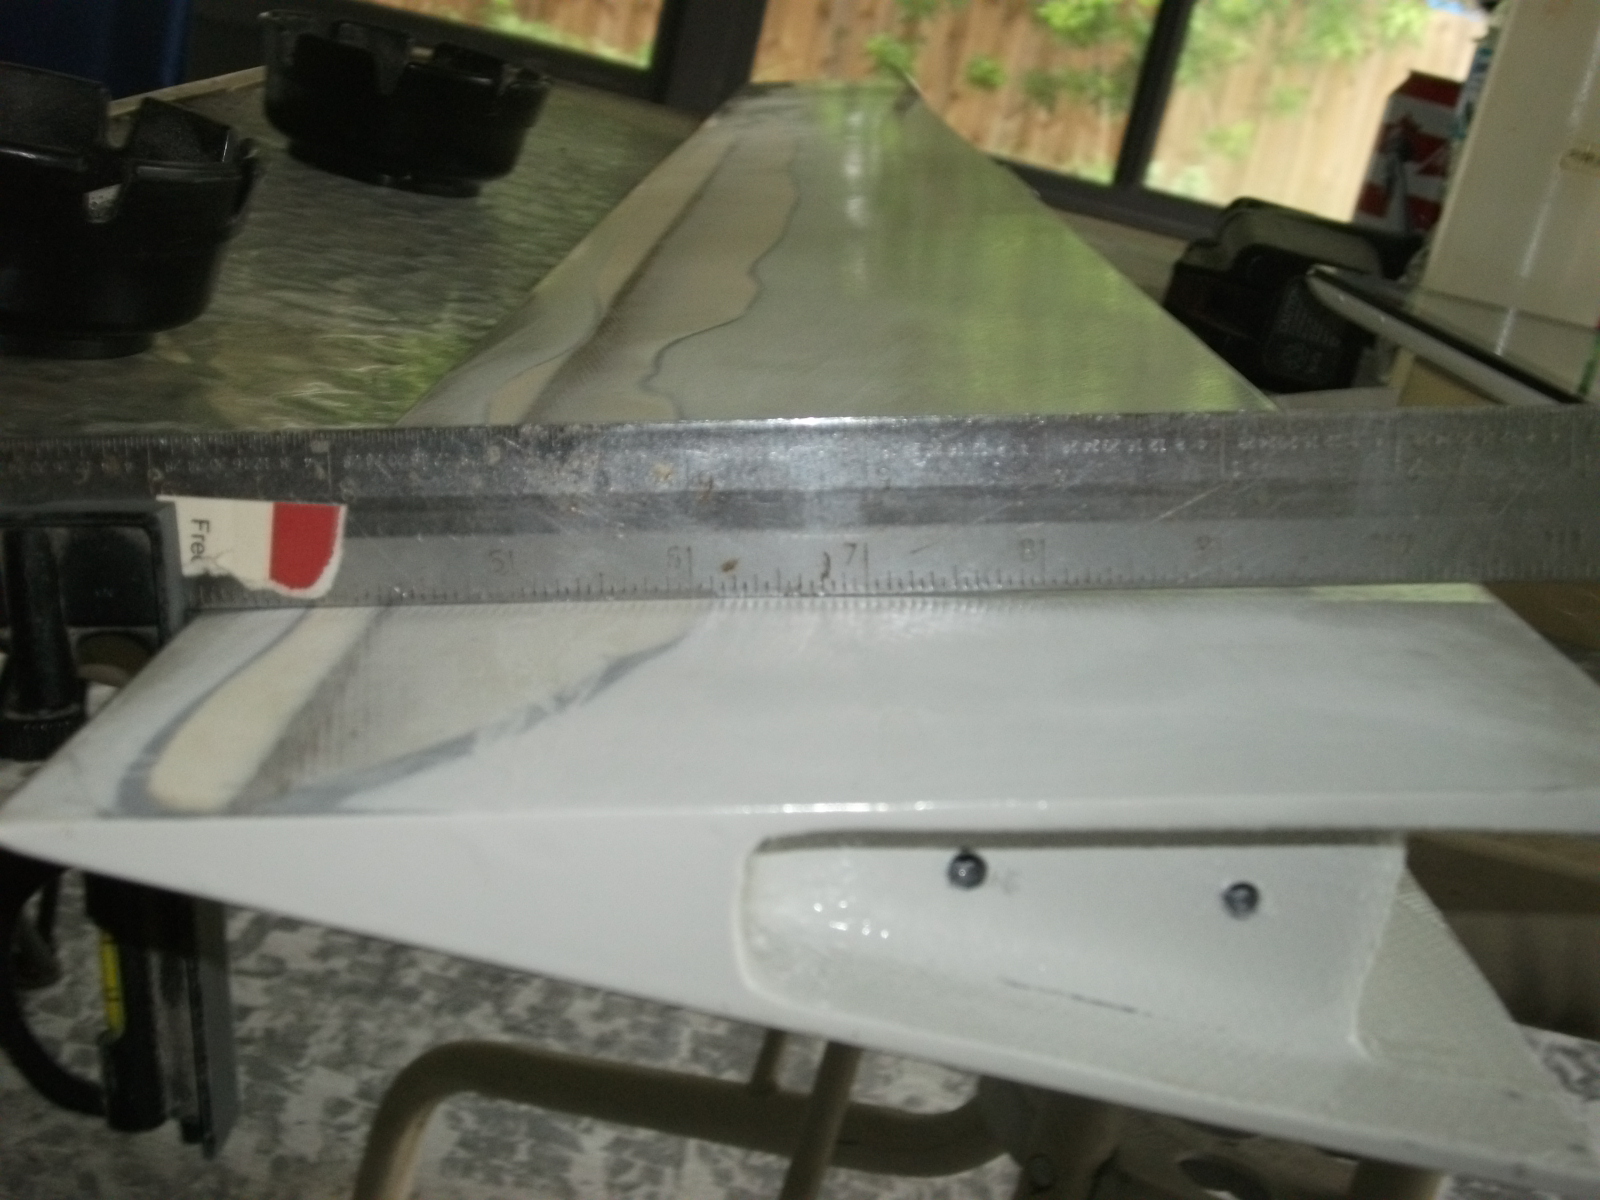
Here’s the outside surface of the right rudder. You’ll notice that it’s not concave or even flat. In fact, there’s a pretty good outward curve on that surface.

After removing all the filler, it’s still not right.

Here’s the rudder that was causing the flutter.
Eventually, Malcolm ended up sanding deep into the foam before the he could get the correct shape.

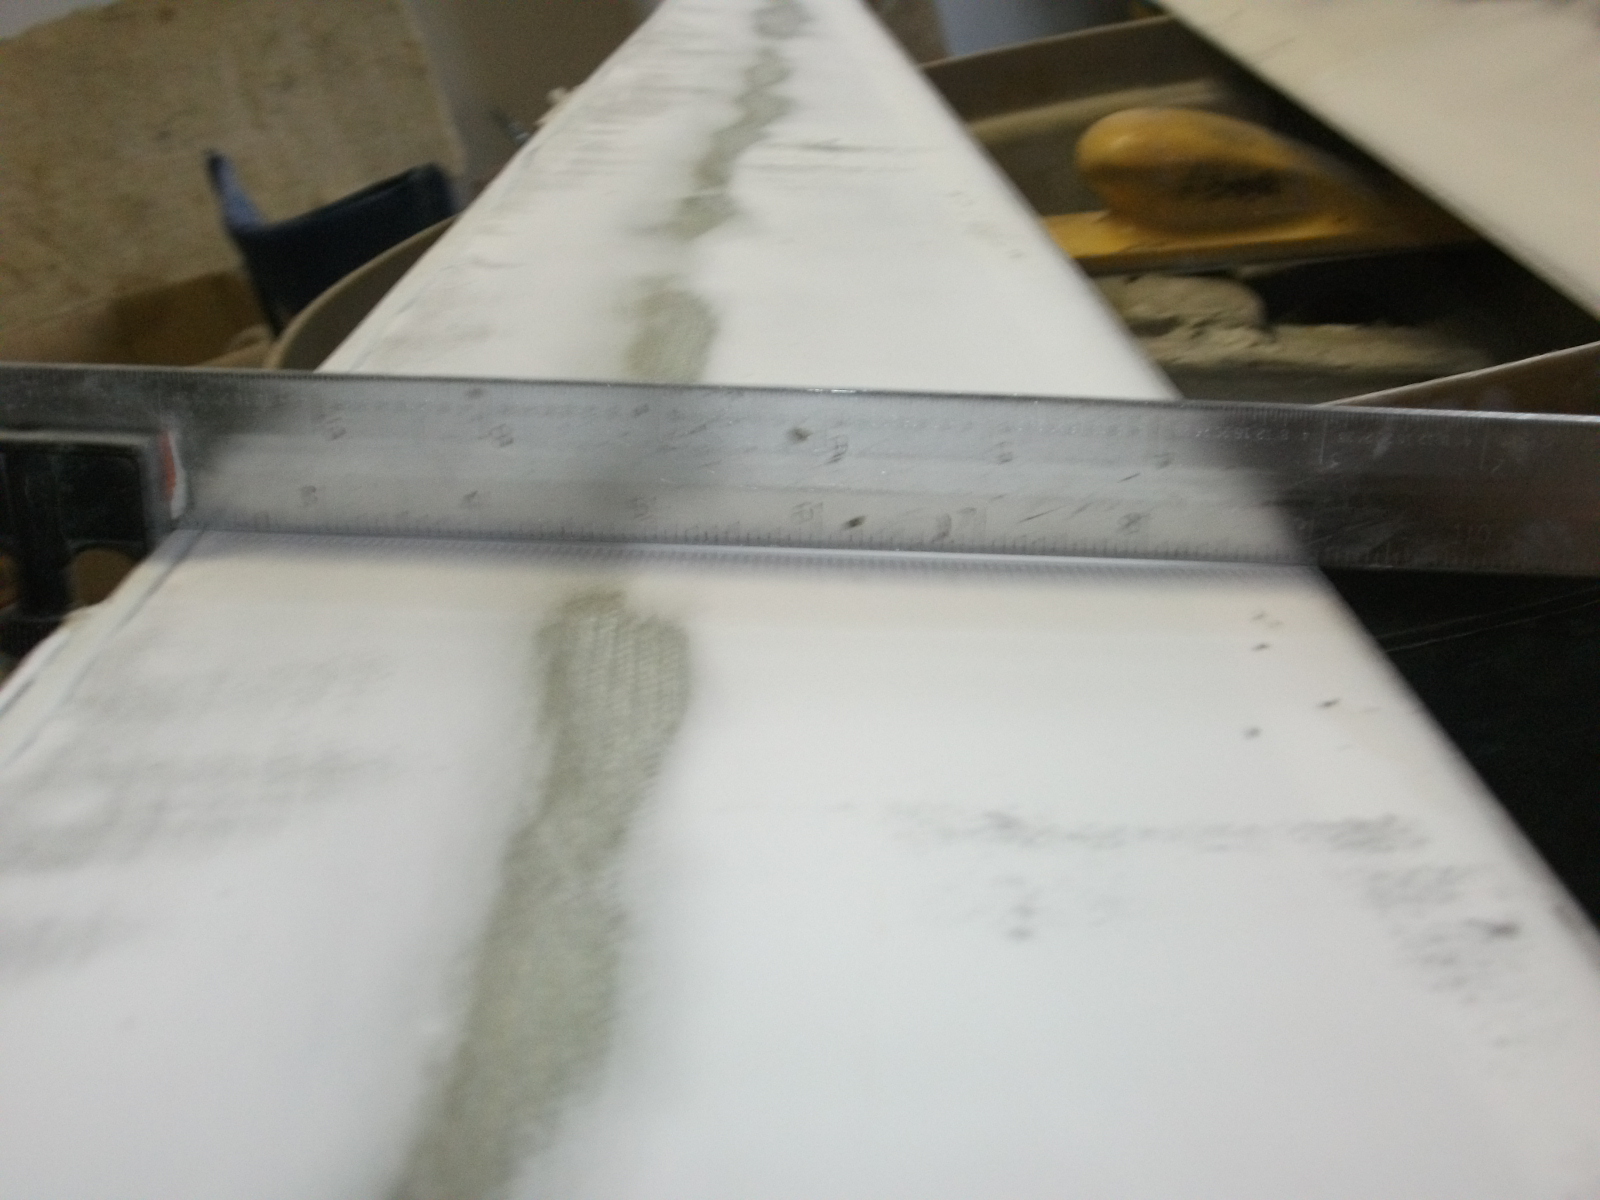
Covered with uni.
With filler. We now have a low spot on the outside surface.
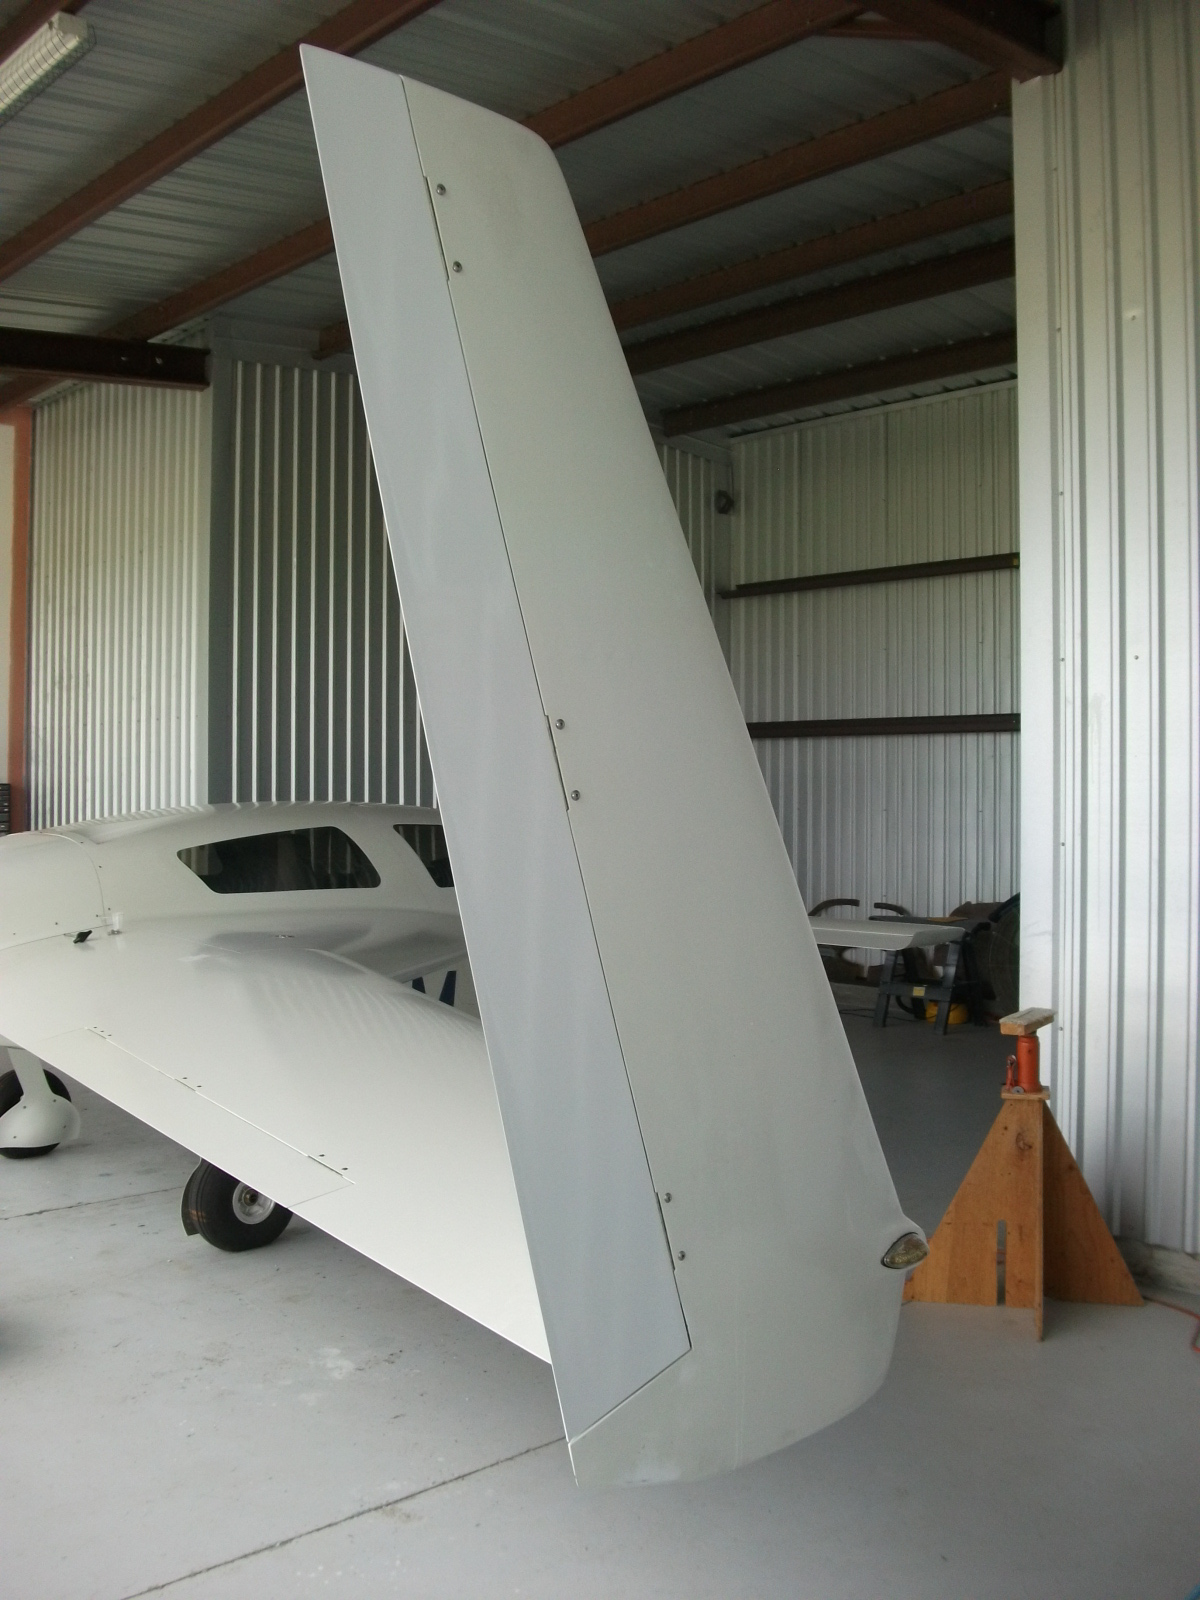
Painted and installed.
I didn’t want to try and install the roll trim because I wasn’t sure when Scott was going to be able to make another test flight.
On the Friday the 31st, Scott made test flight #4. The plane accelerated through 165kts with no flutter. He said that he got it up into the “170’s”, but the data log showed a max speed of 180kts. There was some scary weather approaching so the flight was cut short.
The next day, I installed the roll trim.
Here’s my roll trim mechanism.
Since I had originally intended to install roll trim, I had pulled all the wires, I just had to terminate them. Now for the pitch trim, I went with the TCW Technologies Safety Trim controller. I did this for a couple of reasons. The primary reason was that the Vertical Power VP-X trim driver is designed for low power RC Allen trim motors and is limited to 1amp. They don’t recommend using it to drive Velocity trim motors. The other reason I used the Safety Trim controller is that it has some really nice features:
Dual speed; it will drive the motor faster at lower airspeeds when large changes in trim are needed quickly while at high airspeeds, it drives the motor slower to prevent trim overshoot.
Runaway prevention; If the pitch trim switch should fail in the closed position, the trim motor will not continue to run. The controller will only allow the motor to run for about 3 seconds at a time. If you need more trim, you release the switch and then press it again.
Reversible; If the switch gets stuck, you can disable and reverse the motor with a switch on the panel.
So when I realized that I had to install the roll trim, I was thinking that I was going to have to buy and install another trim controller. But fellow builder Bob Holtaway did some testing and determined that the pitch trim pulled significantly less current that expected. And since the roll trim has much less load than the pitch trim, I decided to go that route instead.
Everytime I work with the VP-X, I’m amazed. Just about every aspect of it is well thought out and easy to use. Once I connected the wires, it took about 10 seconds to configure the VP-X to drive the roll trim motor. I had the trim motor wires reversed so it ran backwards. It took about 2 seconds to correct that in the VP-X configuration.
So at this point, the gear door flutter, rudder/winglet flutter and left roll have been resolved. I’m hoping that I don’t discover another surprise that rears it’s head at 190kts.