- 3.4.5 – Elevator Hinge Installation
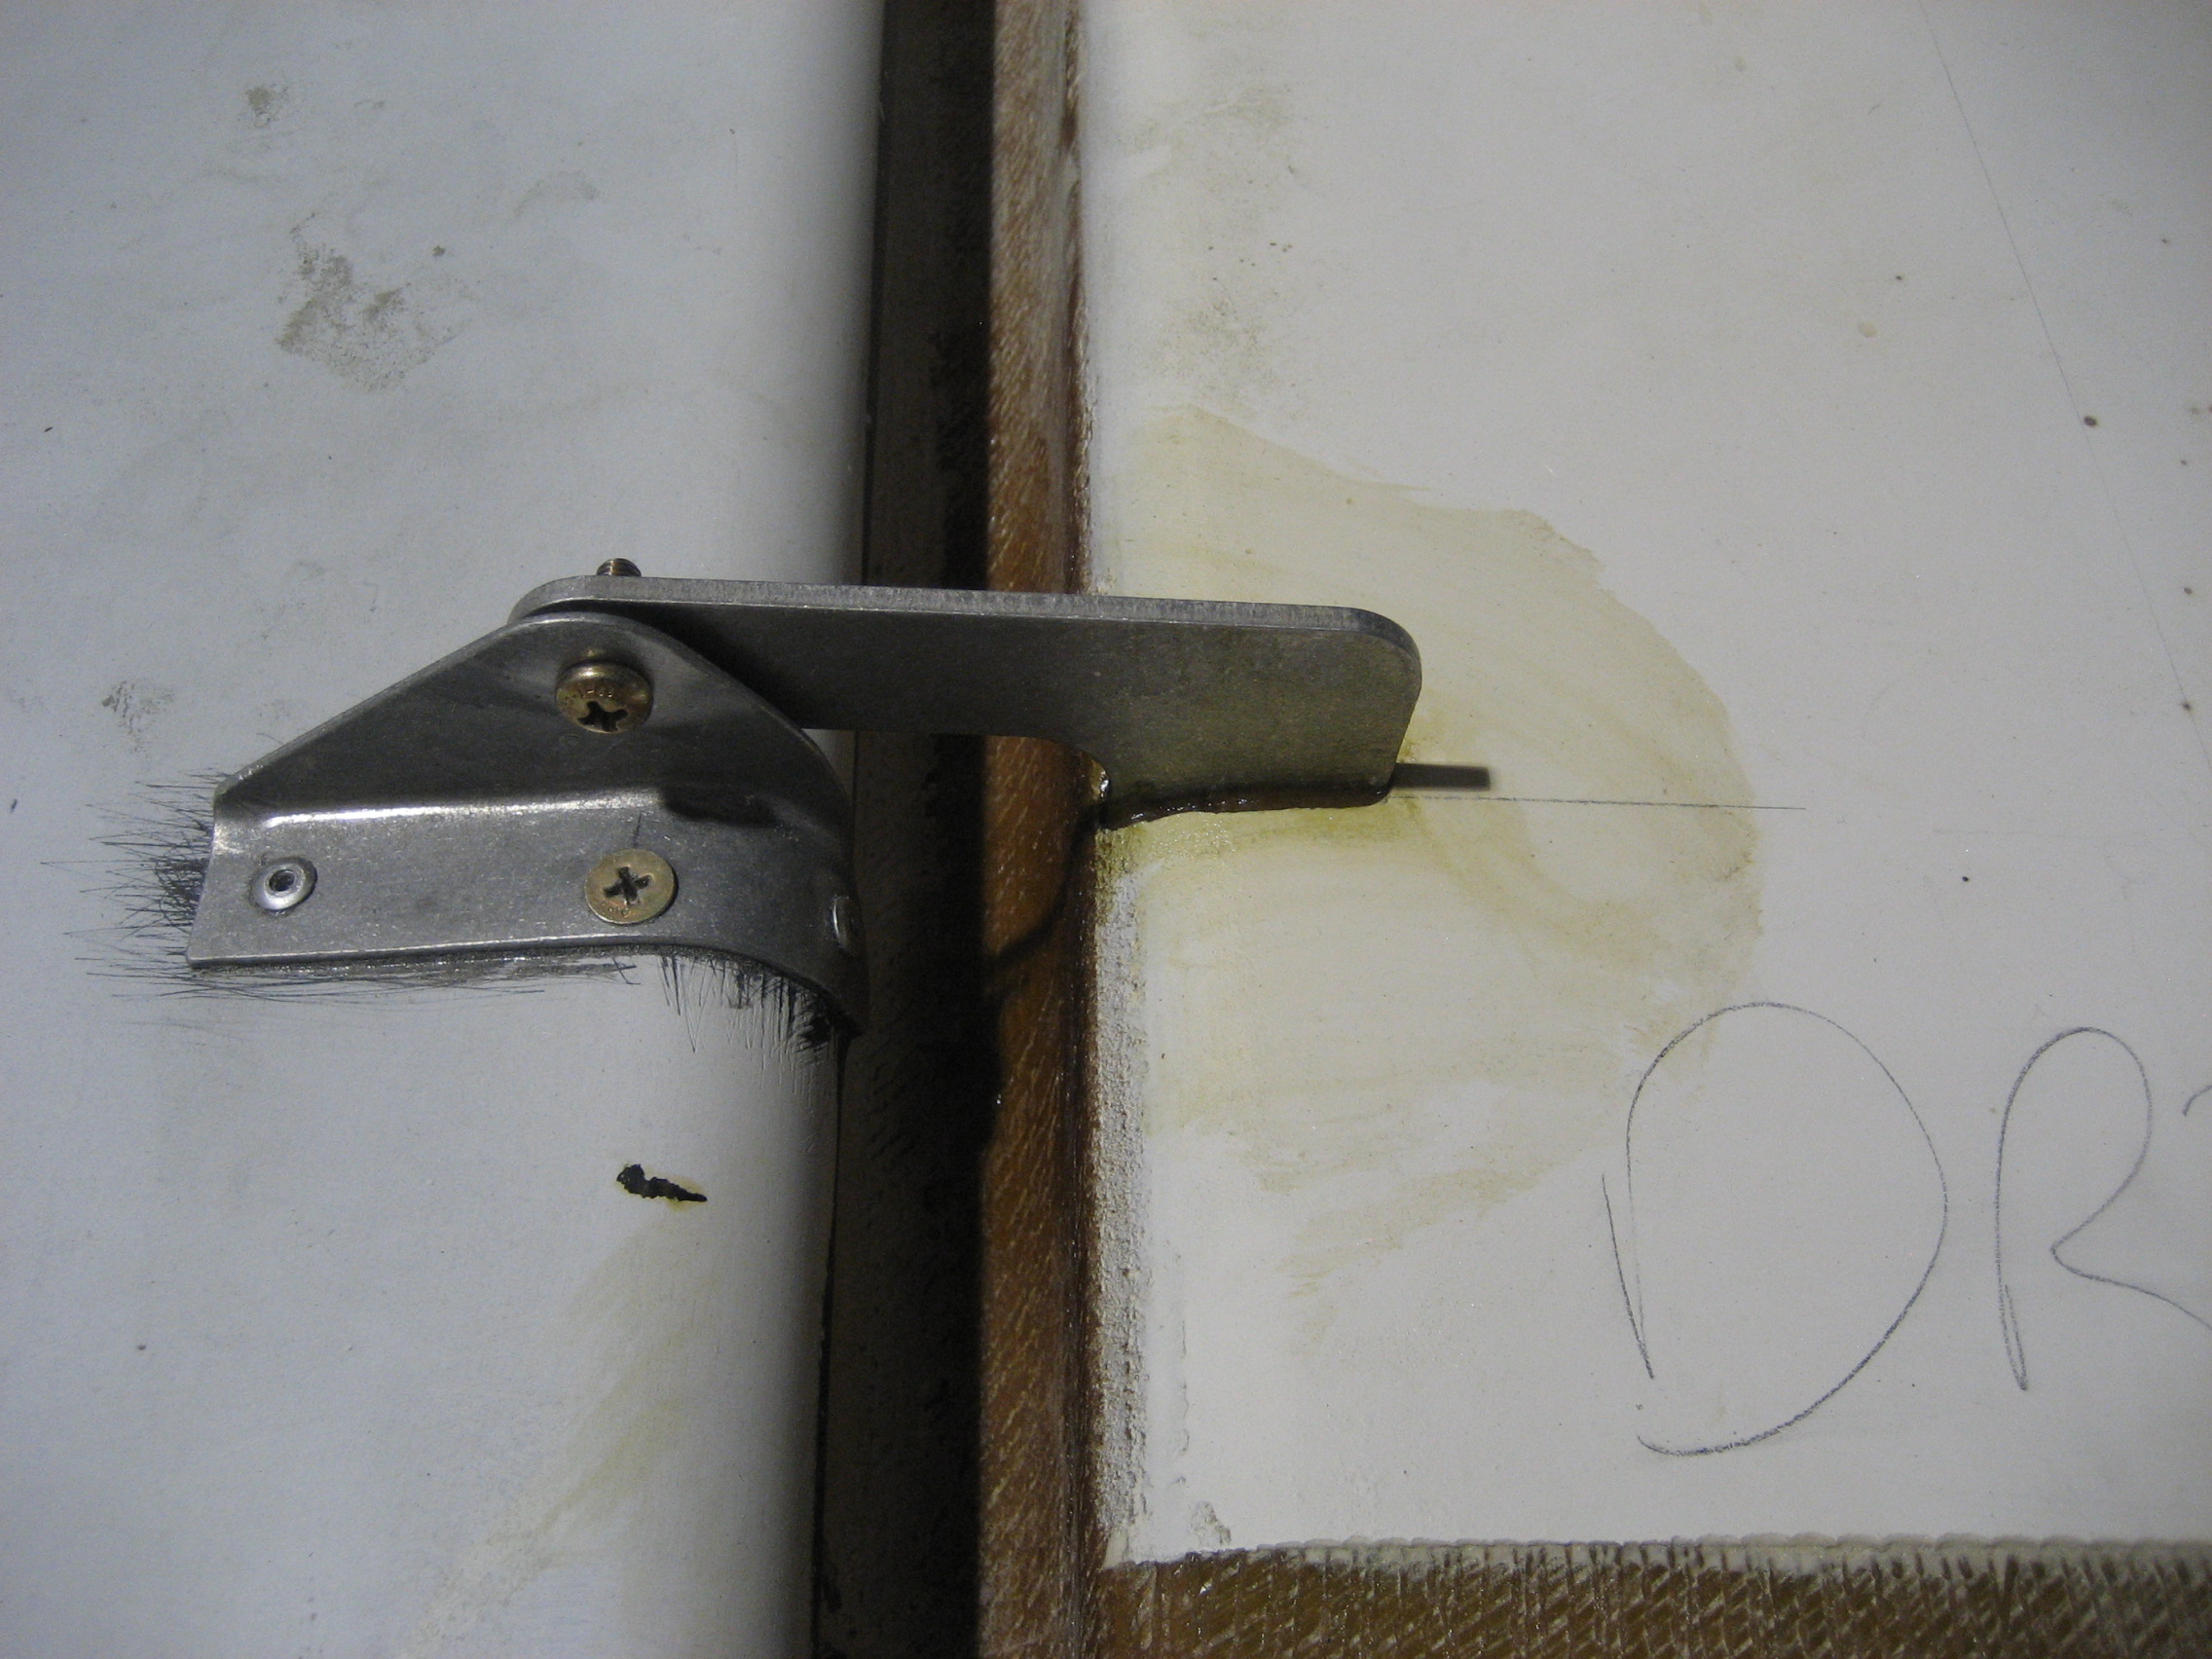
- 3.4.6 Elevator Hinge Arm Installation
- 3.5.2 Elevator Torque Tube Install
Now it’s time to mount the hinge arm to the canard.
First, the location of the L-shaped hinge arms are identified and slots are cut into the fiberglass at the rear of the canard. Then the foam is removed to create a pocket for the hinge arm.
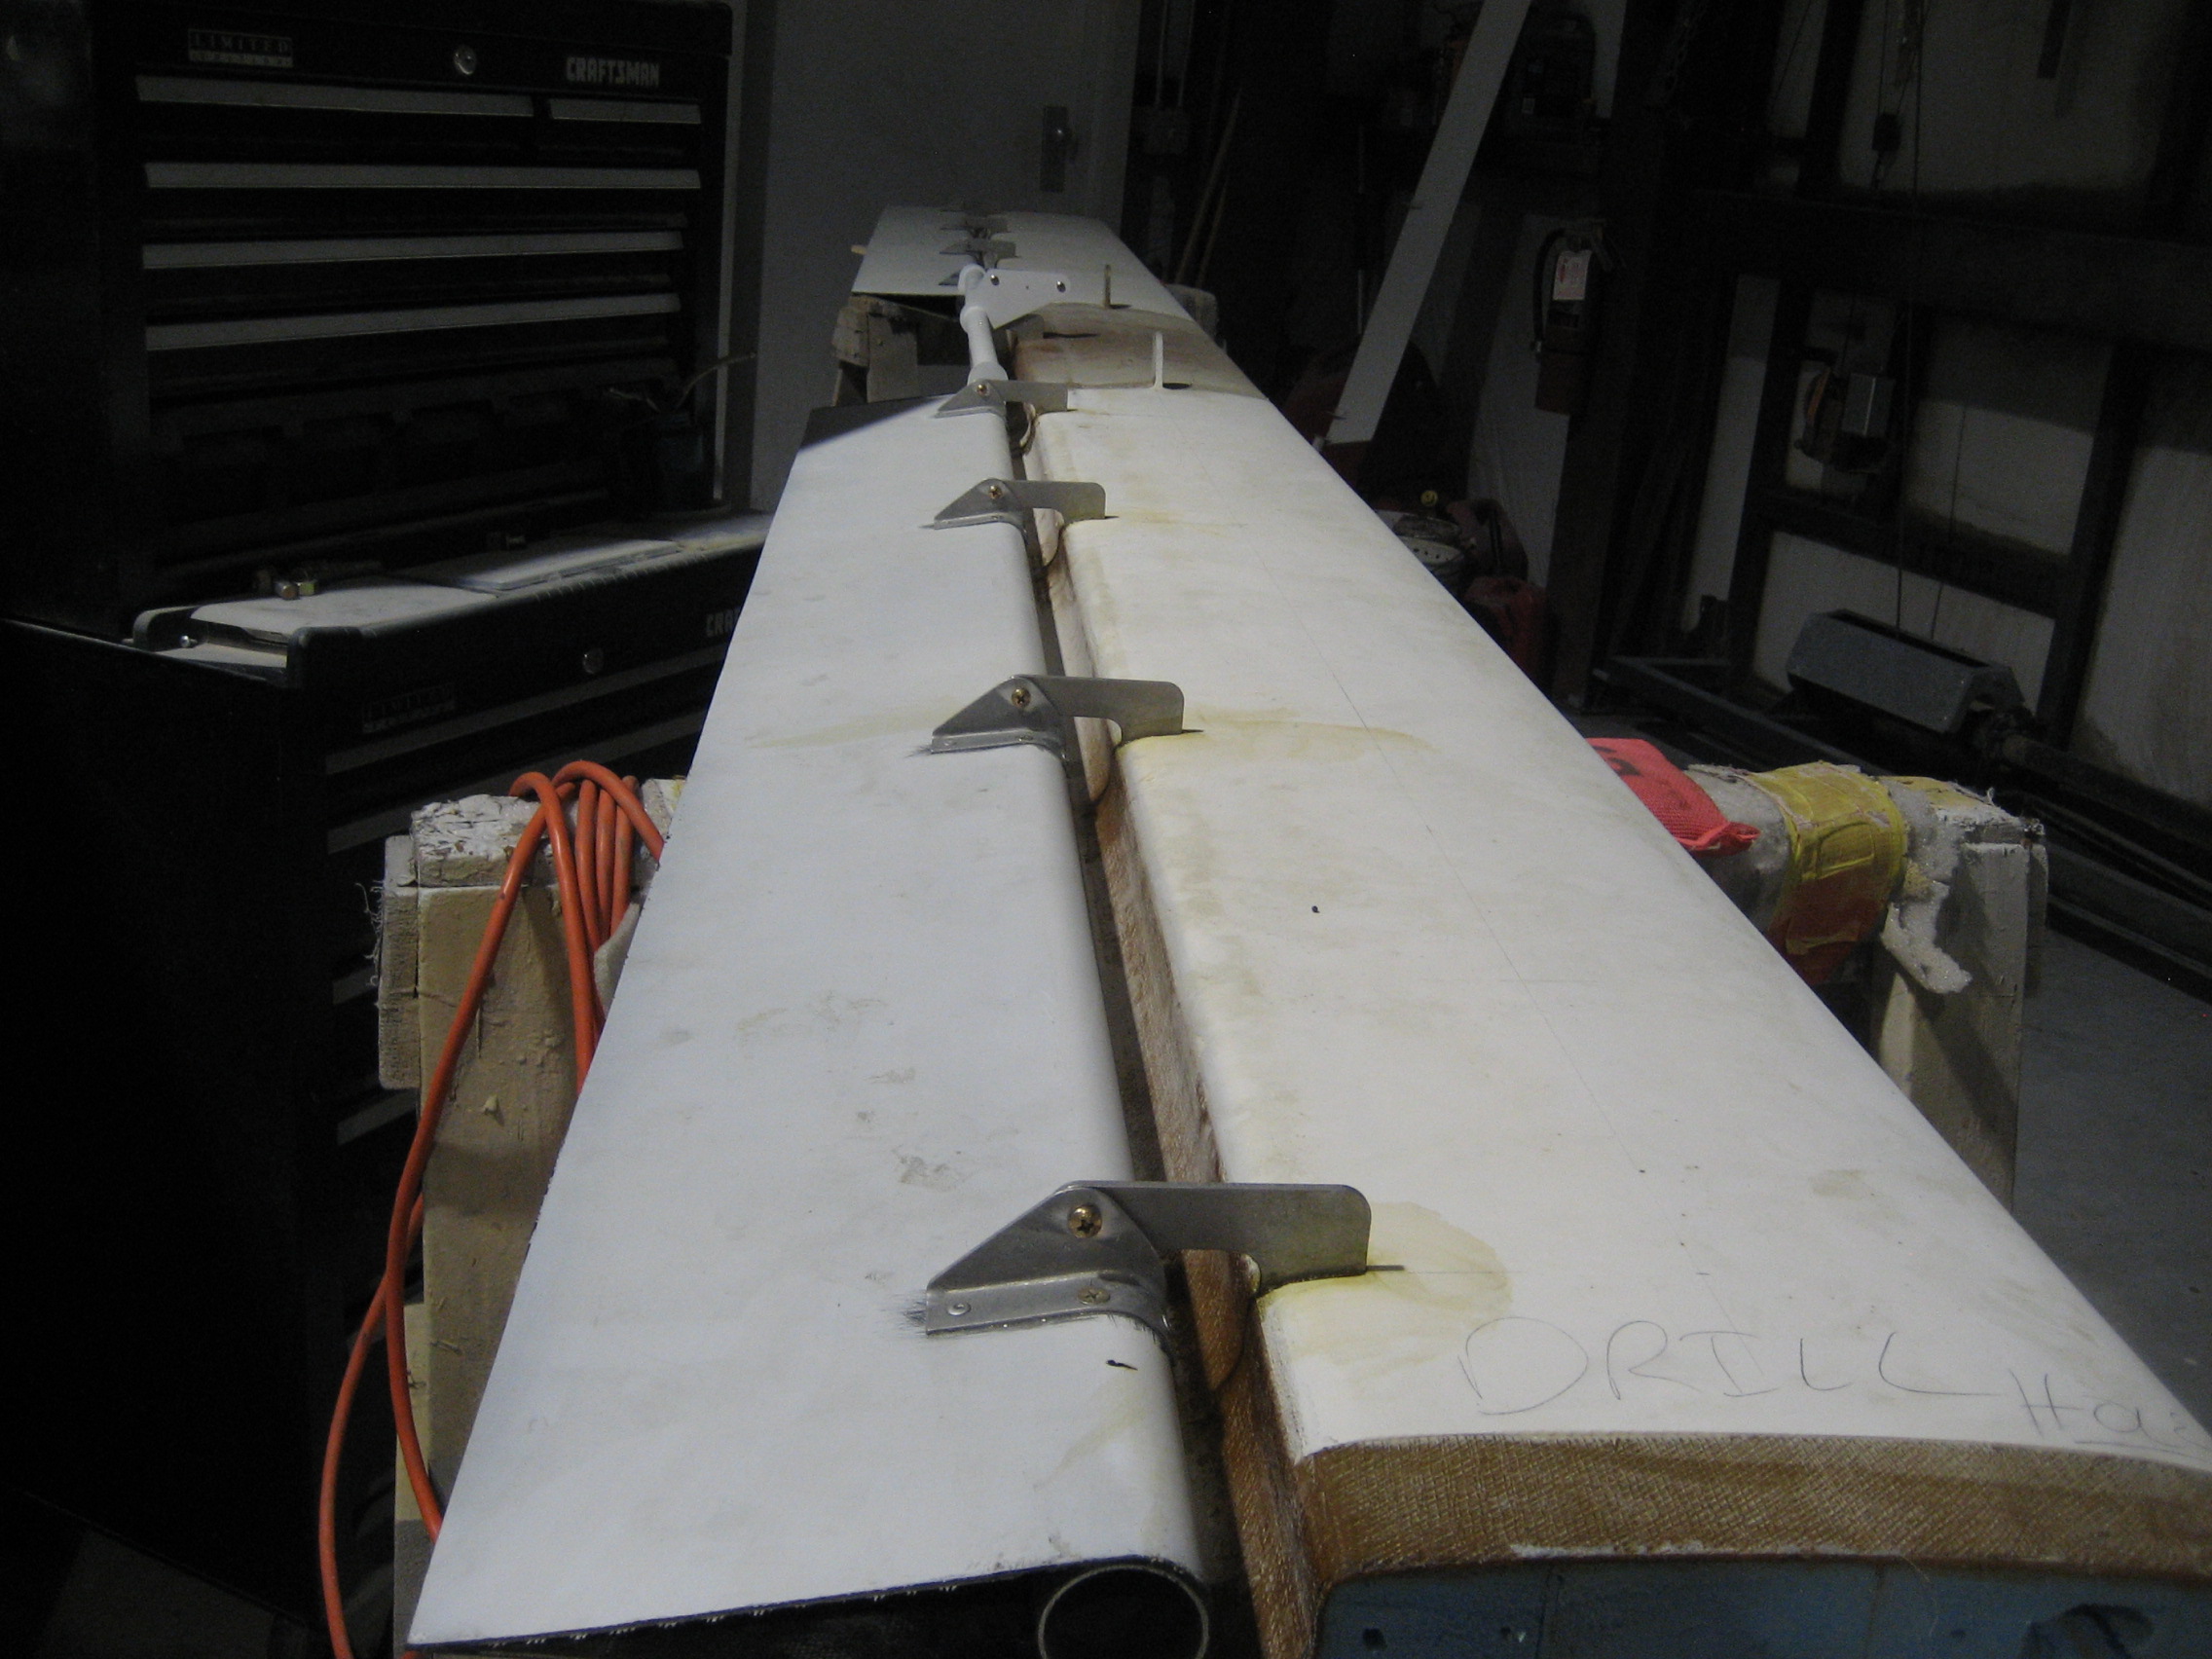
Next the position of the elevator (relative to the canard) has to be established. This is done by laying the canard on its back and using straight beams to establish the bottom of the canard. Then the elevators are put into position and clamped in place with the hinge arms in their pockets. To insure alignment of the two elevators, the elevator torque tube is temporarily installed which connects the two elevators.
Here’s the canard (it’s upside down so you’re looking at the bottom) with the two elevators in position. The elevators are held in the approximate position with aluminum I-beams, weights and clamps while we tweak the alignment. Lots of straight edges and string is used to make certain everything is aligned.


Once we’re happy that everything is just right, an epoxy/cabo mix is injected into the pockets where the hinge arm are.