
- 5.5.1 Install Door Lift Gas Struts
- 5.5.1 Install Door Lift Gas Struts
- 5.5.1 Door Lift Gas Struts
- 5.5.1 Door lift gas struts
- 5.5.1 Install Door Lift Gas Struts
- 5.2.4 Door Hinge Installation (Modification)
- 5.2.3 Door Opening
- 5.3 Door Latch Micro Switches
- 5.3.1 Door Latches
- 5.5 Strake Extension Cutout
- 5.2 Correcting Door Fit
- 5.2.3 Door Fit (Improving)
- 5.3.6 Door Pin Sleeves
- 5.2.2 Door openings
- 5.1.4 Window Scratches
- 5.6 Improving door fit
One of the things Ann did at Oshkosh was look at every single Velocity interior she could find. Since she is designing the interior, she needed ideas. Unfortunately, she found some.
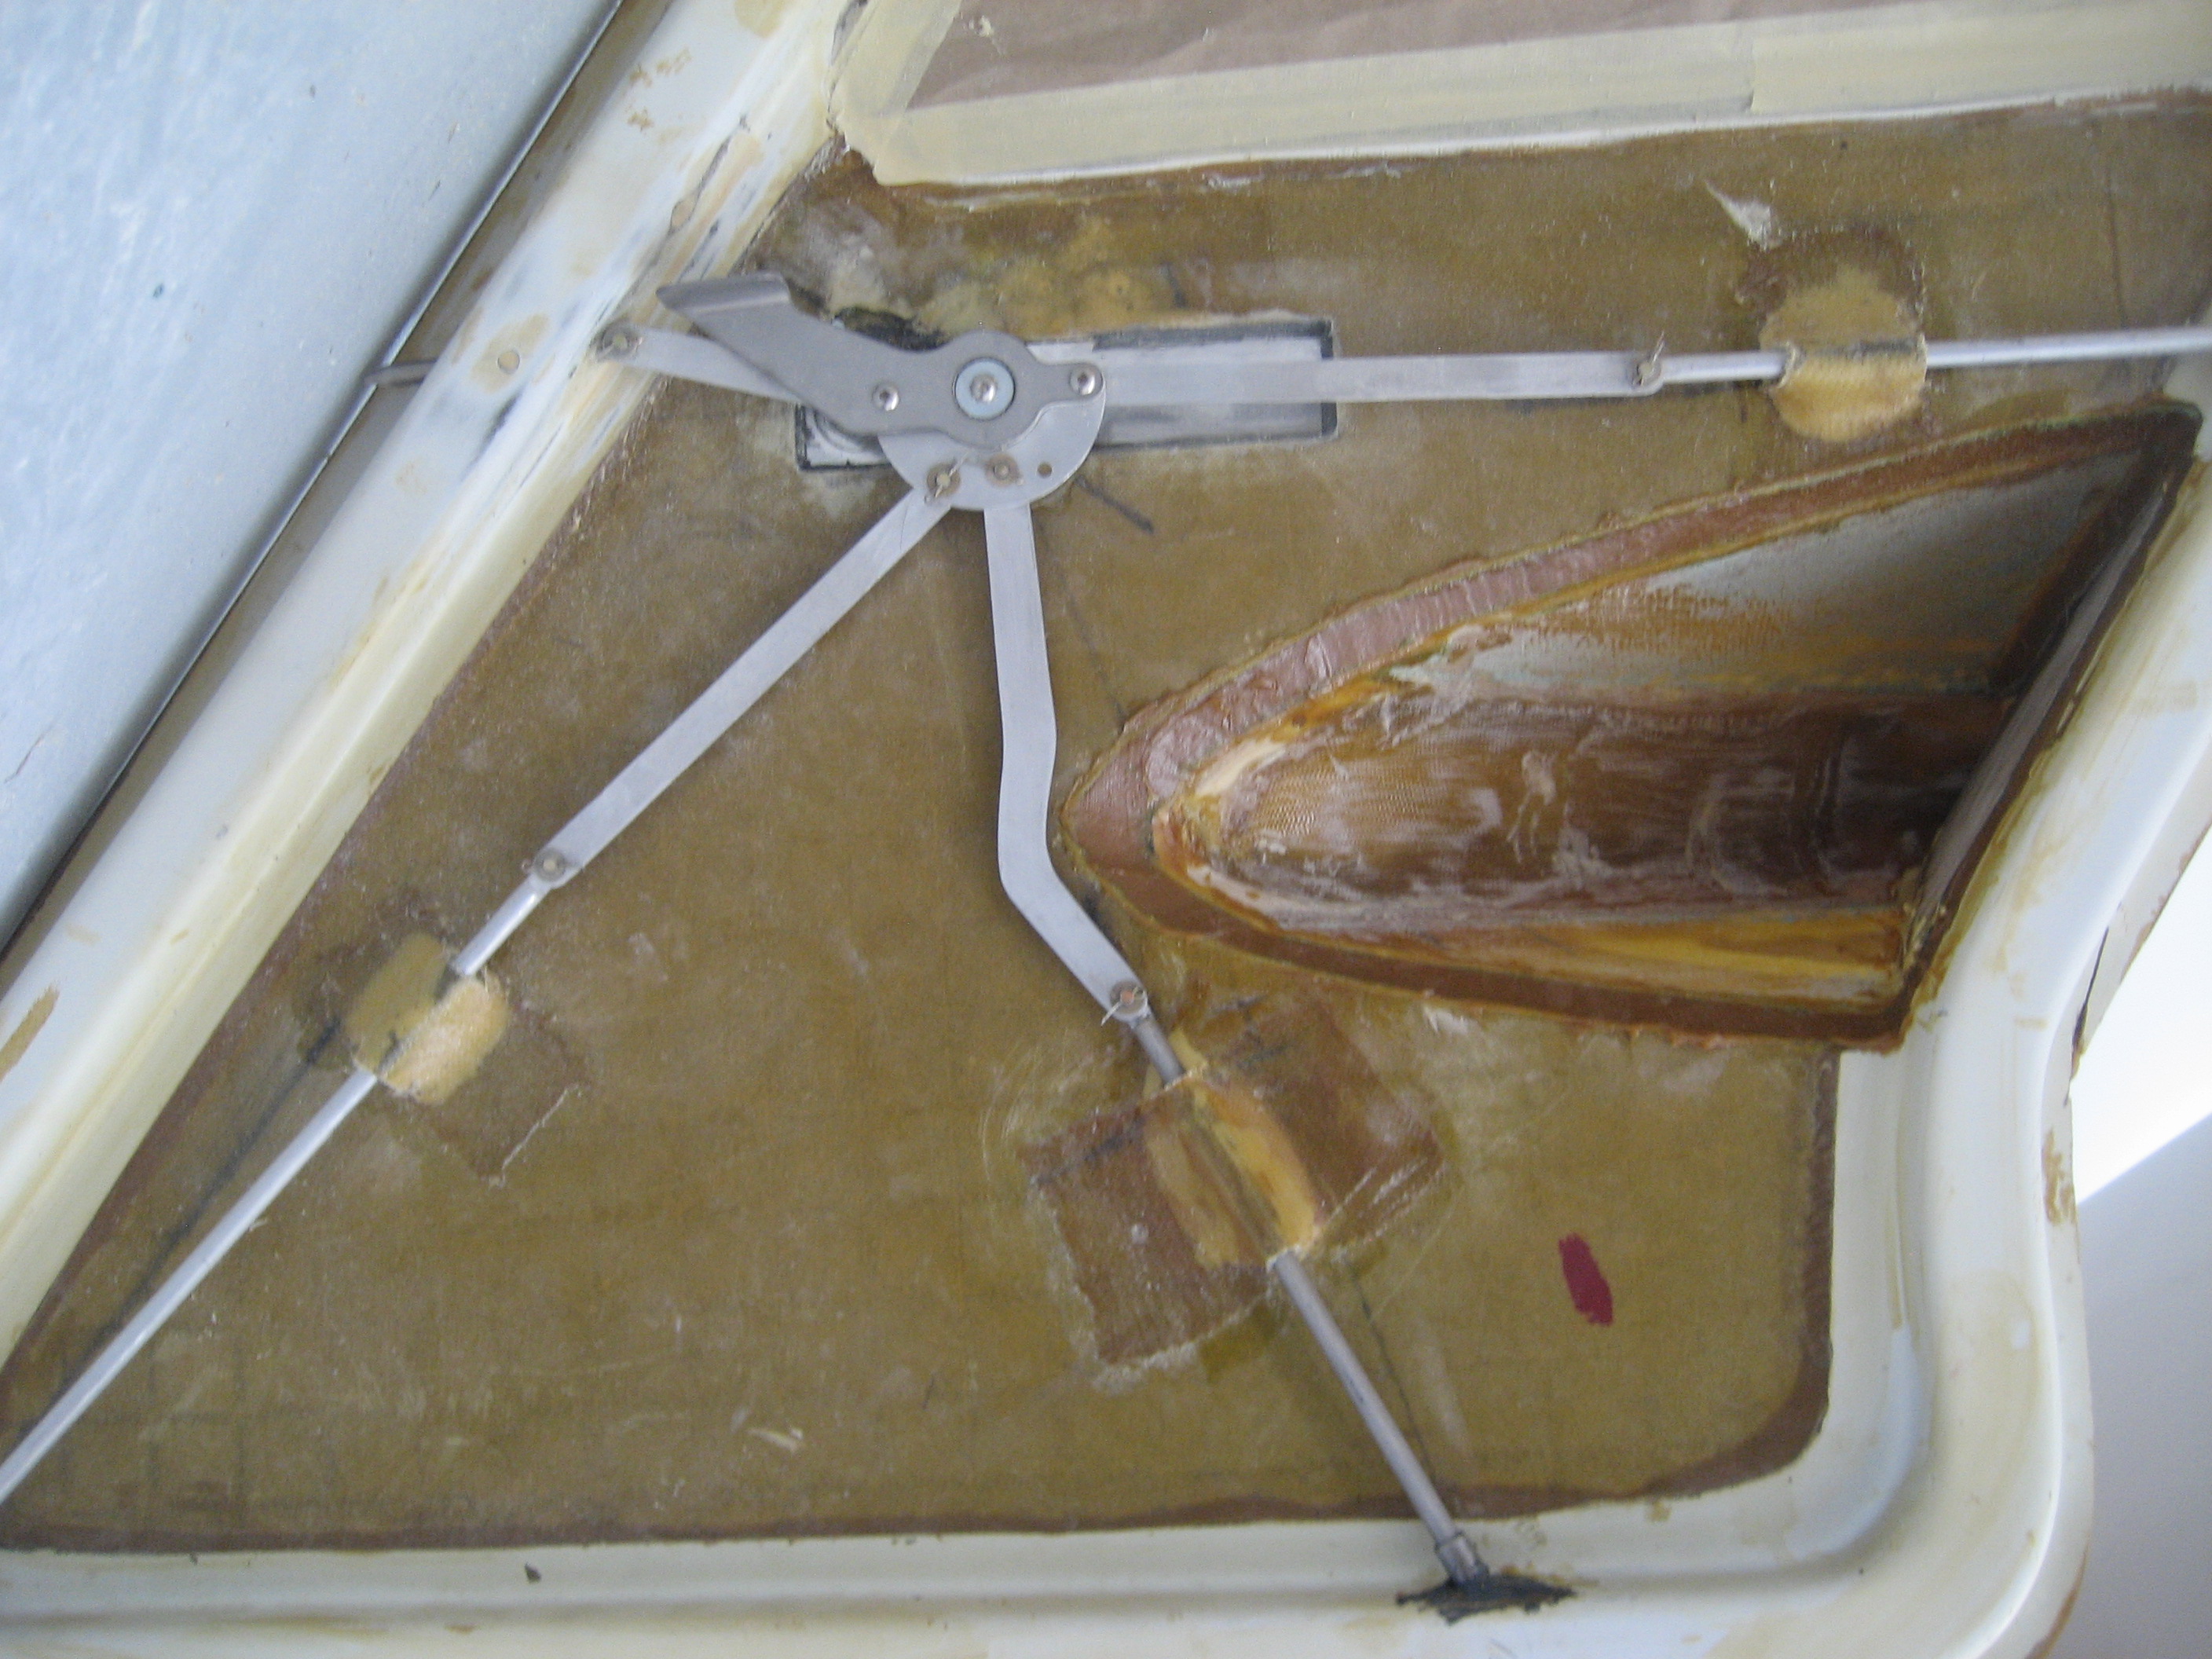
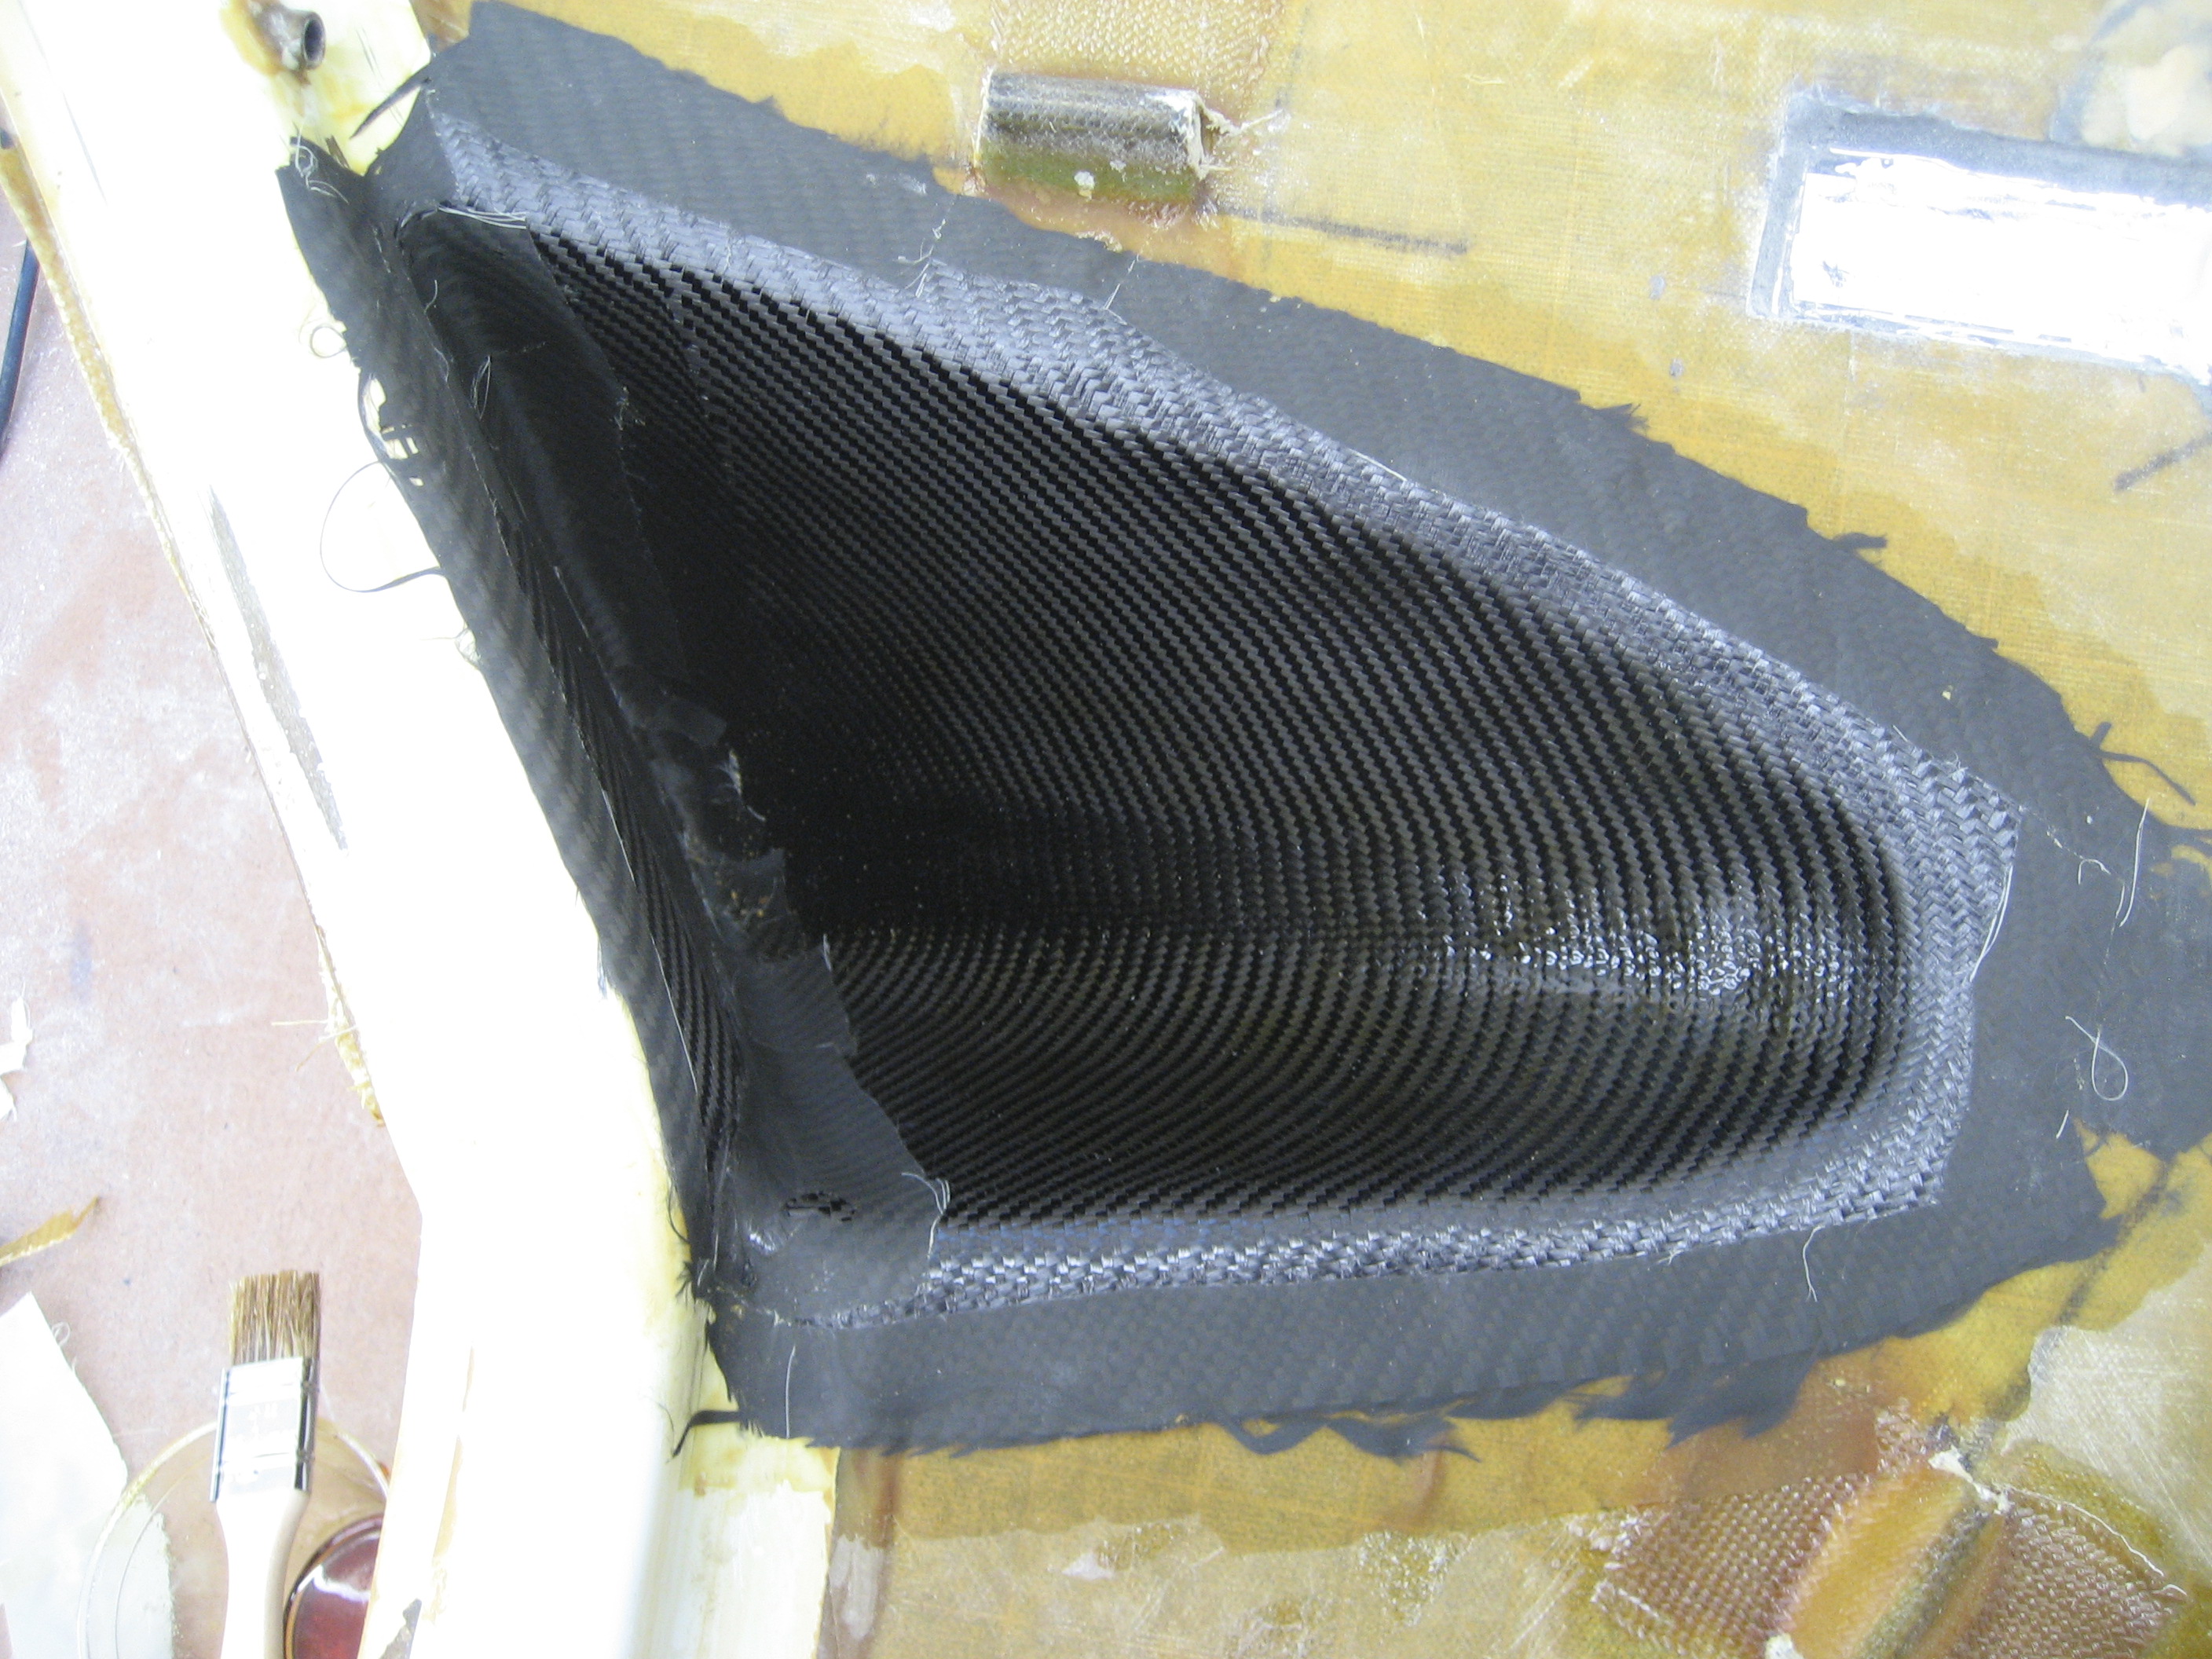
Here the scoop. The strake extends forward about halfway into the door. What most people do is make a triangular cutout in the door and use that space as a type of arm rest. My plan was to skip this step. Ann didn’t like that. She and Malcolm both strongly “suggested” that the cutout be made… and it was.
But there’s a catch. When I designed the door linkage, I didn’t think there would be a cutout. If I did, I would have accommodated it. As it was, it required a bit of a workaround.
First I had to remove the lower/rear pin and it’s linkage.

Then it had to be relocated forward.
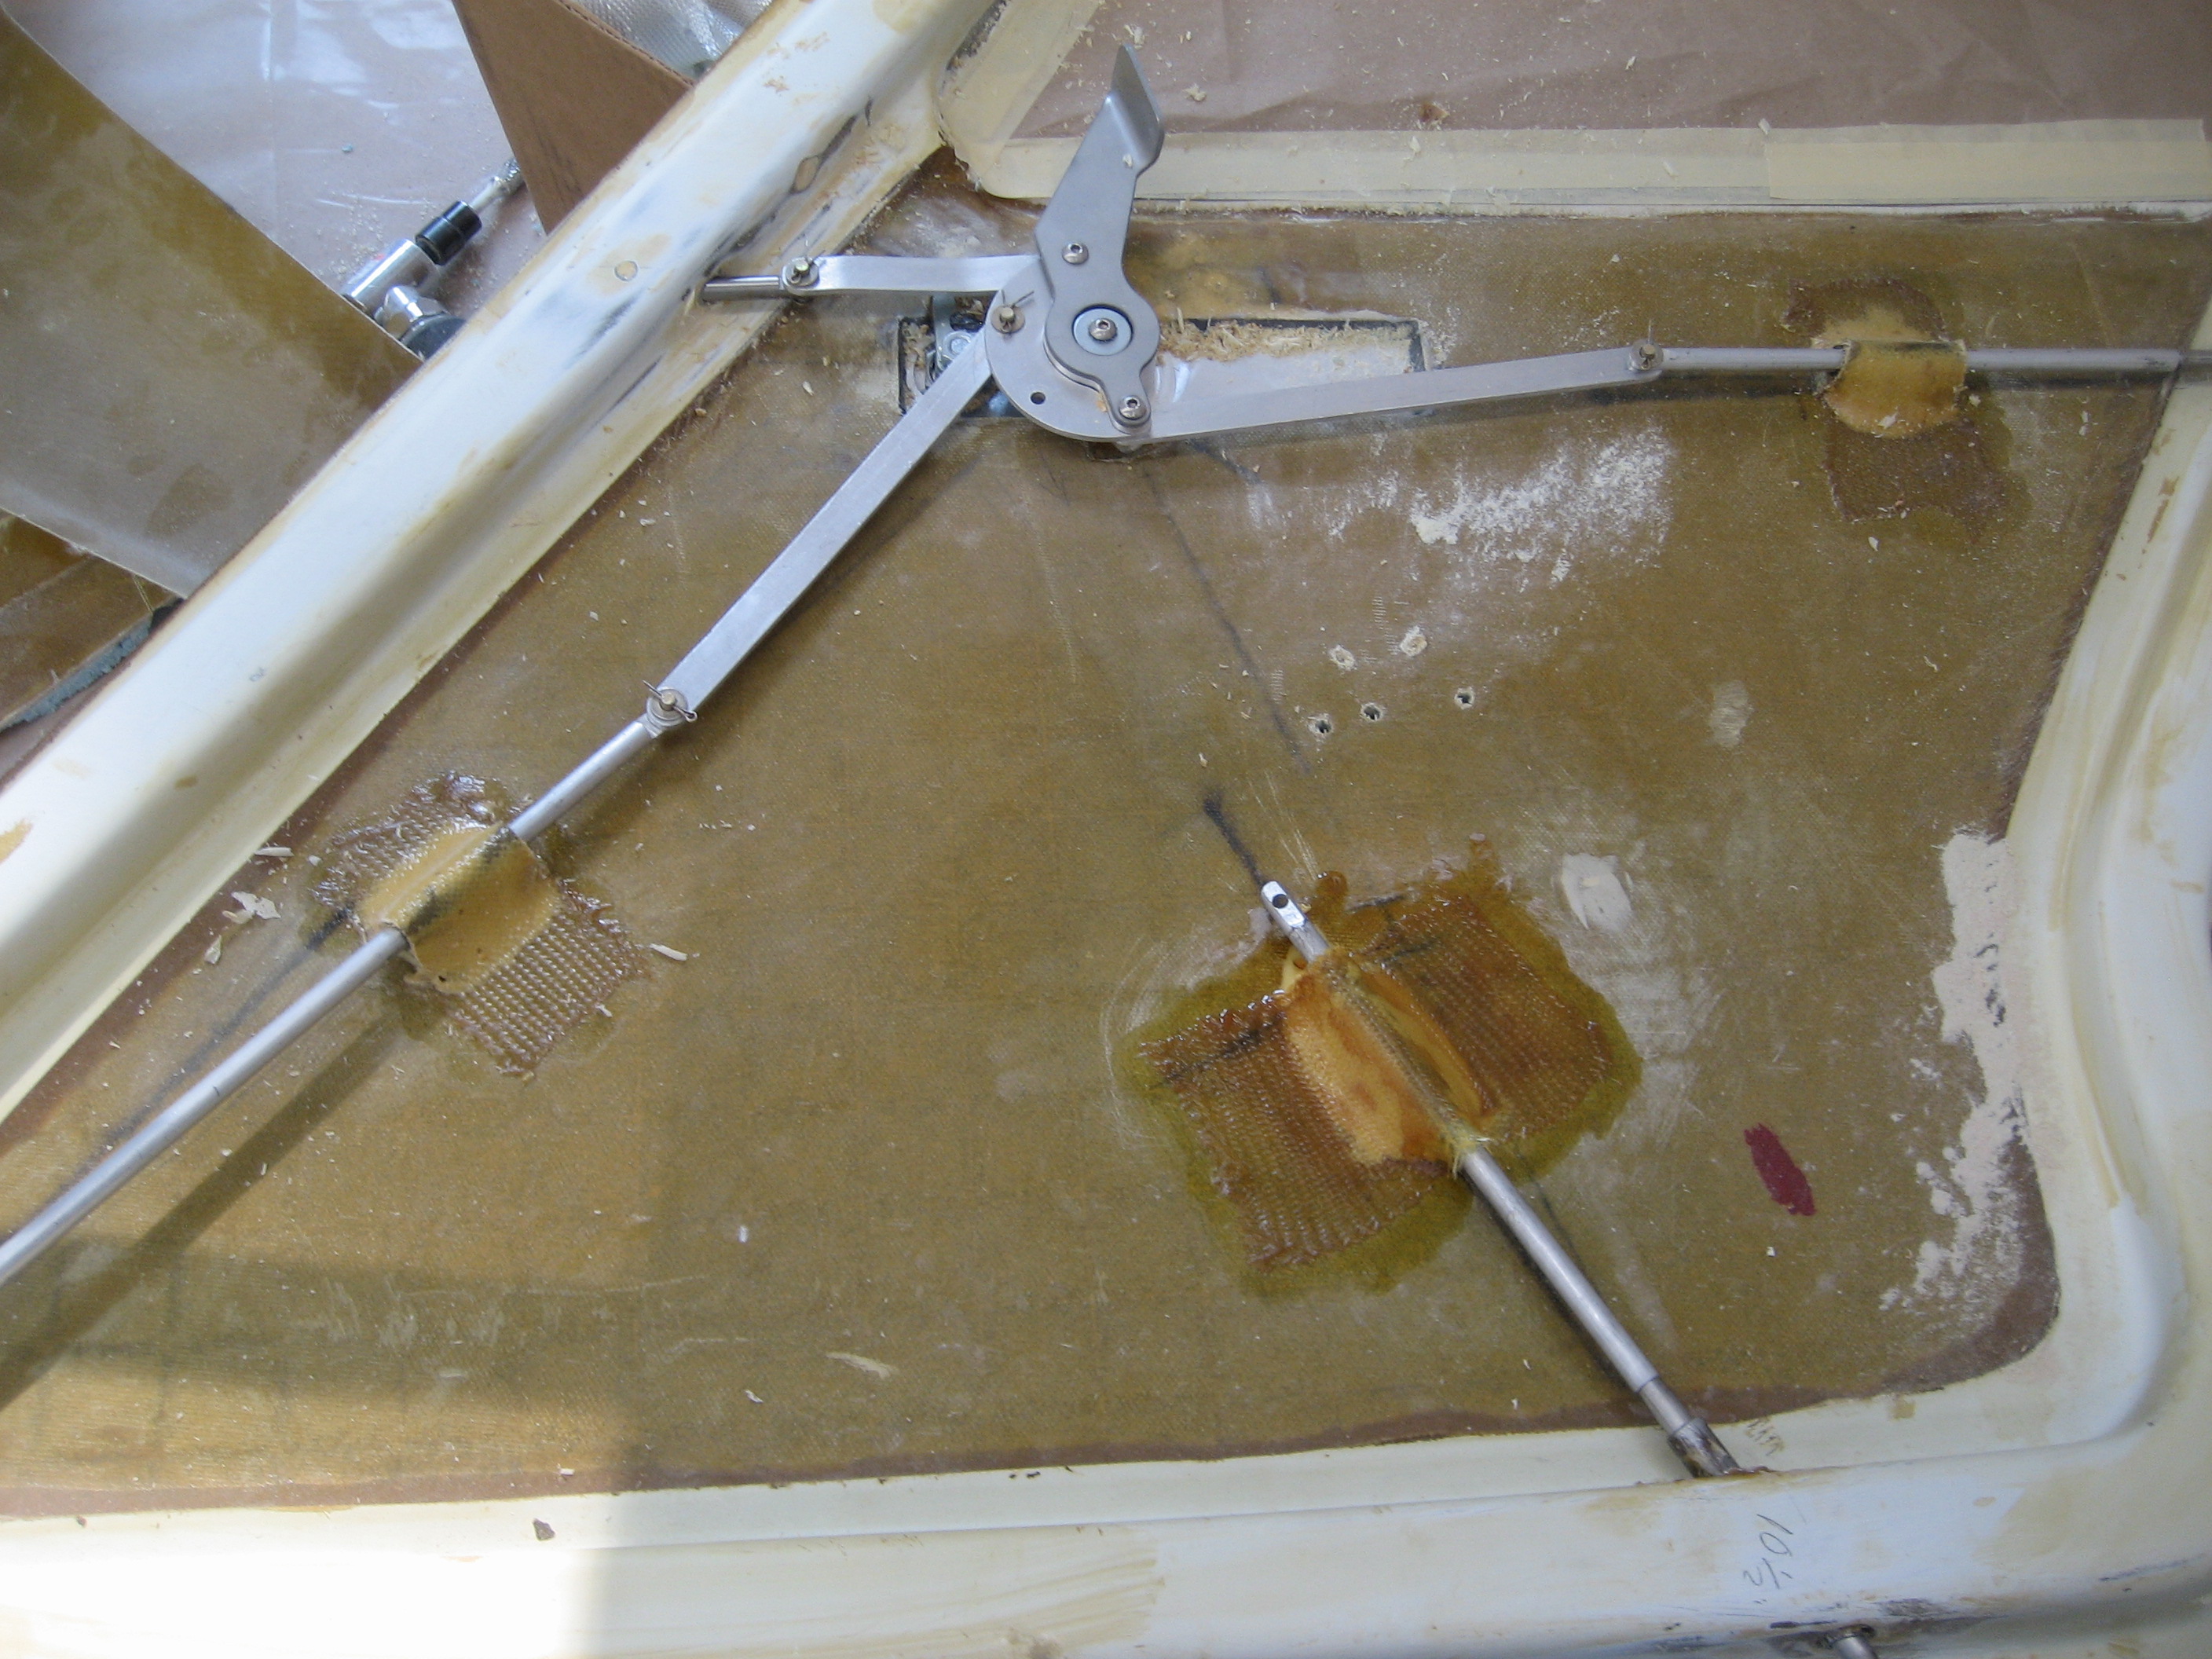
Next I cut out the door panel where the strake extension was. That’s when I noticed that I would need a slight dogleg in that link.

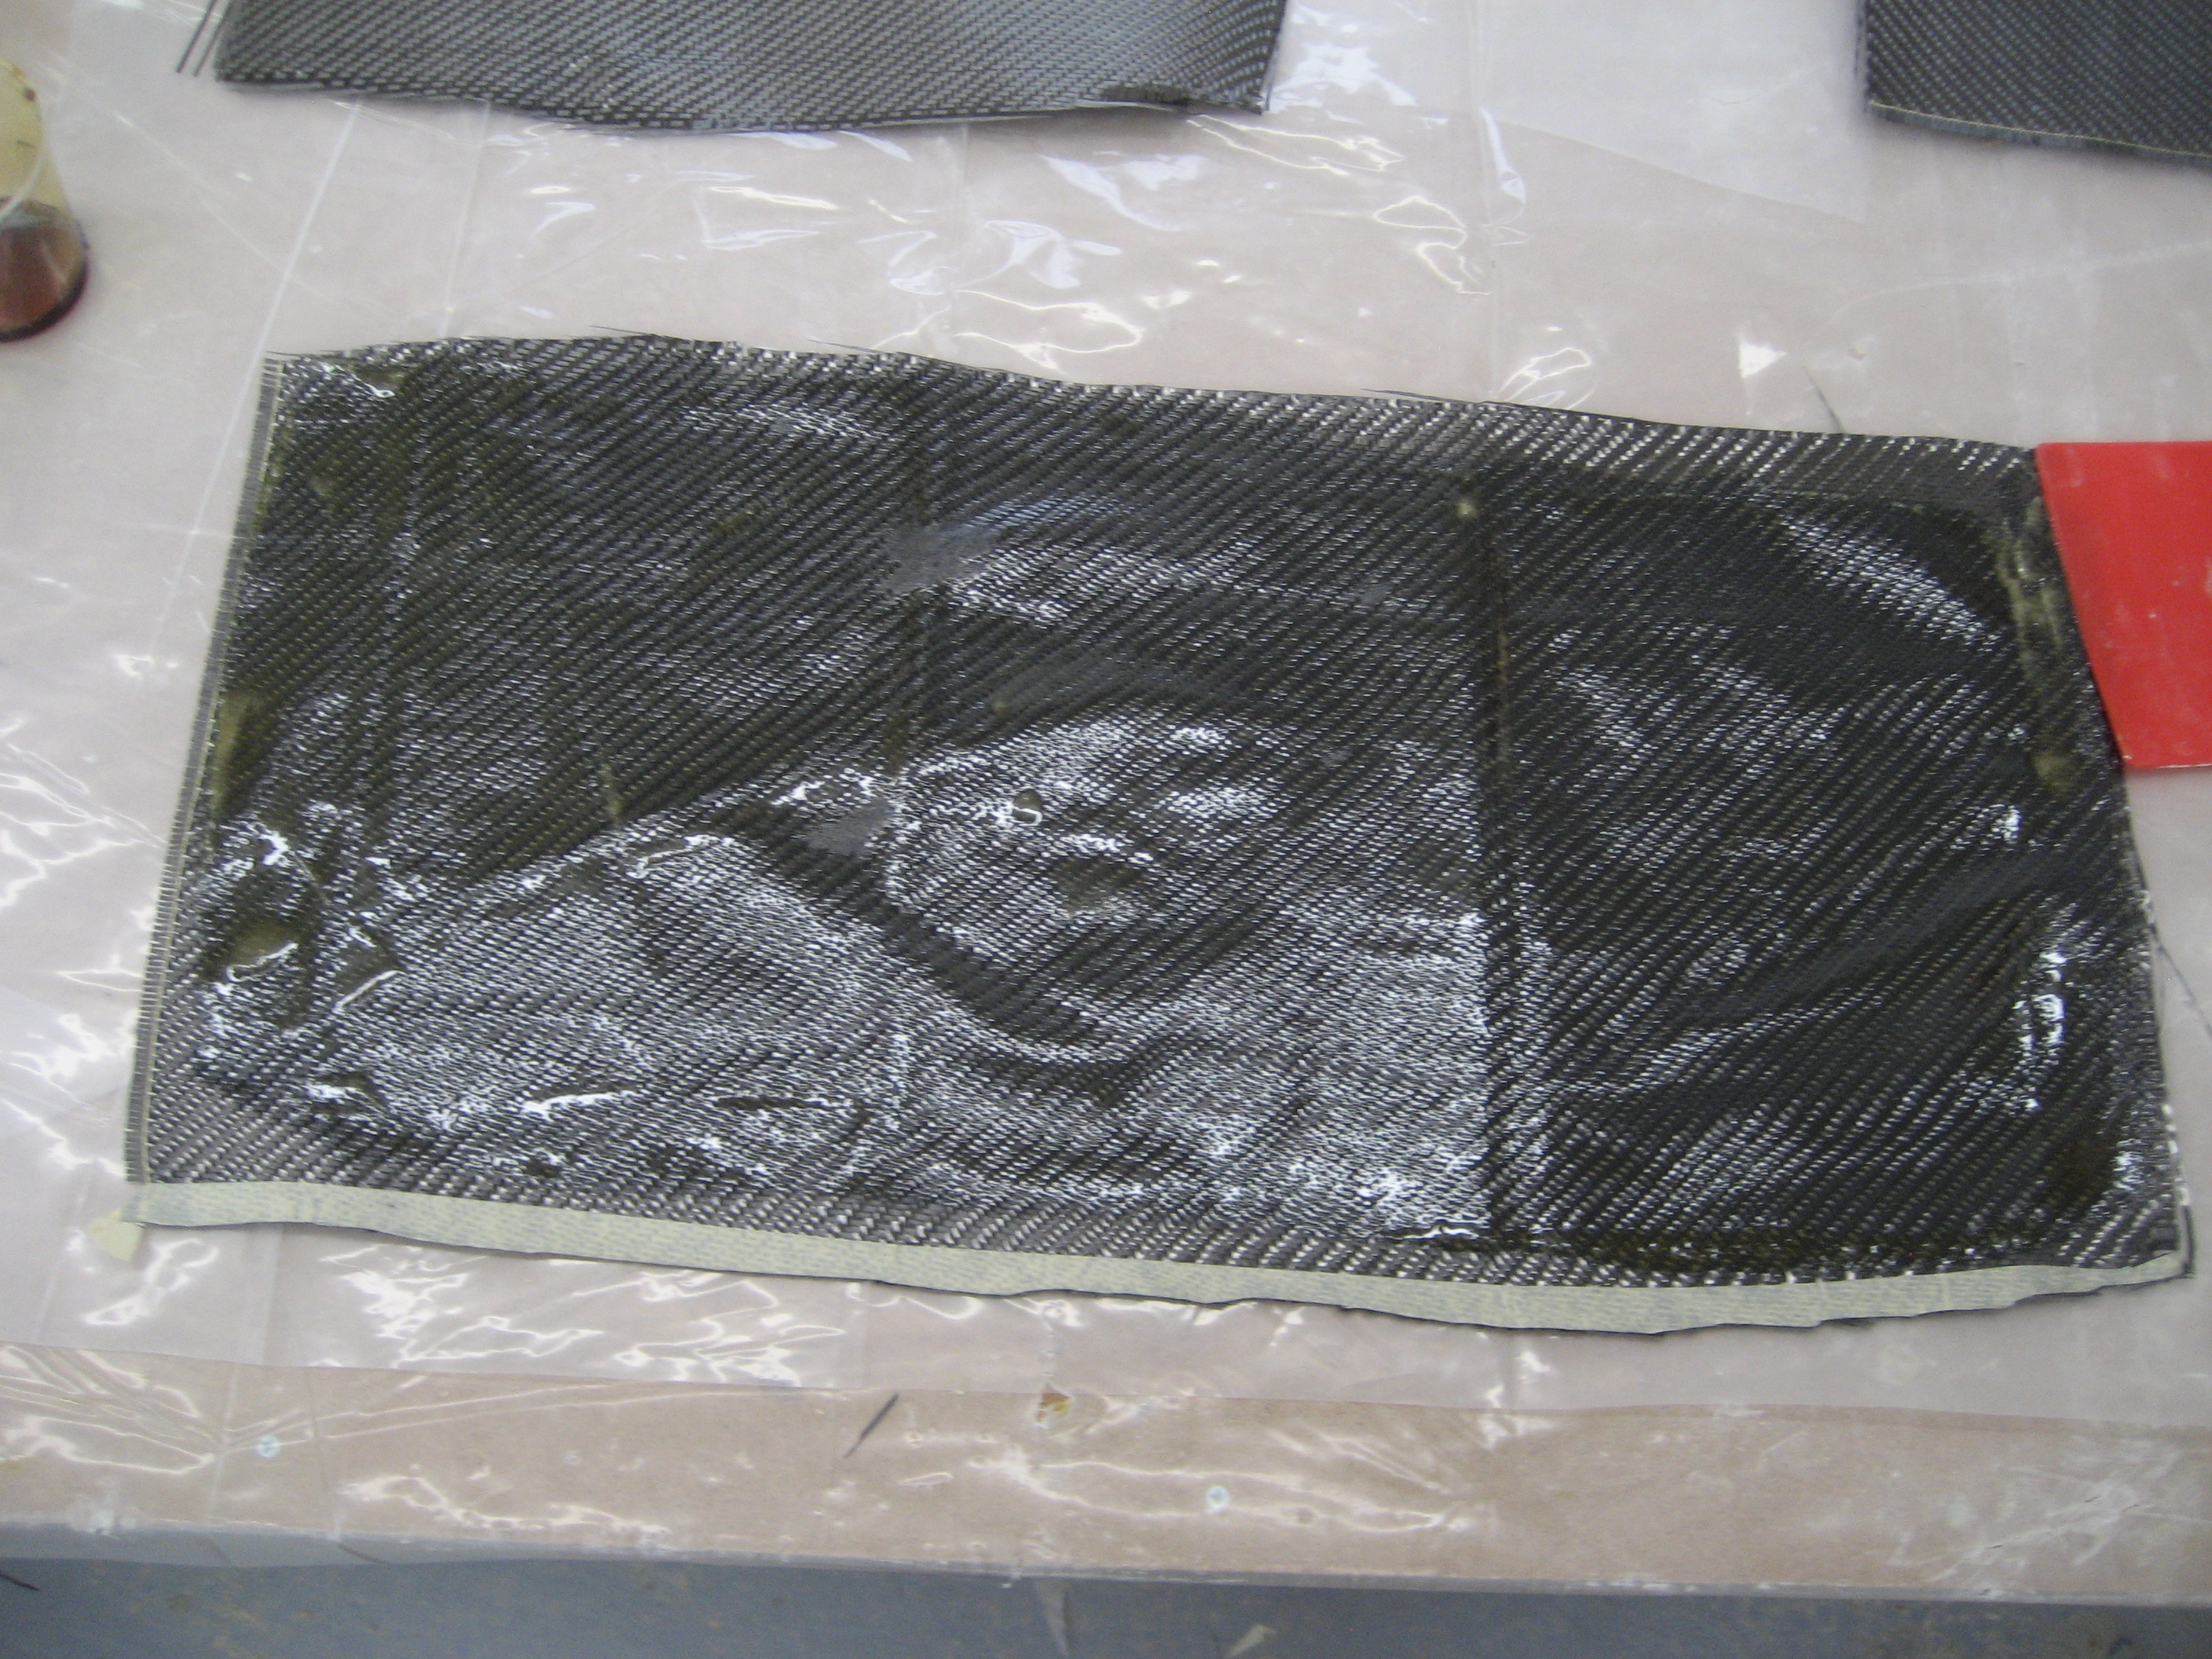
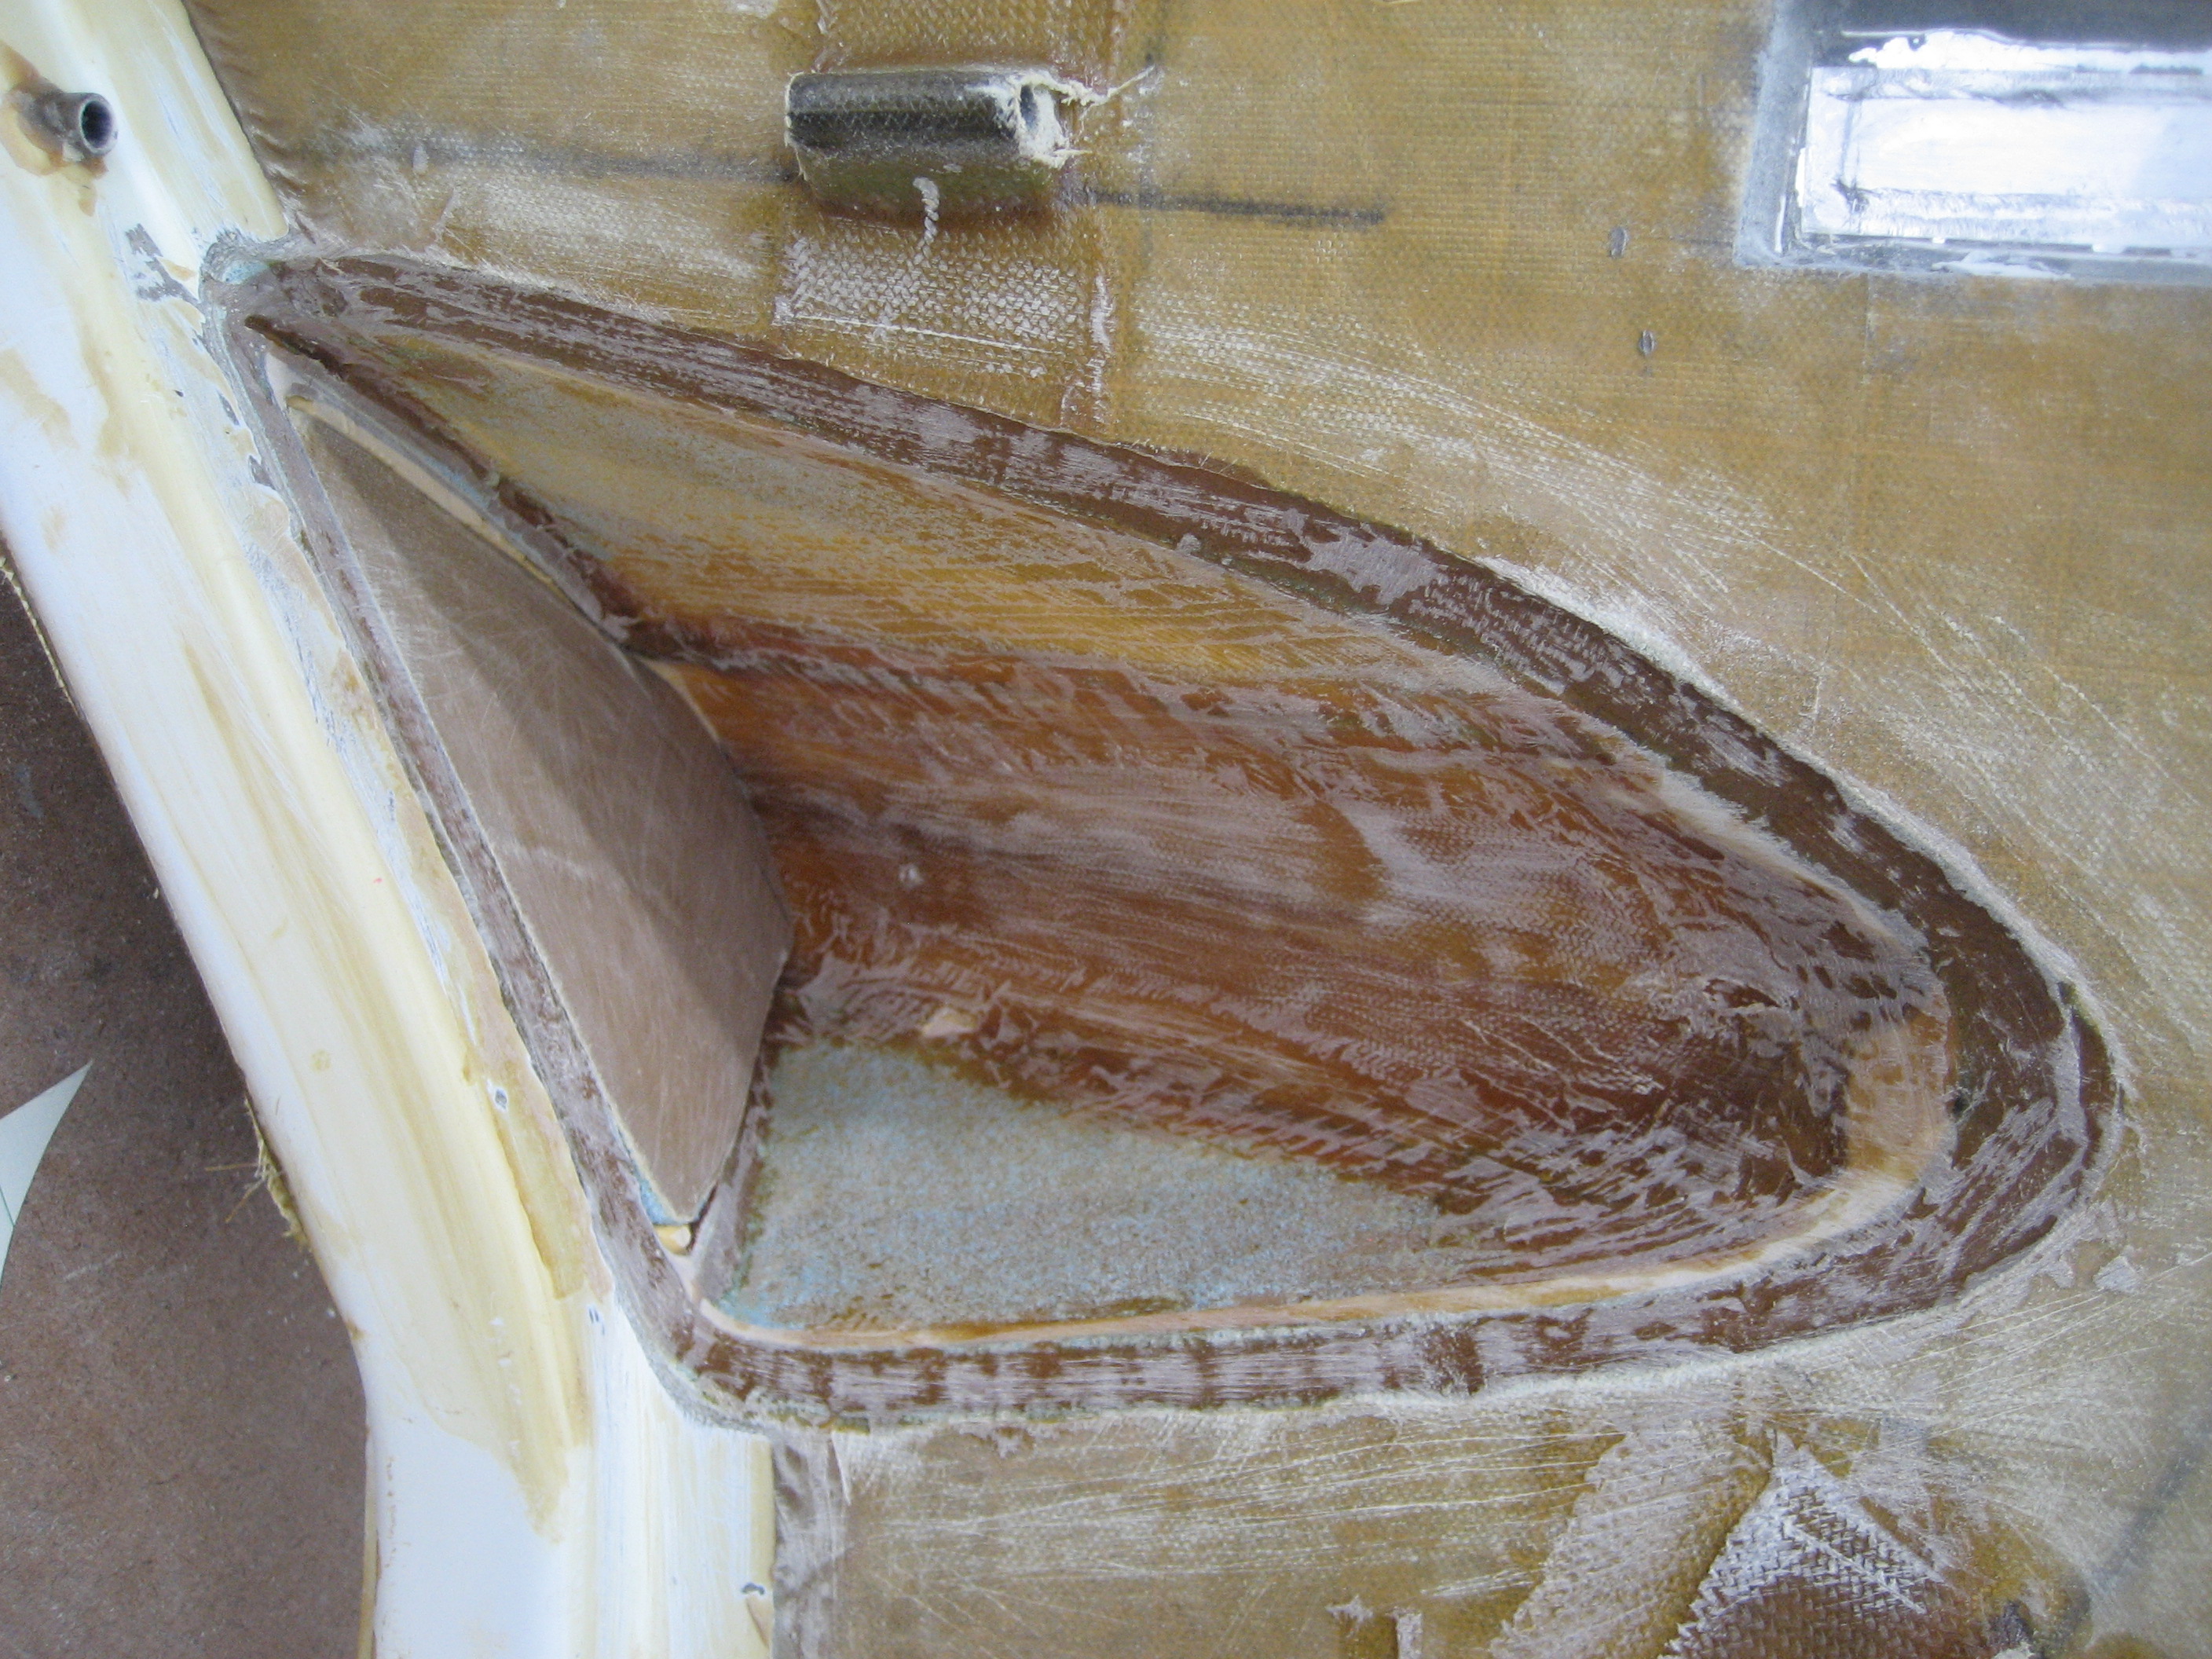
The strake is made of 1/2″ foam with a outer and inner fiberglass skin. That “sandwich” of foam and fiberglass is what gives the structure it’s strength. Now here’s a Hangar 18 special: Remove the inner fiberglass skin and foam. That way you pickup an additional inch of room. But it’s weak with just the outer skin. Carbon Fiber to the rescue. I hadn’t worked with CF before but afterwards, I think it’s easier to work with. If only it weren’t so EXPENSIVE. Here’s two layers of carbon fiber ready to be cut and laid in place.

Opening before:
Opening after:
And it’s stronger.