I have two primary switch panels. The first is what I call the “Overhead Switch Panel” (OSP) which is located overhead (duh) between the front seats.
The second is the “Left Lower Switch Panel” (LLSP) which is located below the pilot side EFIS.
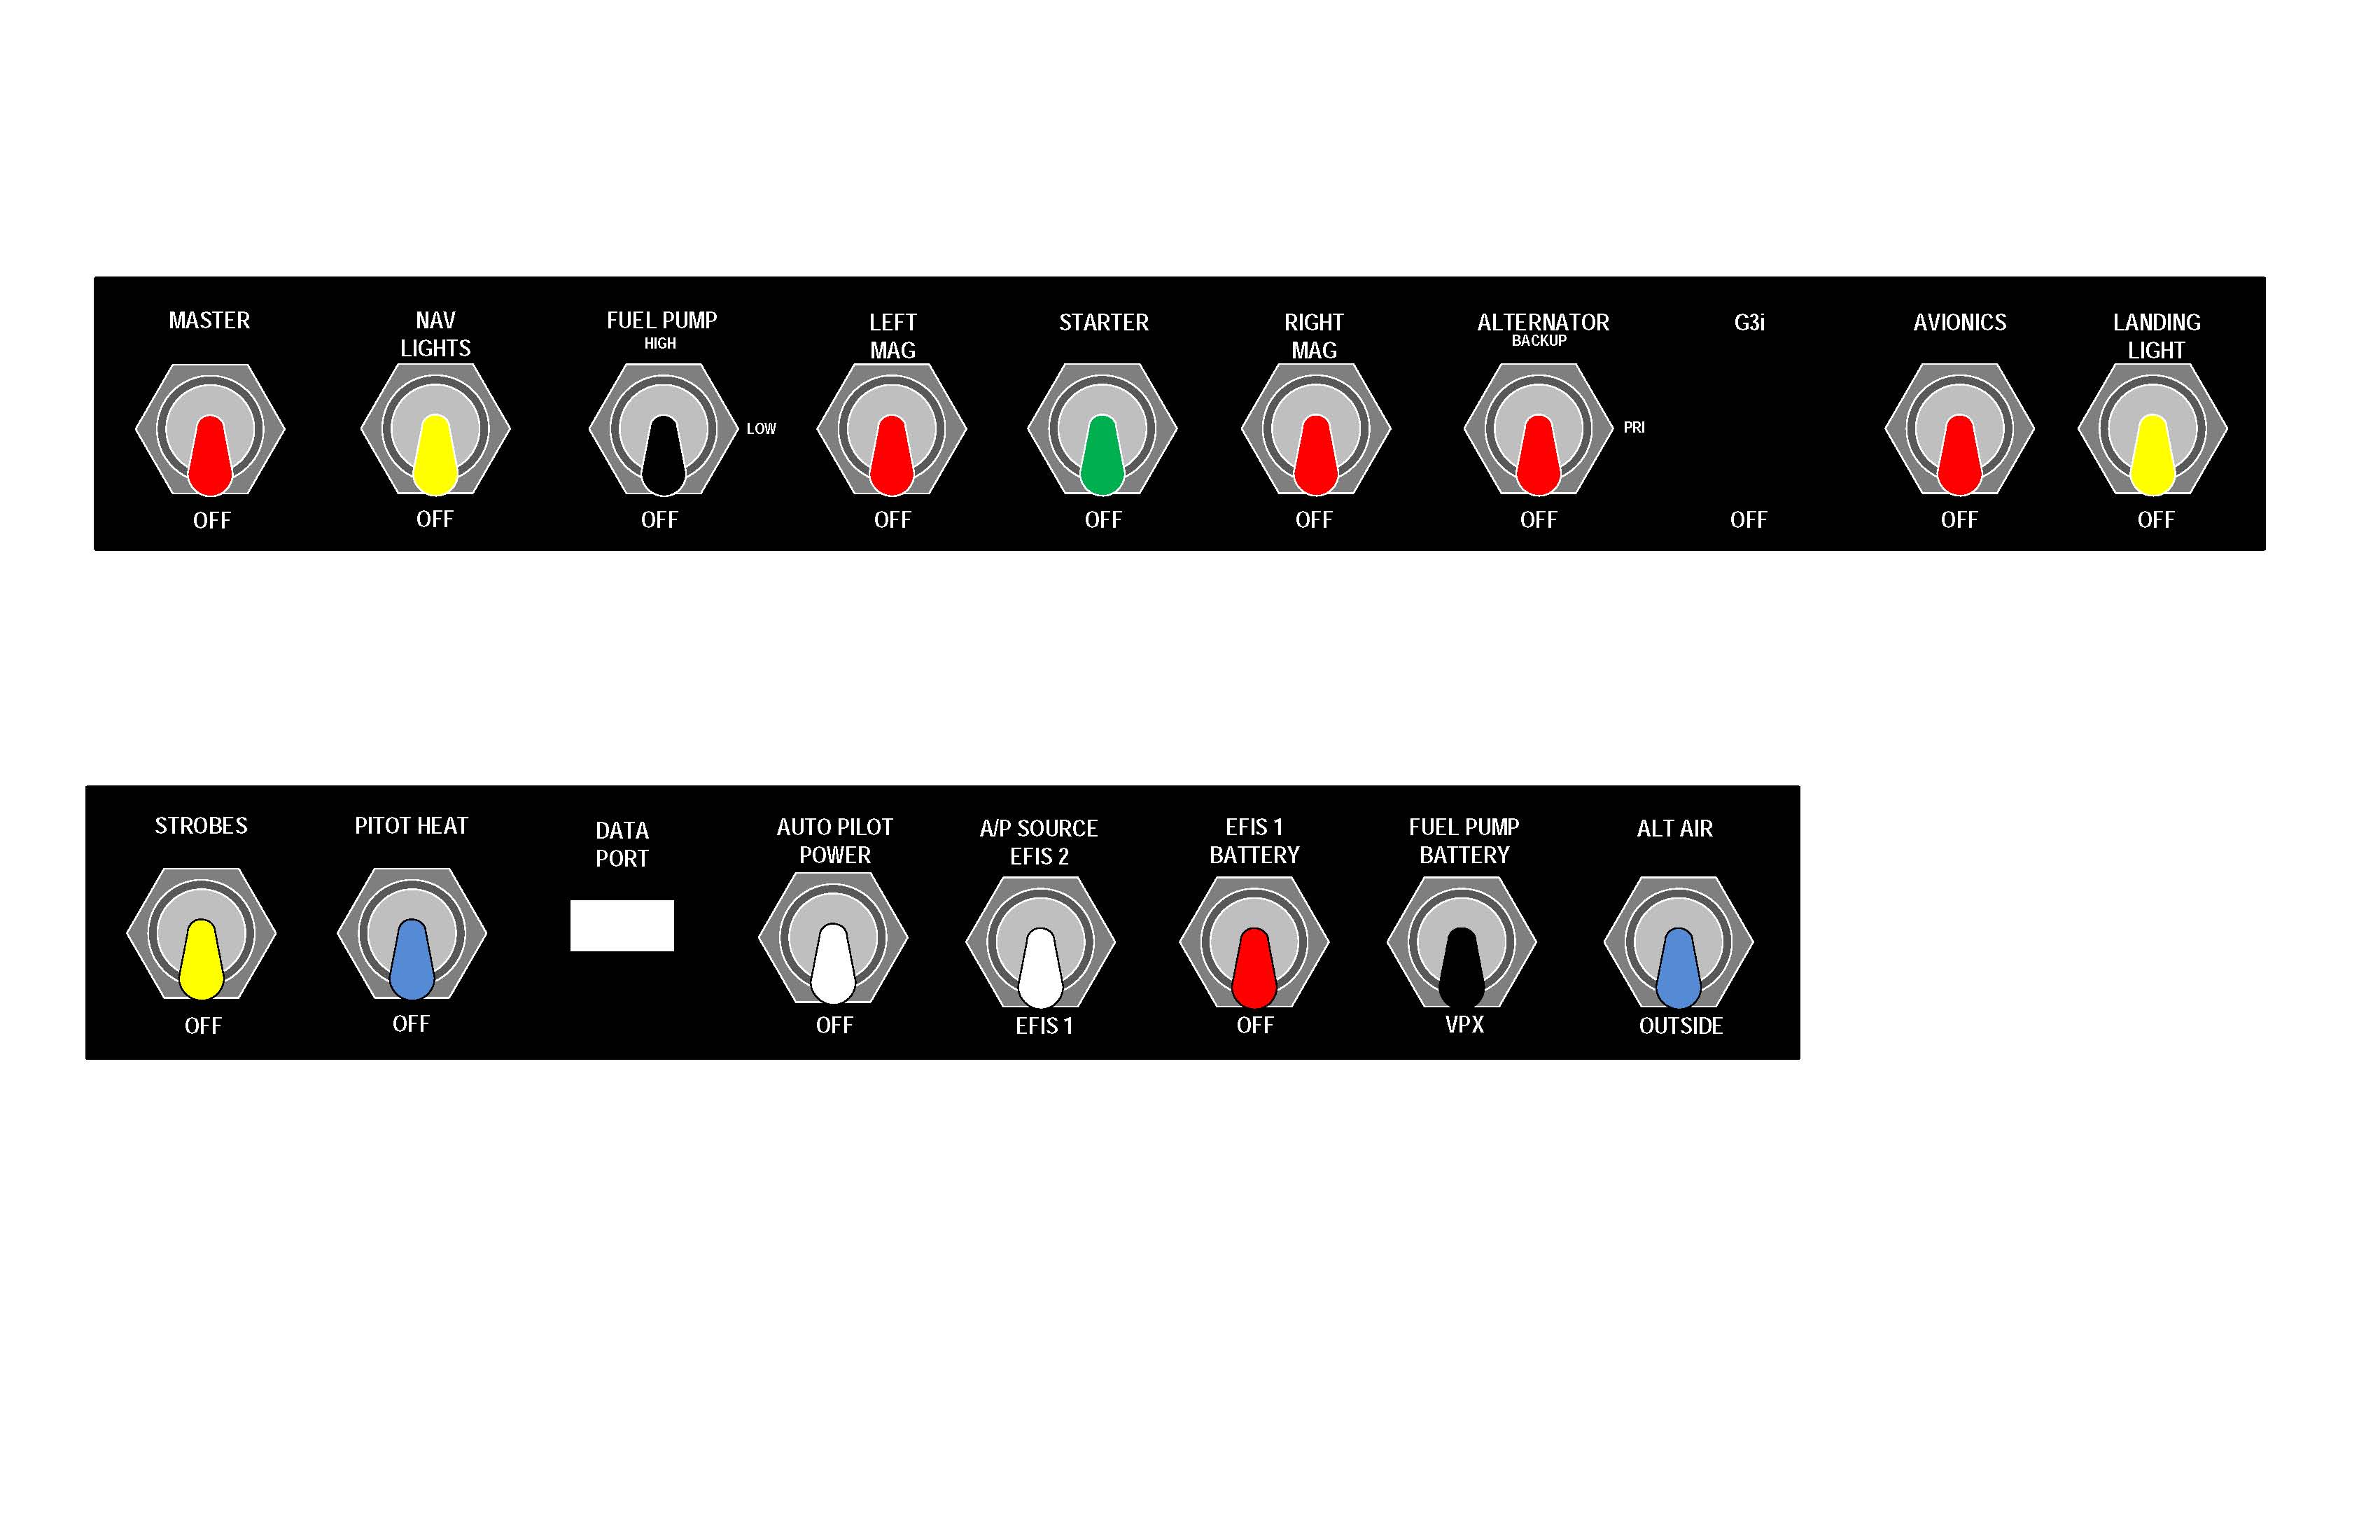
My philosophy for the switch placement in the OSP was that these switches were for startup. Once the engine was running and the airplane was ready to move, these switches would not be touched. Part of the reason for that was these switches would be a bit hard to read in flight because they are so close to your head. Furthermore, the switches would be switched up left to right during startup and then down right to left during shutdown.
The LLSP would be for things that I would need to activate or deactivate in flight. AutoPilot, Pitot Heat, etc.
I later added colored covers to the switches to identify function and purpose. Red was always up, yellow was lighting, black was fuel pump, blue is pitot/static, white is autopilot and green is the starter.
When I added the EFIS 1 backup battery, the easiest place to locate that was on the LLSP. So even though it should be on the OSP, it ended up down on the LLSP.
Here’s what I learned after flying for a year.
I have impulse couplings on both mags which means instead of starting on the left mag, I start on both mags. So the to keep with the left-to-right start sequence, the mag switches were out of order. Next is that my hot start procedure (which works EVERY TIME), is to switch the boost pump on low while cranking the engine. So I need both hands on the OSP during engine start and then once the engine catches, I need to be on the throttle immediately.
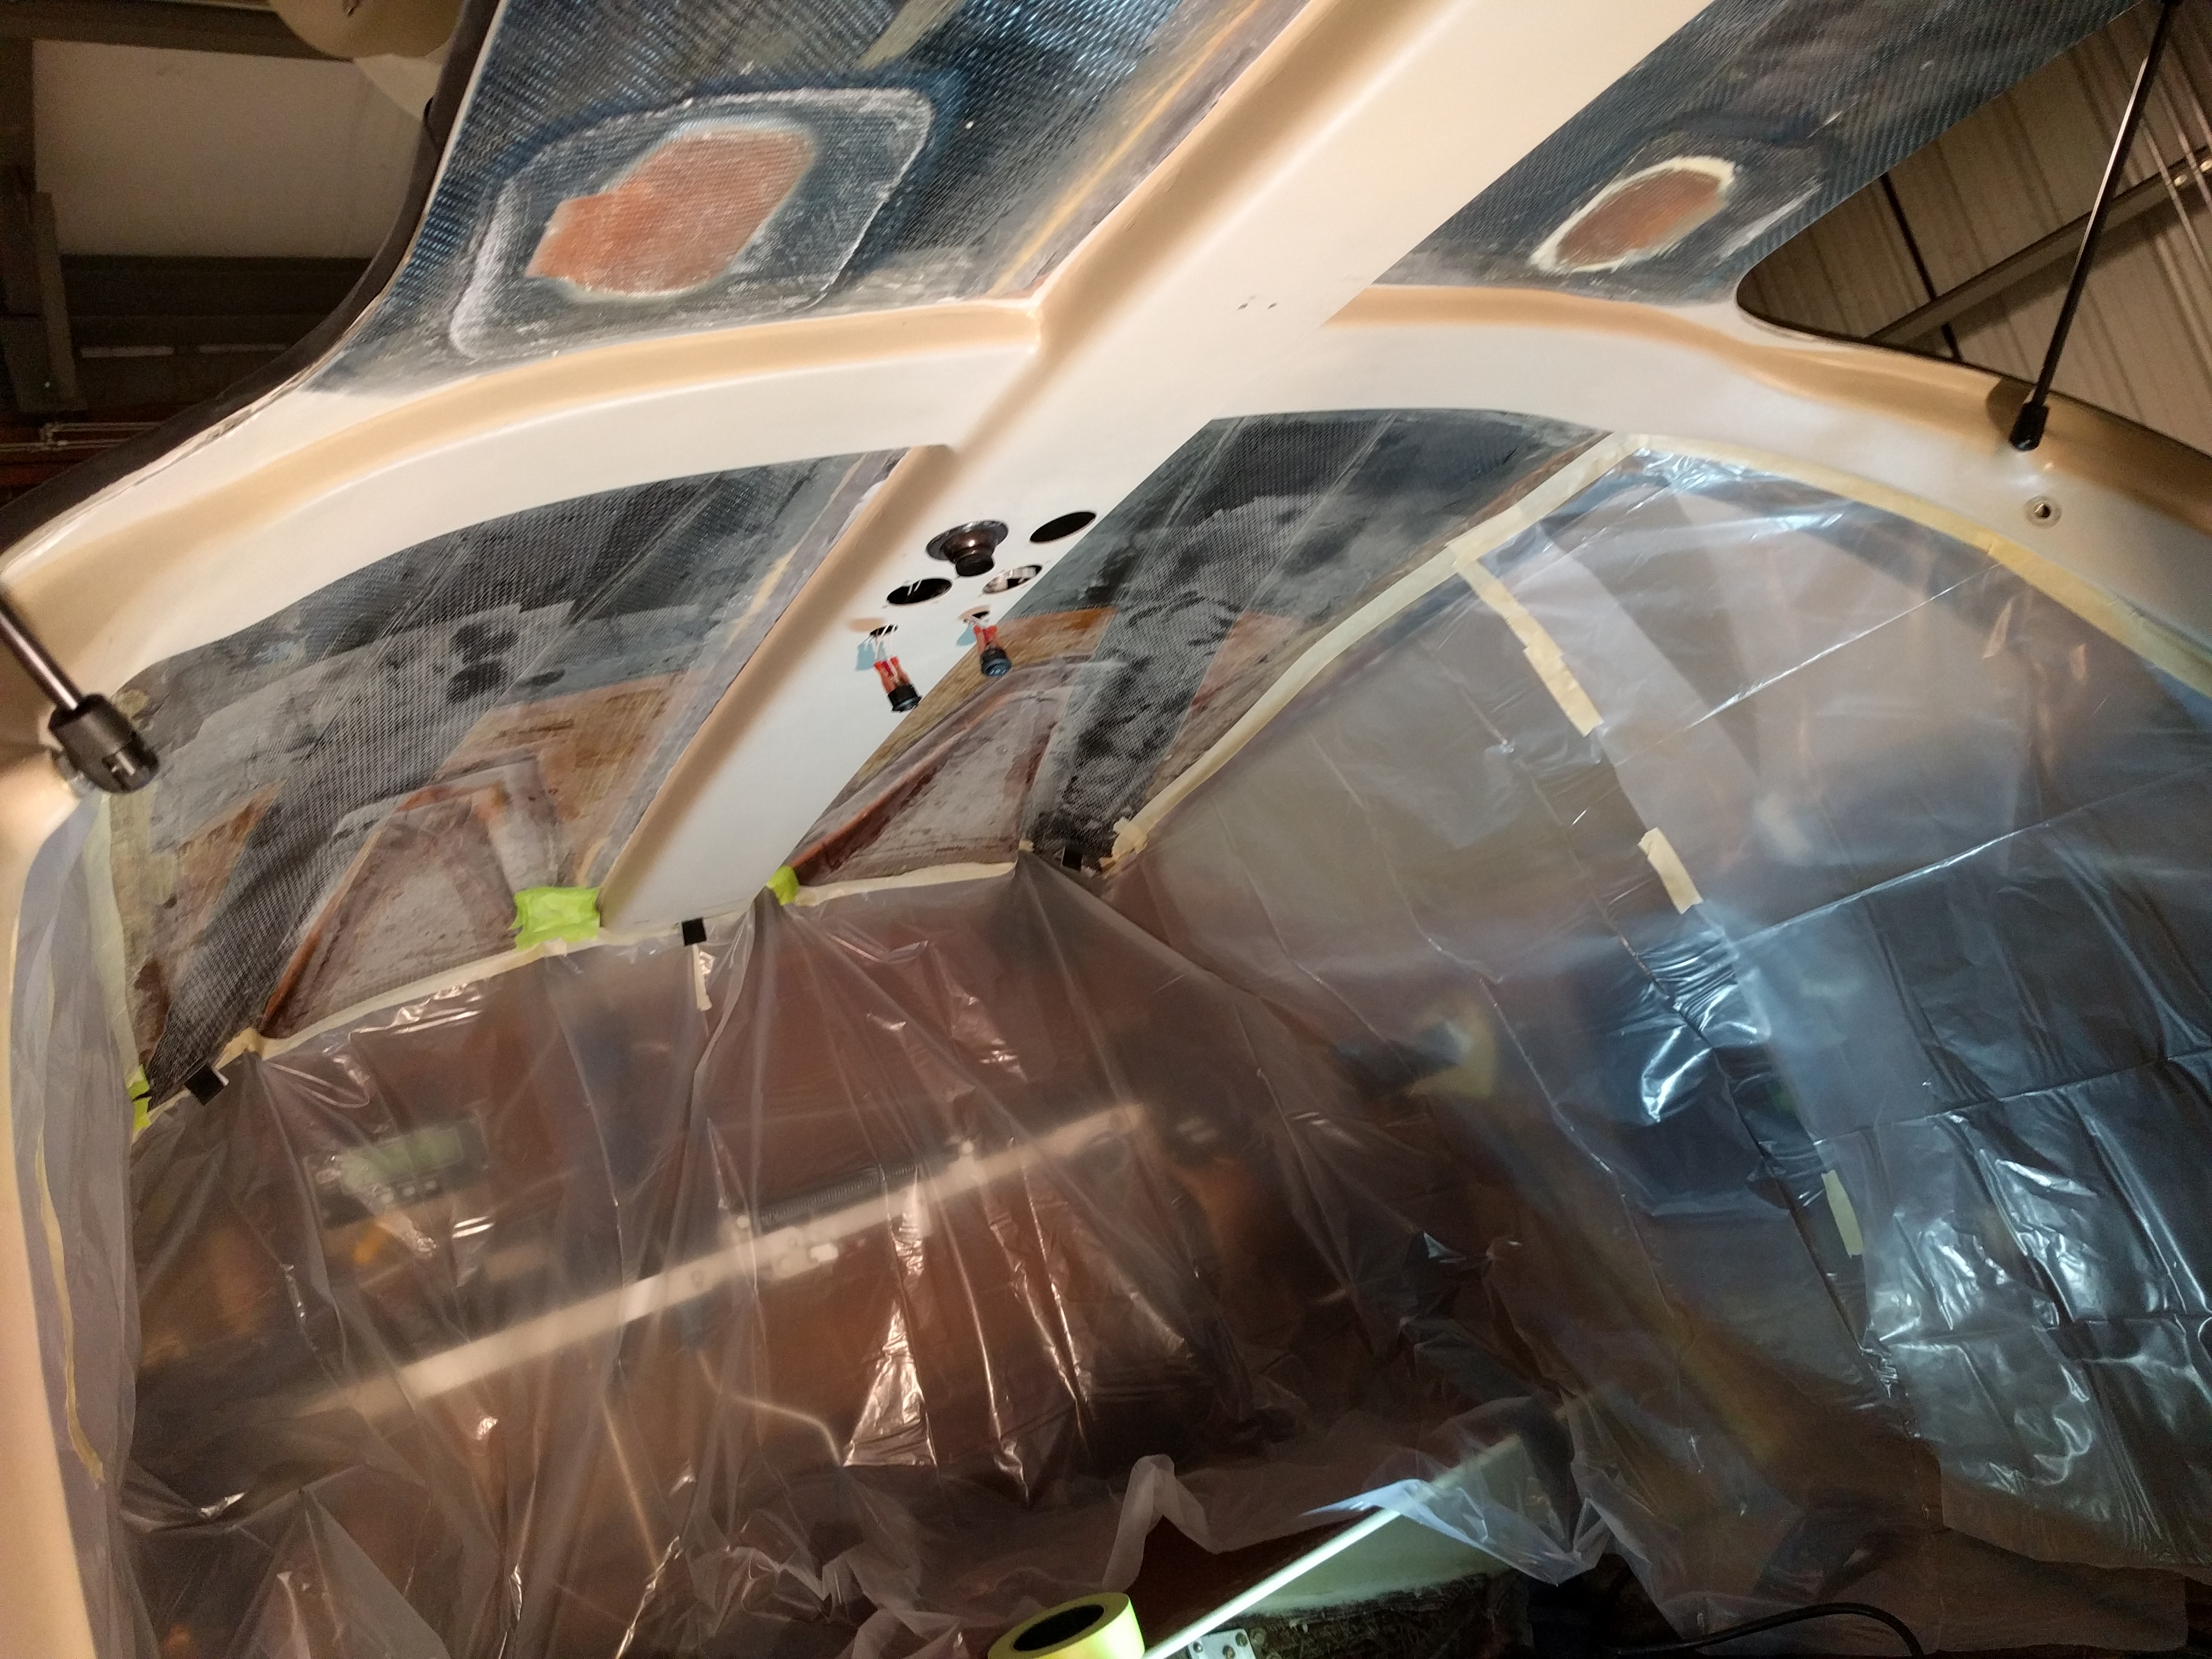
Since I was going to be painting the interior, now was a good time to clean up the switch locations. So here’s what I did.
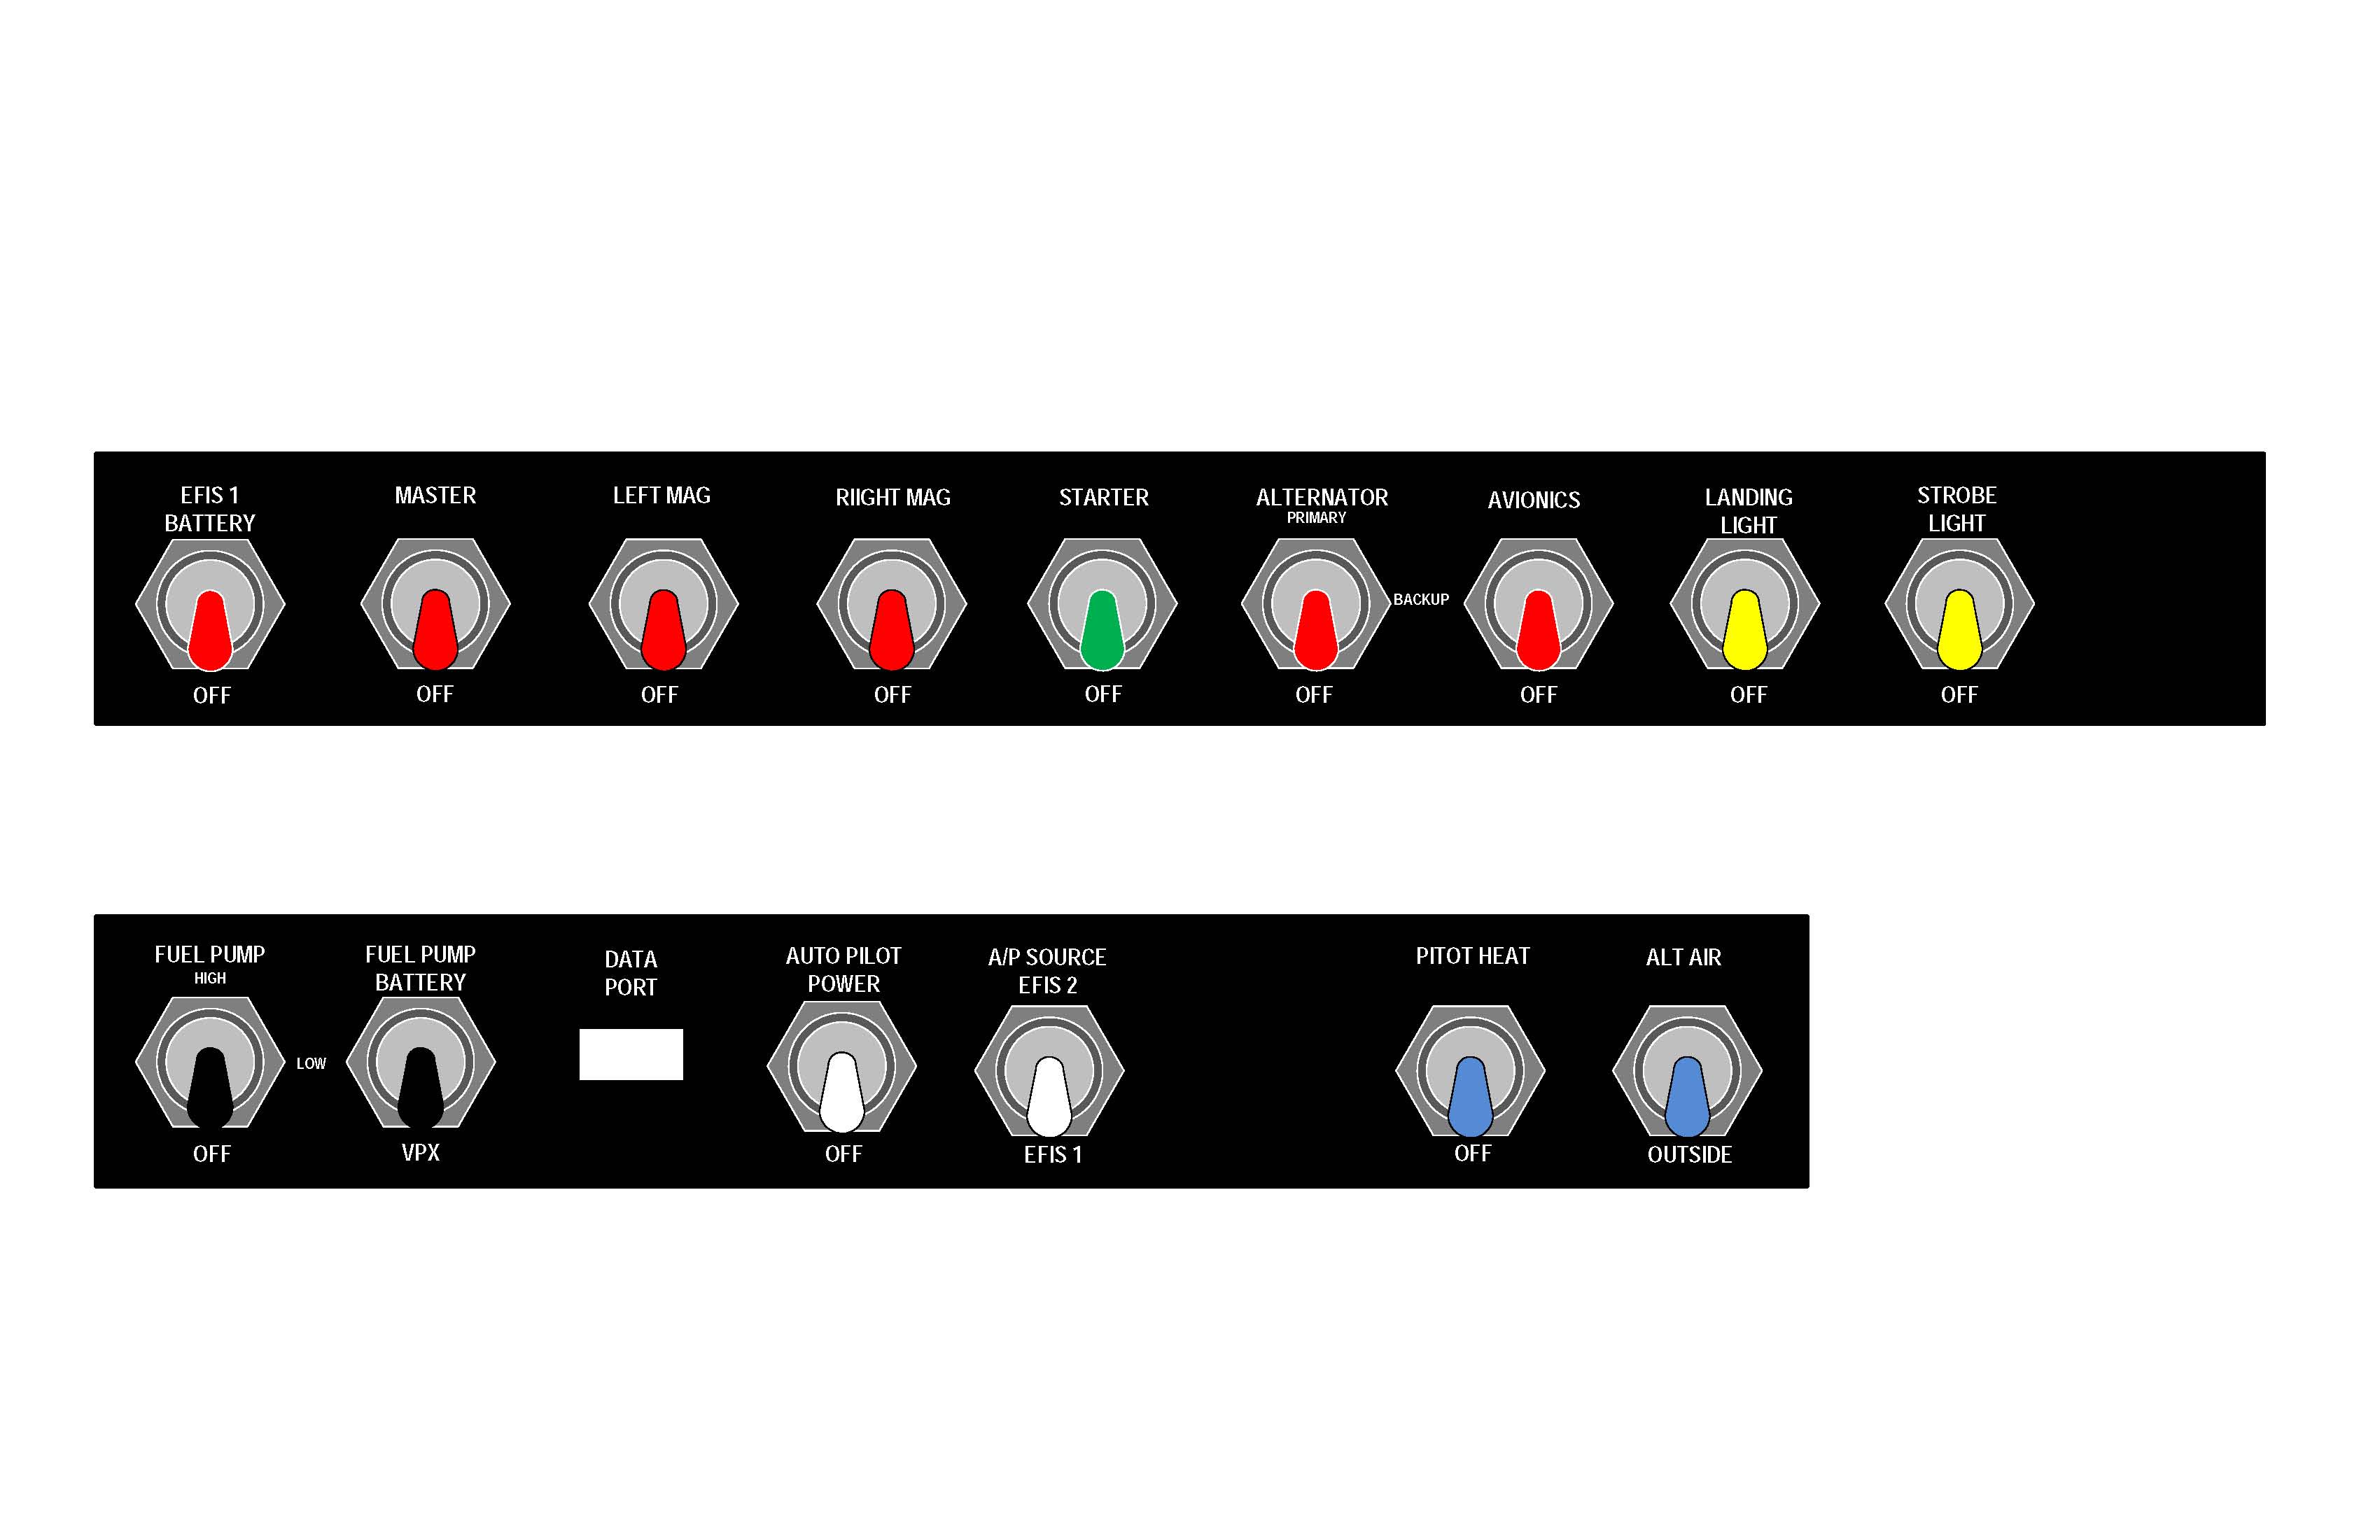
Moved the EFIS 1 switch to the leftmost position on the OSP. That gets turned on during preflight.
The navigation lights are now on whenever the master switch is on. Since the Velocity doesn’t have a rotating beacon, I use the nav lights as an indicator that the power is on.
Next is the Master switch.
Now it’s time to prime the engine. Fuel Pump is on the LLSP to allow for the hot start. But the engine isn’t even running yet so it’s okay to jump down to the LLSP for this one.
Next is both mags on and then hit the starter.
Once the engine is running and stable, the Alternator comes on (primary alternator is all the way up now) followed by the Avionics.
I usually turn on the landing light on when I’m ready to move. Since the landing lights flash once I hit 90KIAS they need to be warmed up by the time I’m ready to take off.
Strobes come on when I take the runway. It’s the rightmost switch so it’s easy to find without looking.
I grouped the LLSP so that fuel pump, autopilot and pitot/static switches are together.
The really nice thing about this change was how easy it was. Without the VPX, it would have been a pain! But with the VPX, just make a couple of changes in the config and it’s done.