
- 7.2 Nose Gear Installation (Door mechanism)
- 7.8.2 Landing Gear Plumbing – Dump Valve
- 7.8.2 Landing Gear Plumbing – Bulkhead fittings
- 7.8.2 Landing Gear Plumbing – Dump Valve
- 7.8.2 Landing Gear Plumbing.
- 7.8.2 Landing Gear Plumbing
- 7.8.4 Landing Gear Electrical
- 7.0 Landing Gear Retract Test
- 7.0 Landing Gear Retract Test II
- 7.7.3 Main Gear Doors
- 7.7.2 Parking Brake
- 7.8.4 – Landing Gear Electrical
- 7.8.4 Main gear microswitch wire routing
- 7.8.4 Main Gear Micro Switches
- 7.8.4 Nose Gear Up Microswitch mount
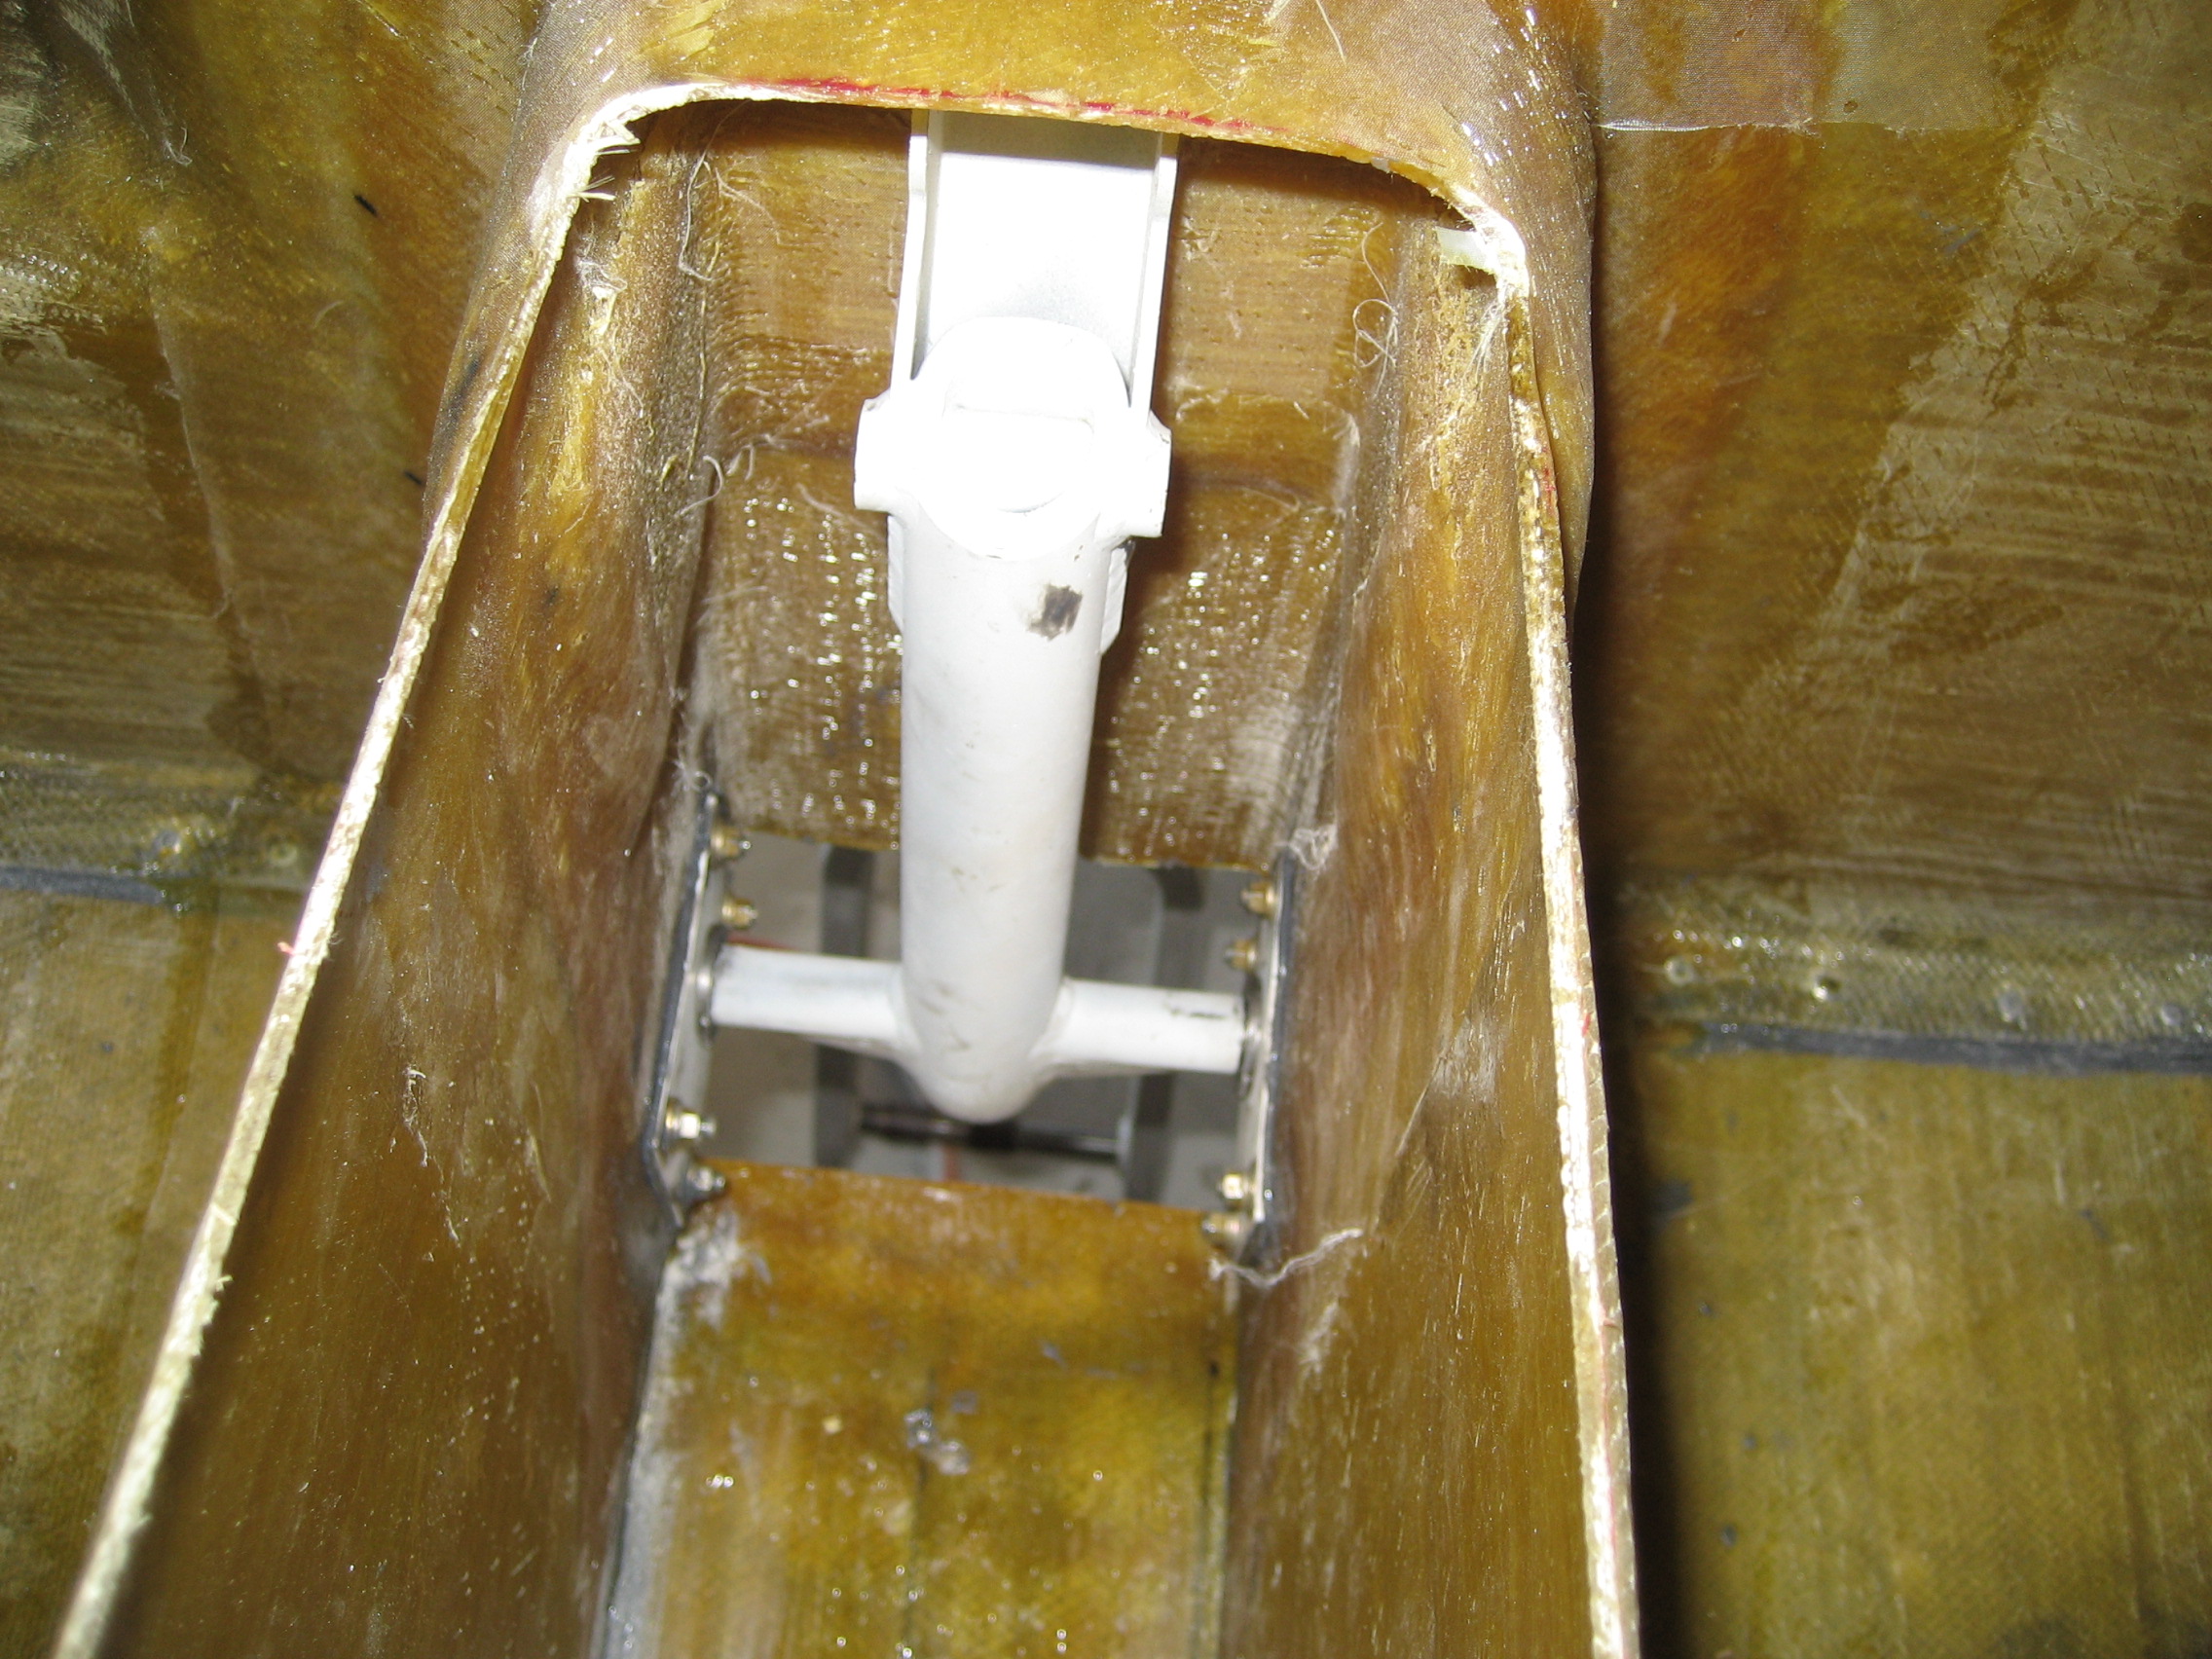
- 7.6.3 / 7.8.1 Install Landing Gear Hydraulic Cylinders
- 7.1 Nose Gear Door Installation
- 7.1 Nose Gear Door Installation
- 7.6.1 Main Gear Pulley Installation
- 7.6.1 Main Gear Pulley Installation
- 7.2.1 Nose Gear Installation
- 7.2.1 Nose Gear Installation
- 7.4.1 Gear Leg Cut Out
- 7.2.5 Nose Gear Guides
- 7.8.1 Hydraulic Power Pack Installation
- 7.4.3 Transverse Bulkhead Installation
- 7.5 Main Gear Bushings
- 7.4.3 Transverse Bulkhead Installation
- 7.6.2 Main Gear Sockets
- 7.7.1 Main Gear Leg UpStops
- 7.7.3 Main Gear Doors
- 7.7.3 Main Gear Doors
- 7.7.1 Main Gear Legs (Painting)
- 7.2 Nose Gear Door Mechanism
- 7.3 Nose Gear Door Mechanism
- 11.1.4 Lower Cowling to Wing Flanges
- Nose gear spring replacement
- 7.2 – Nose Gear Door Actuator Replacement
- 7-99 Sealing the Nose Landing Gear
The hole for the nose gear pivot was drilled out earlier. Now the bushings have to be installed. There’s a plate on the inside and outside for each side of the nose gear pivot which gets held in place with structural adhesive and fours bolts (per side).

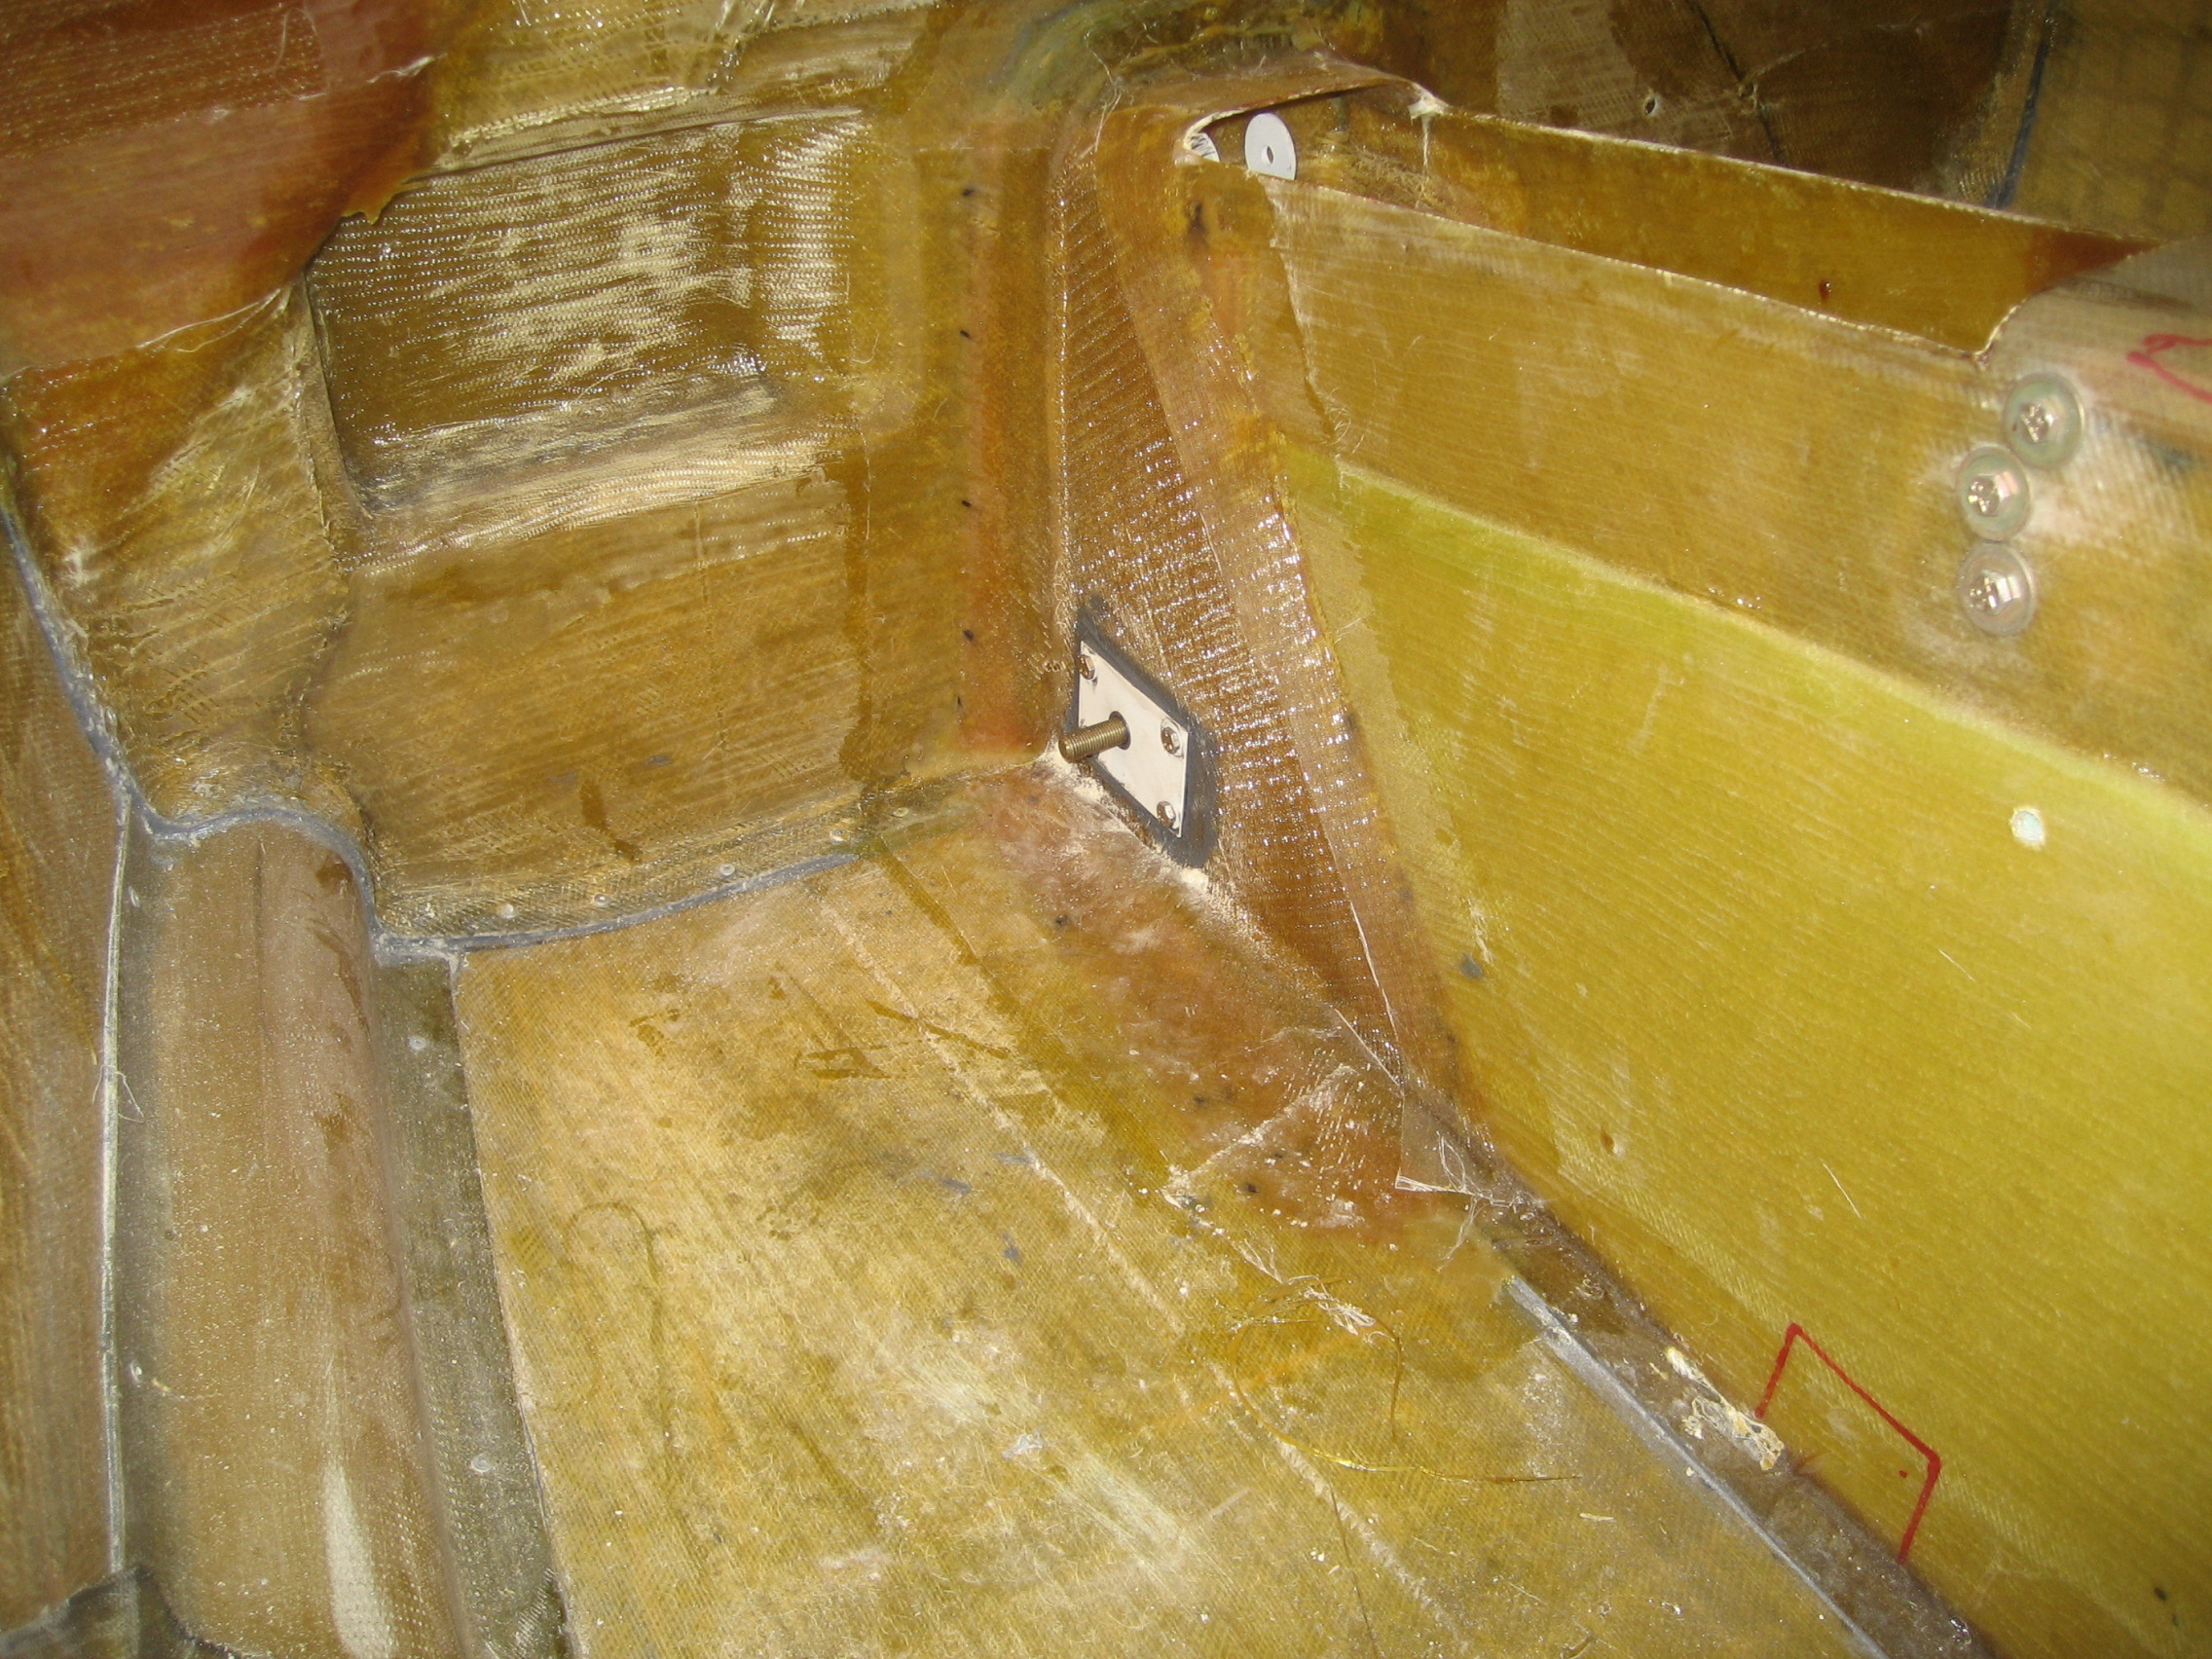
Once the main pivot had set up, I had to insure the rear pivot point was correctly located. It was. This is the second mounting location that hasn’t required any adjustment. I’m told that they almost always need to be moved a little. This makes me a bit apprehensive. When thing go together too well, I usually think it means that I’m overlooking something. But Scott Swing said it was good so I used epoxy to hold the bushings and mounting plate is place.
Then the hydraulic cylinder is attached.

Almost ready for a nose wheel.
