
- 12.1 Engine arrival
- 12.1 Engine Installation Prep
- 12.1 Engine Installation Prep
- 12.1.2 Engine Mounts
- 12.1.2 Engine Installation
- 12.2.1 Aluminun Oil Lines
- 12.2.1 Aluminum Oil Lines
- 12.2.1 Cabin Heat
- 12.2.2 Fuel Lines
- 12.2.2 Fuel Lines
- 12.1.2 Intake tube modification
- 12.2.2 Fuel Lines
- 12.1.2 Intake tube modification
- 12.1.2 Intake tube modification (completed)
- 12.3.1 – Installing Throttle, Mixture, and Prop Controls
- 12.3.1 – Mixture Control Mounting Bracket
- 12.3.1 Prop Control Bracket
- 12.3.1 Throttle Control Bracket
- 12.2.3 Cylinder Intake Drain Lines
- 12.2.1 – Aluminum Oil Lines
- 12.3.4 Cooling Plenum
- 12.1.2 Oil Cooler mod
- 12.2.4 Pressure lines
- 12.3.4 Cooling Plenum
- 12.2.4 Pressure Lines
- 12.3.4 Cooling Plenum Intakes
- 12.2.3 Electric Fuel Pump Drain
- 12.2.3 Mechanical Fuel Pump Drain
- 12.2.3 Fuel Pump Drain Lines
- 12.2.3 Spider Drain Line
- 12.3.5 Propeller
- 12.4 Exhaust Installation
- 12.3.6 Nose Oil Cooler
- 12.3.6 Nose Oil Cooler Control
- 12.4 EGT Probe Installation
- 12.2.4 Oil Pressure Sensor (remediation)
- 12.4 Oil breather line
- 12.3.4 NACA duct extensions
- 12.4.2 Exhaust Fairing
- 12.3.6 Cabin Heat Damper Control
- 12.99 Induction Air
- 12.2.2 Fuel Line
- 12.3.6 Nose Mounted Oil Cooler
- 12.99 Engine Woes
- Engine Dehydrator
- Fouled injectors
- 12.99 – Oil temperature and heat challenges
- 12.99 Cabin Heat
- Electronic Ignition
- 12.99 Engine induction air
My CHT’s (Cylinder Head Temperature) run hot. This is not an unknown issue with a Velocity. Keeping CHT’s in a manageable is an ongoing challenge with many piston engine aircraft. Since the engines are air cooled, getting air to flow around the cylinders is key.
So here’s the Velocity engine setup for a Continental IO550 engine.

Air enters the upper plenum through the two roof NACA Ducts (upper right of diagram). This air then moves down around the six cylinders cooling them (and also passes through the oil cooler) on its way to the lower plenum. The lower plenum air is the exhausted through the openings at the rear of the cowling in front of the propeller.
My configuration has one difference. The engine exhaust is routed aft out the bottom of the lower cowling with fairings around each of the two exhaust pipes. This is another exit point for the hot, lower plenum air. This should provide better cooling than the standard setup where the exhaust sticks straight down out the lower cowling.

One of the first things airplane owners do when faced with high CHT’s is to find and plug any holes in the baffling separating the upper and lower plenum. Those openings will allow cooling air to escape into the lower plenum. I checked and plugged any holes and made sure there were no large gaps between the baffles and the cylinders.
Now what?
Normally, people look at trying to get more air into the upper plenum. On a Velocity this can be a challenge that traditional tractor style aircraft don’t have to worry about. On your typical Cessna, Piper or Beechcraft, the upper plenum entrance is at the front of the airplane and it’s wide open. Not so on the Velocity. Some builders have installed vortex generators on the roof to keep the air attached to the top of the fuselage making it easier to get into the NACA Ducts on the roof. Some of these VG’s are so big they look like shark fins.
One of the things my good friend Malcolm Collier taught me was to think of cooling air like a length of rope; It’s a lot easier to pull rope out of a space than it is to push it into a space. If you pull enough air out of the lower plenum, then more cooling air will have to be drawn into the upper plenum (assuming the openings are large enough and there’s no blockage). To that end, some builders have installed vents on the bottom to provide additional exits for the hot air. But I already had that with my exhaust. I could add these louvers, but I don’t think that’s the solution.
Clearly there’s something else.
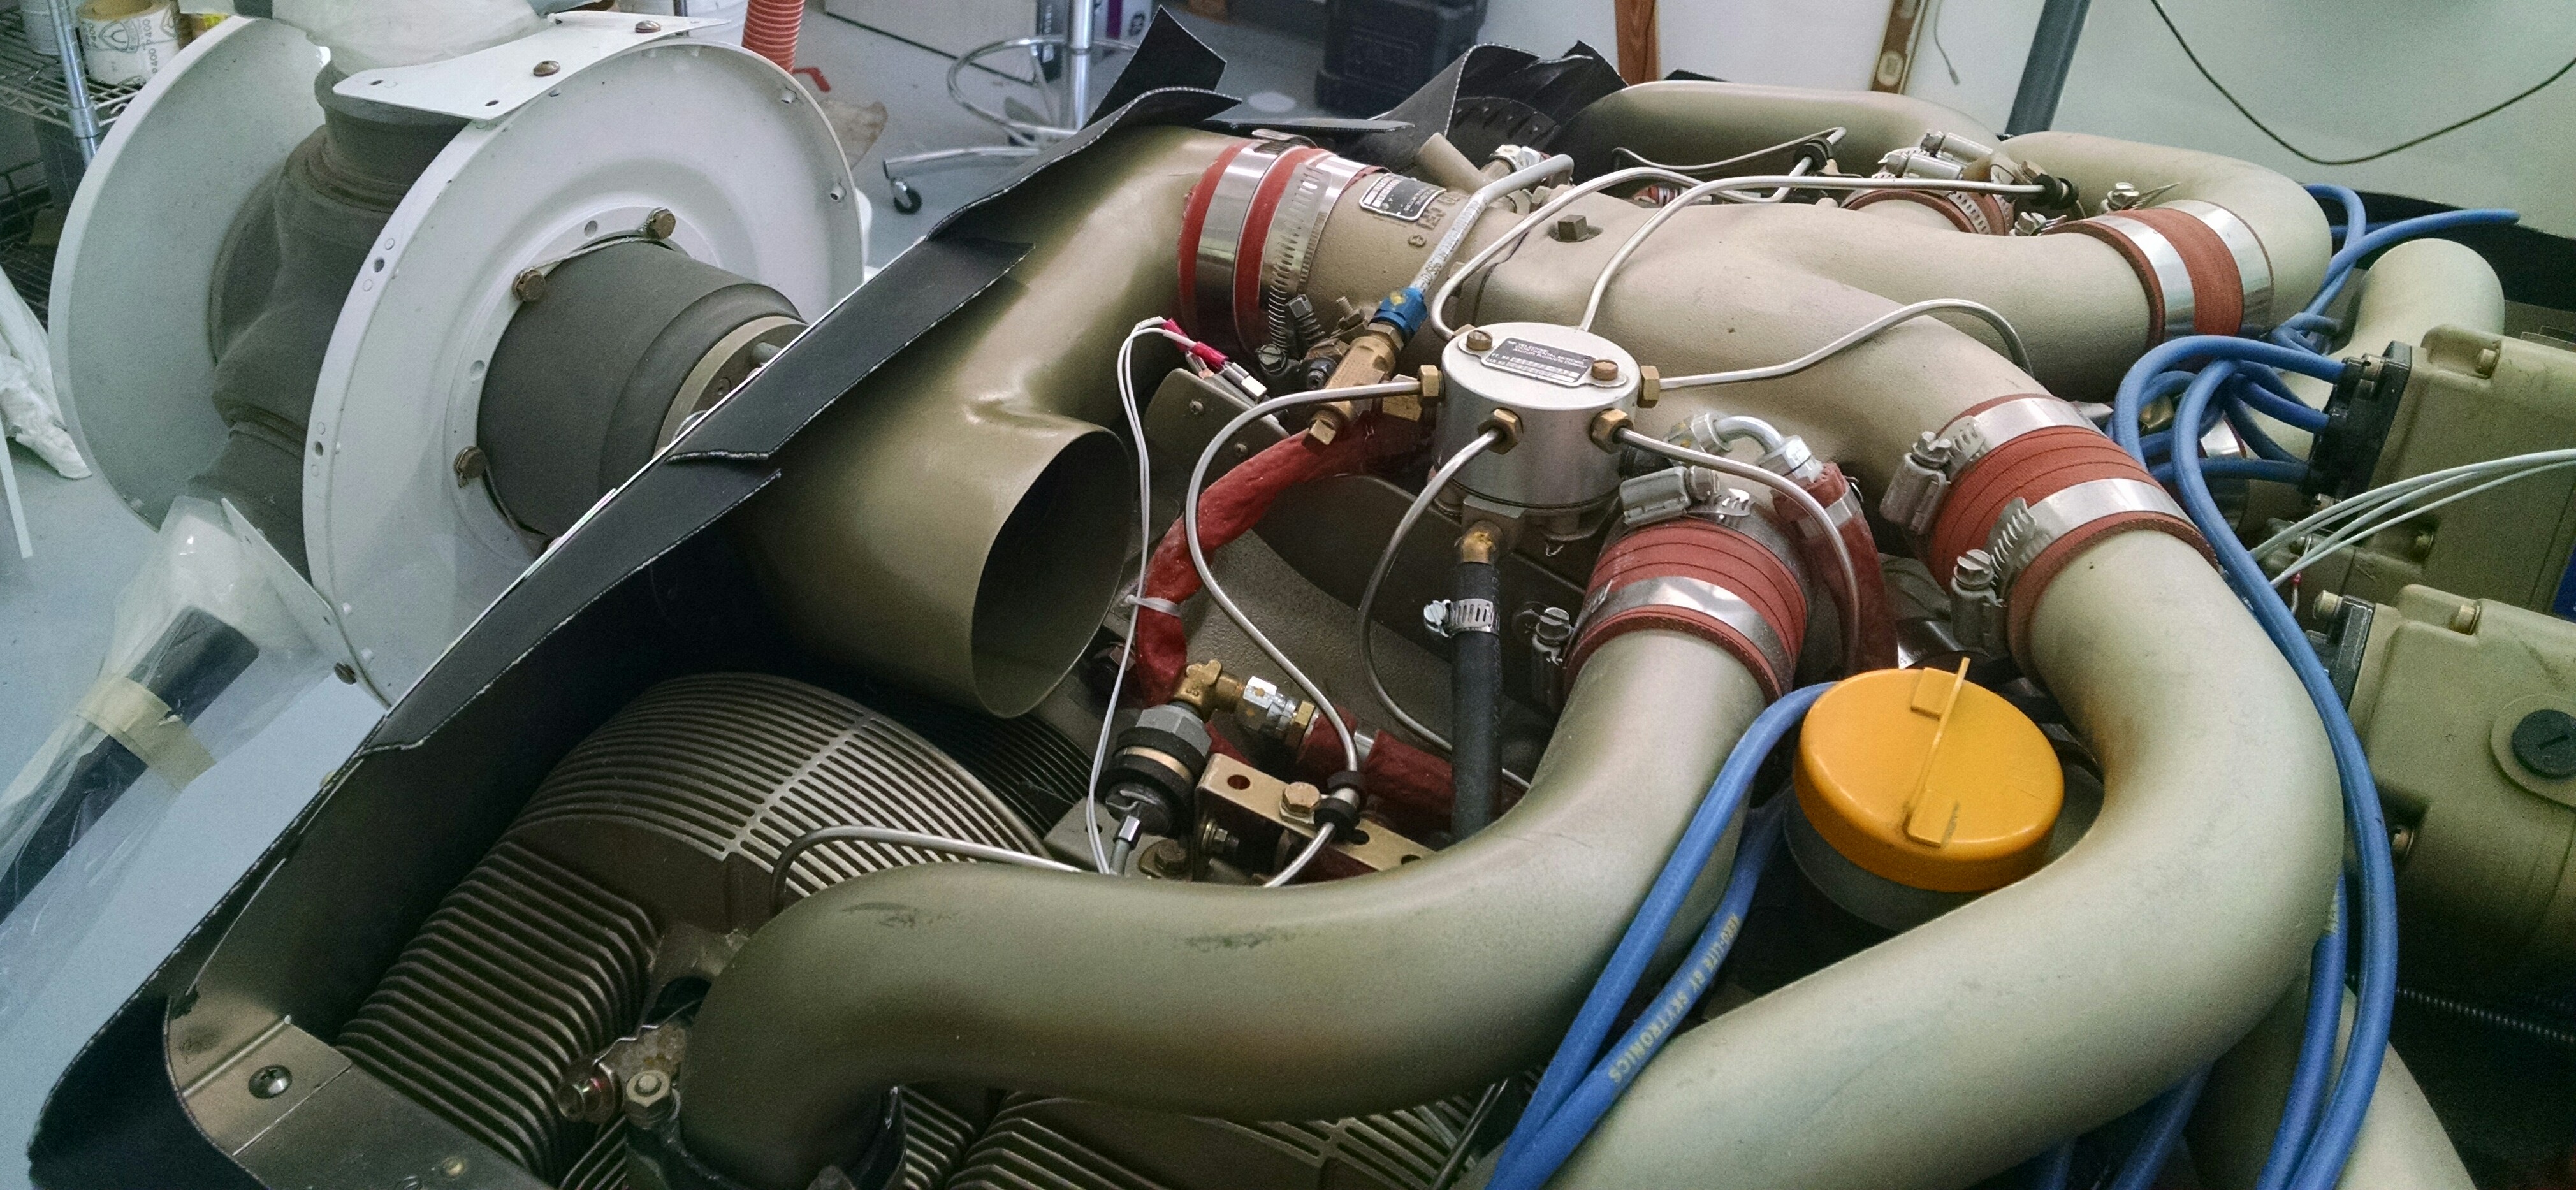
The Continental IO550 engine installation in a Velocity is somewhat unique. The induction air intake is unfiltered. While building, I started building a pipe to connect the intake to the lower plenum which would connect to a filter box that was then connected to an intake scoop or duct. But the space was just too tight and by this point the modifications had piled up and I needed to finish the build and get in the air. So I elected to stick with the plans. I did build a small U-turn so the air was being pulled from the front instead of the back.
Then one day during a short, local flight I noticed that I wasn’t fighting to keep my CHT’s down in the climb. And in cruise they were much lower than usual. Once back on the ground, I discovered that the oil door was open. I’m guessing that it wasn’t pressed all the way down and it popped open once the engine started. But why would that result in lower CHT’s?
Here’s my theory. The oil door is located forward of the engine air intake. I think that the open oil door provided a second air source which went mostly into the engine intake. With the oil door opening providing induction air, that left more NACA air available for cooling.

A quick, back of the napkin calculation showed that the engine consumes about 6.5 cu/ft of air every second. Which means that 6.5 cu/ft per second of cooling air coming in the roof NACA ducts is being consumed by the engine. Now I don’t know how to calculate the volume of air coming through the two roof NACA’s. But every cu/ft would matter.
Now the question is how to fix it.
I’m already in paint. So I would really like to not mess with the cowling. But I’ve got to create an opening for the engine air. I thought about making an oil door with a small scoop that fed a square duct on the underside of the upper cowling that then connected to the intake. But the fuel distribution lines are about an inch from the inside of the cowling. The other problem with that is a scoop sticking up into the air just in front of the prop would disturb the air even more than is already is.
So it would have to be a small NACA duct that terminates just above the intake. My old “U-turn” intake would have to be replaced with a box-type of intake that would accept the air from the NACA duct.
First order of business is to build the new airbox. Just like the original U-turn intake, I started with blue foam. Cut the basic shape on the bandsaw and then using Permagrit files I got it down to the shape I wanted.
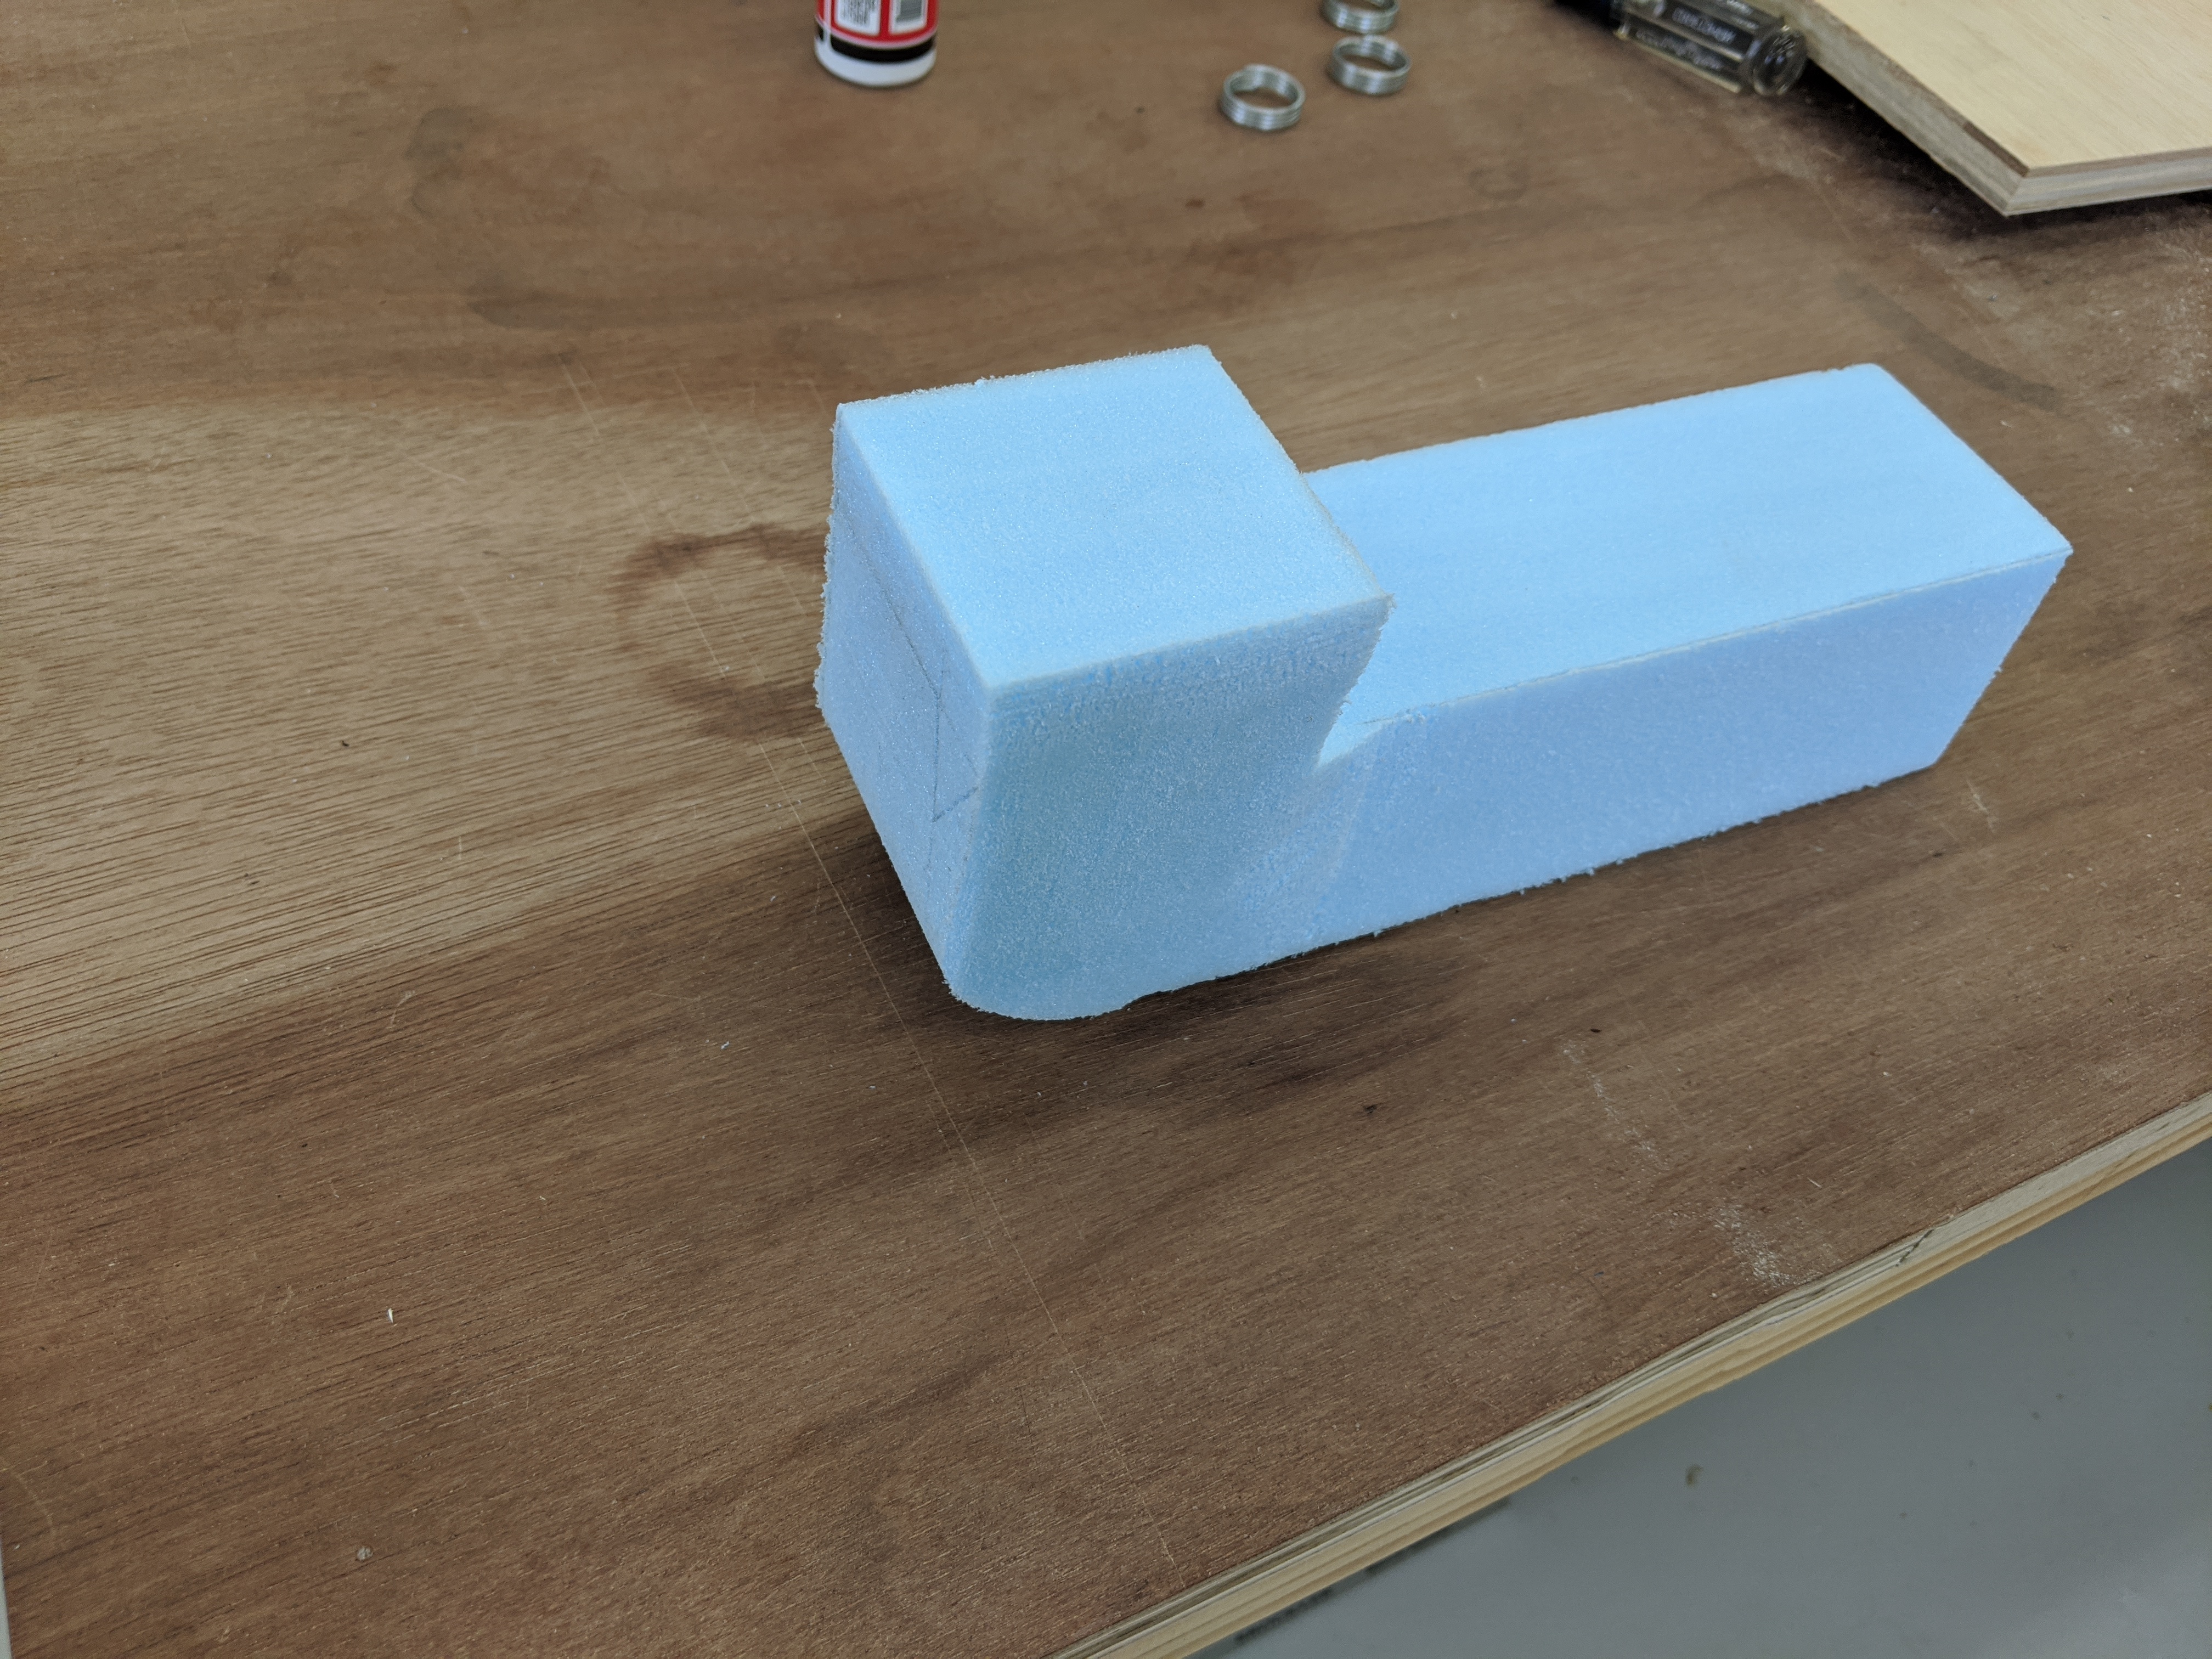


After a test fit, I had to create a couple of… divots to clear engine case bolts and screws from the aluminum baffle at the rear of the engine.

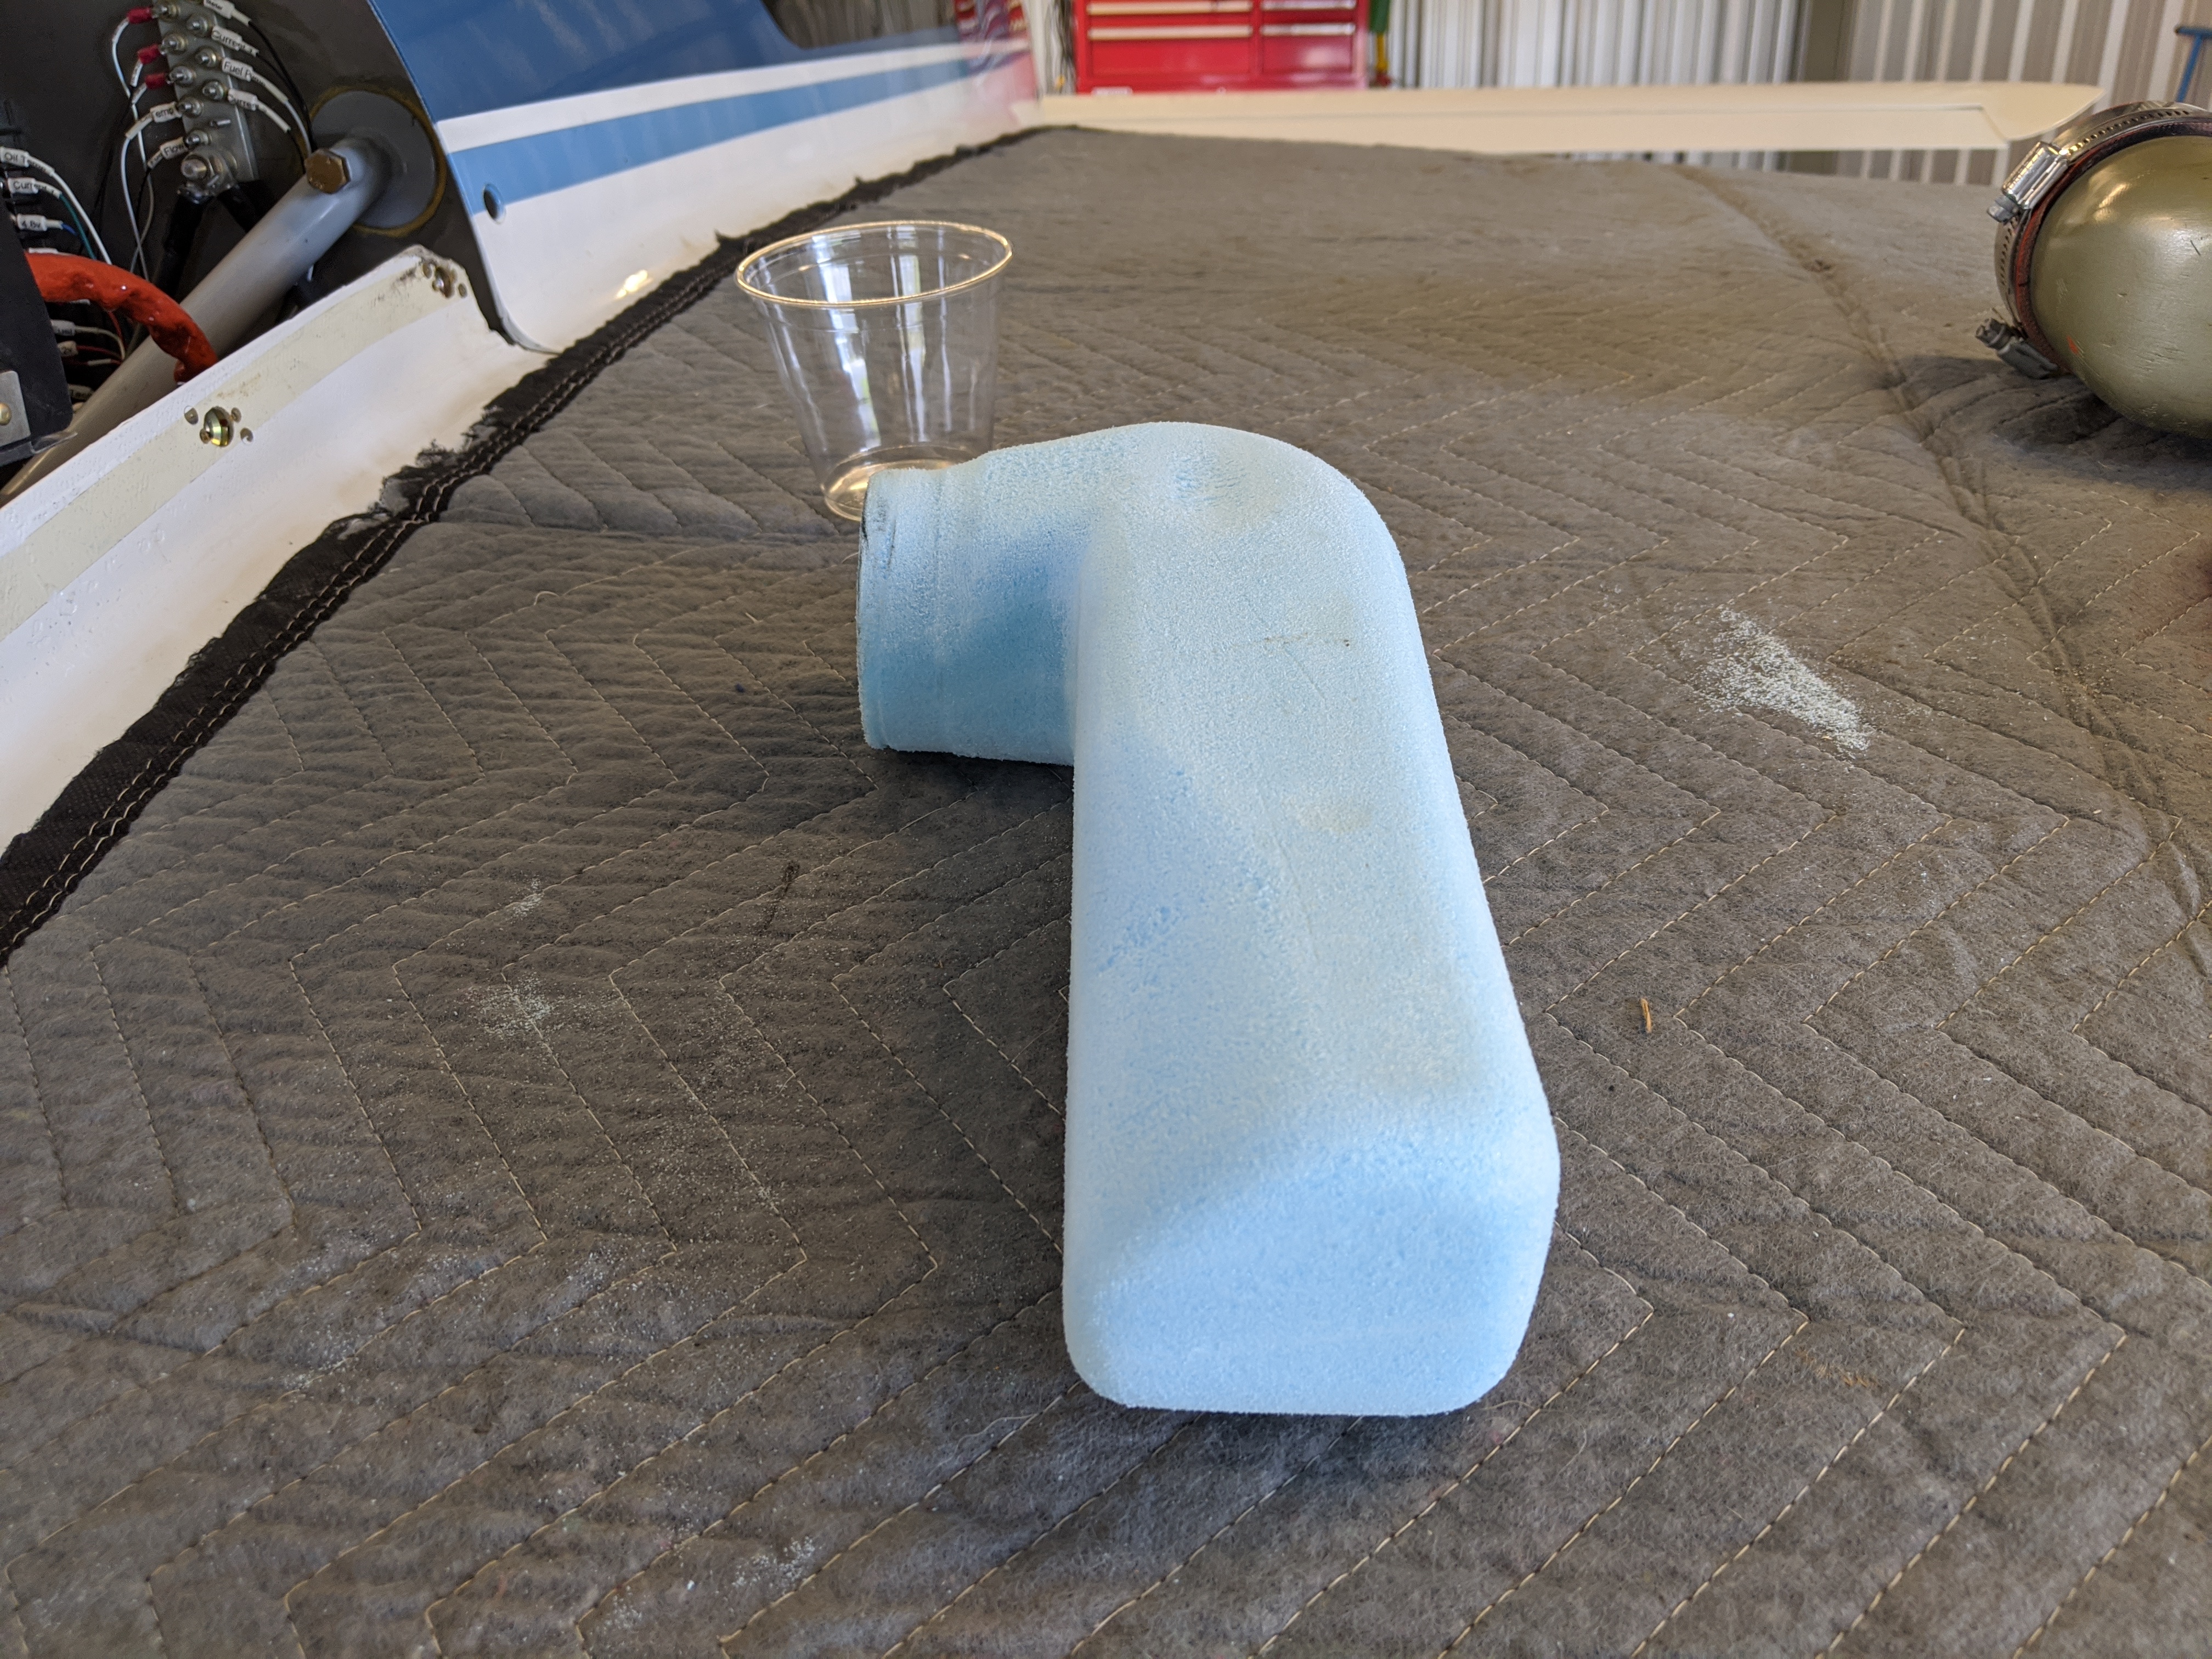
Then the whole thing gets wrapped in duct tape and a few layers of BID to create the final product. Once the epoxy has cured, I poured lacquer thinner down the opening to dissolve the blue foam. Then I just pulled out the duct tape. The first test fit of the new airbox revealed a problem that I ALWAYS discover: I make the foam blank the size I want the finished piece! Which means it a little too big. So rather than remake the whole part, I just ground out the divots and made them a little deeper.

Then I began sanding and filling to make it pretty. Because that’s how I roll.
Now that the airbox is done, it’s time to start on the duct. Because the engine intake is 2.75″ in diameter, that’s a little less than 6 square inches in area. So I will want the NACA duct to have at least that large of an opening. I decided on 4-1/2″ x 1-3/8″. That gives me a little under 6.2 square inches of area.
Andy Millin’s Excel spreadsheet was used to determine the shape of the duct.
I laid out three layers of BID on a waxed piece of glass. These would be the sides of the duct. Then I determined where the end of the duct should be and applied masking tape to the cowling and drew out the duct.
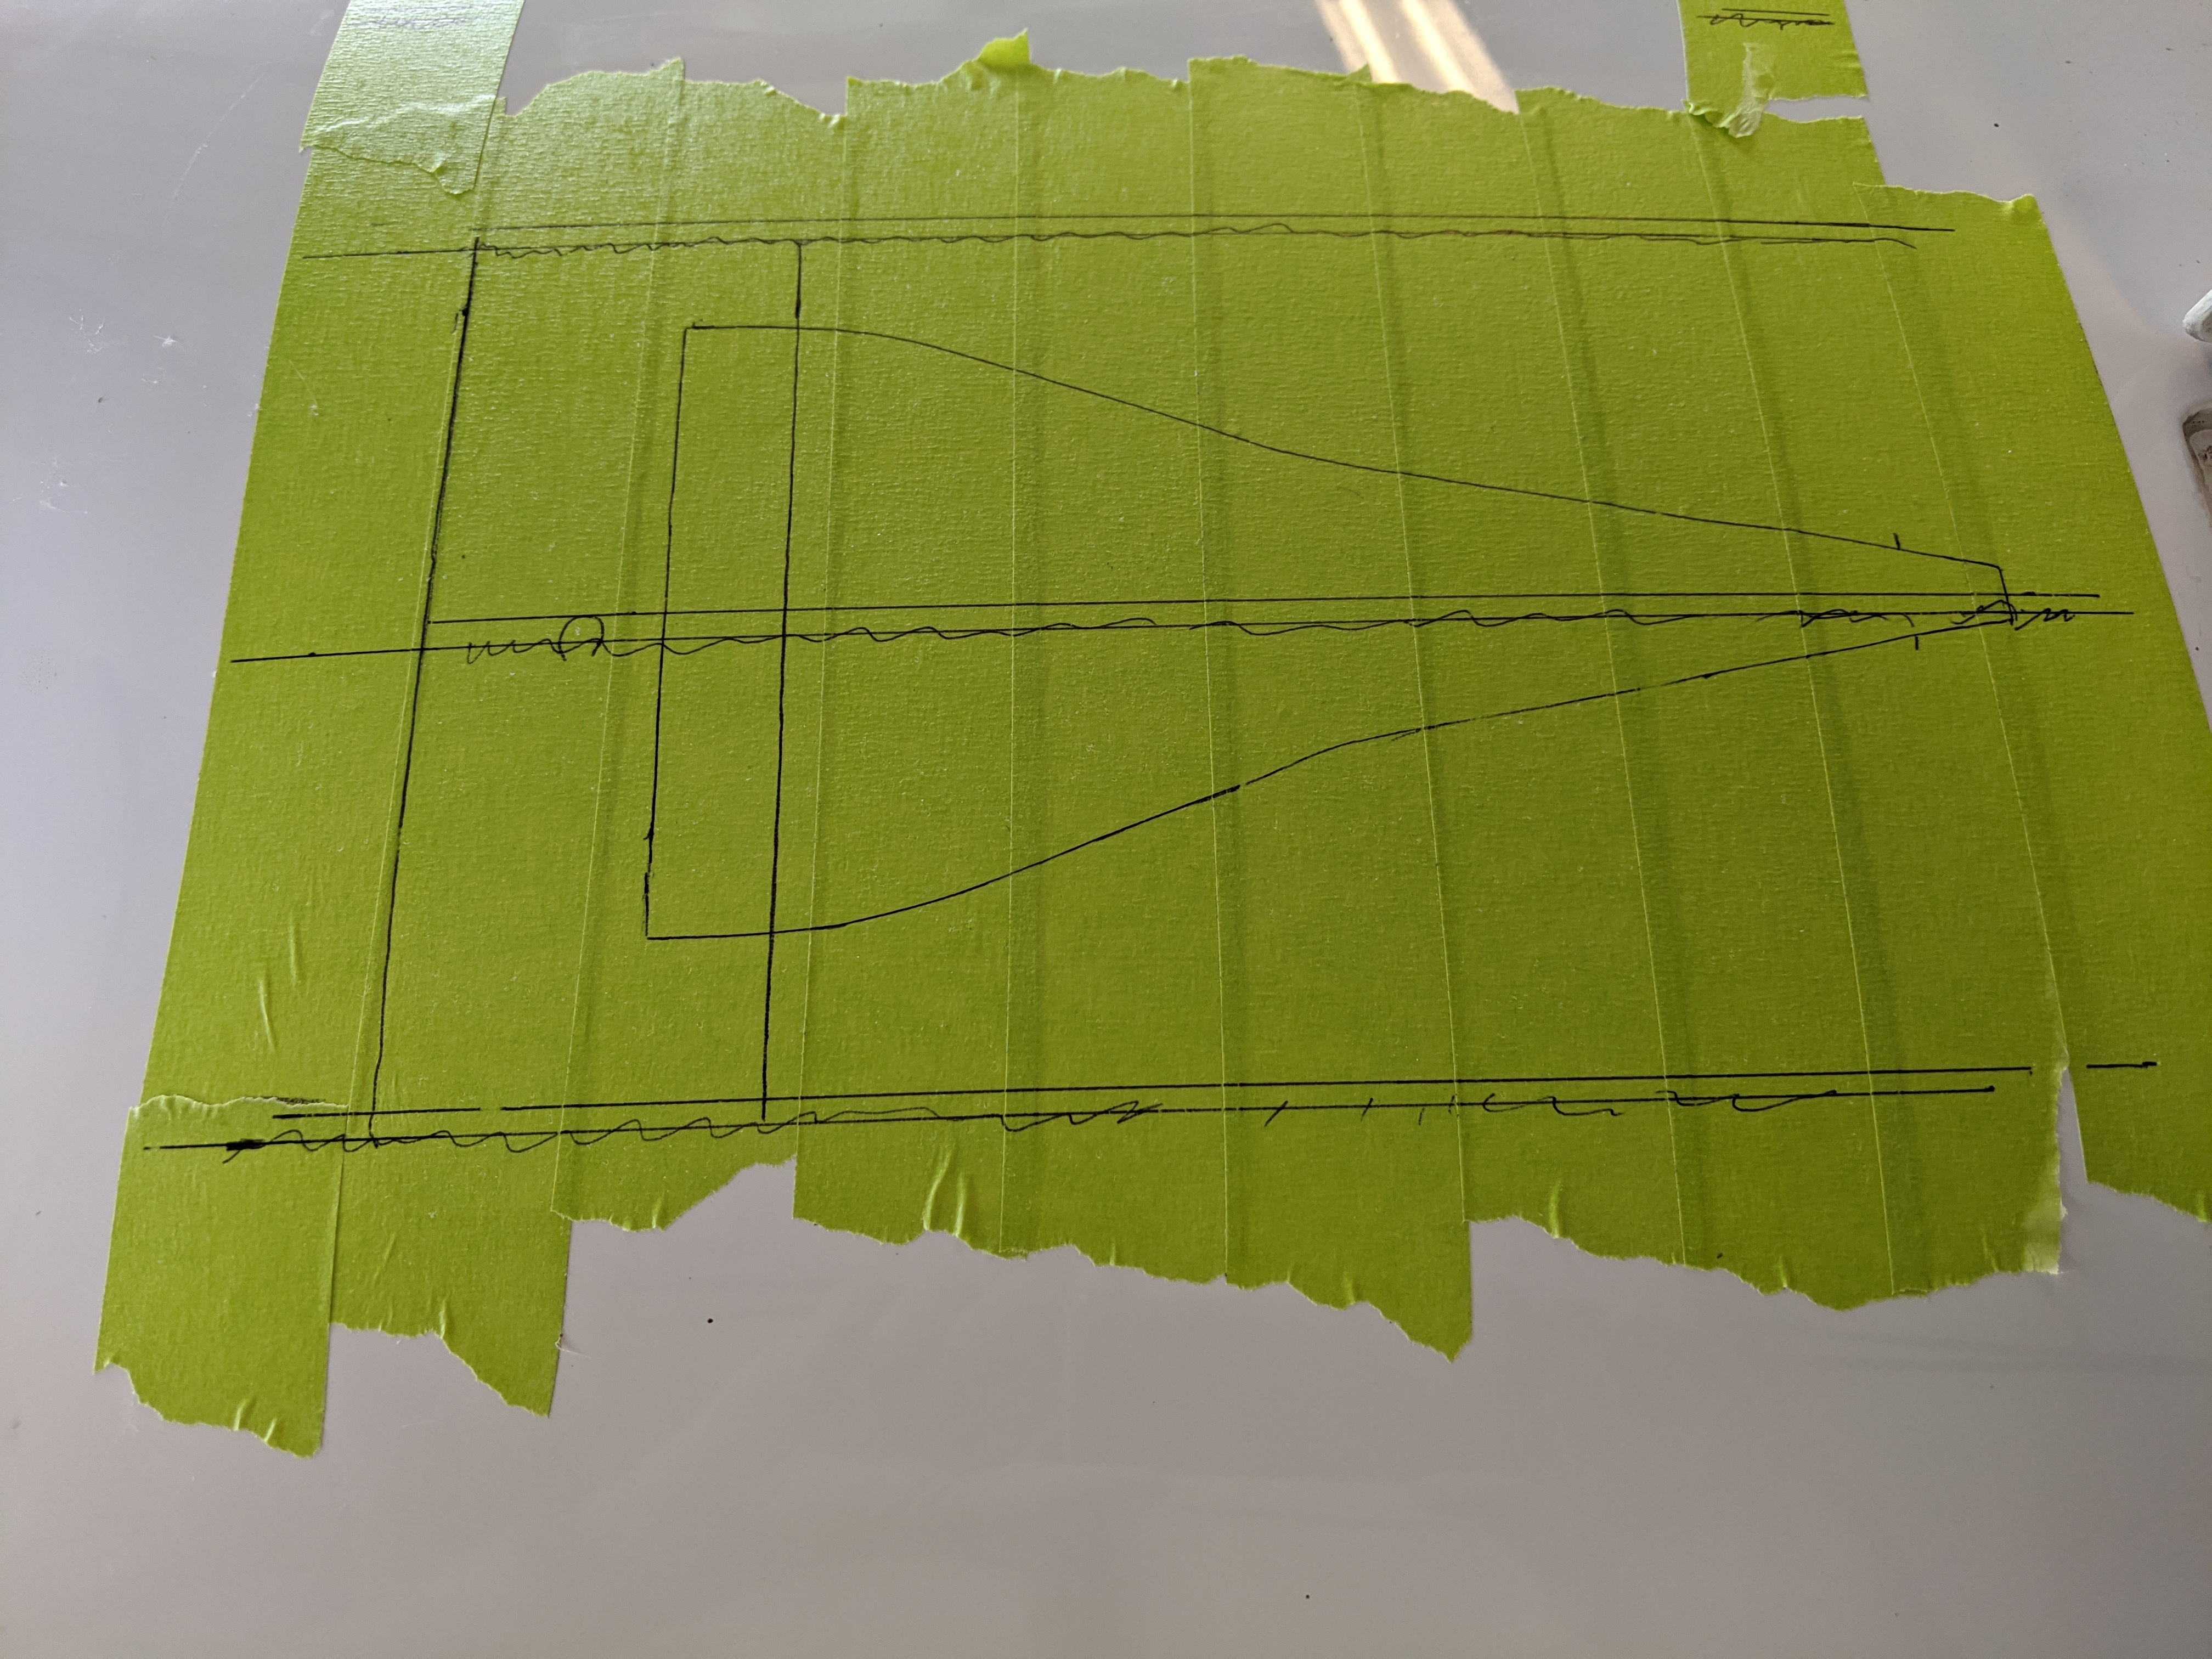
I cut the back and sides of the duct and left the front of the ramp attached.

The side pieces of the duct where cut so that they would be too high. I slid them into the cuts for the side of the duct (I used three layers of BID because it was the exact thickness of the saw blade I used to cut the duct). Stir sticks cut to 1-3/8″ long were used to hold the ramp at the correct angle while the epoxy holding the sides to the cowling and duct ramp cured.


Once the epoxy cured, I trimmed the top and bottom of the side pieces. I left them longer on the back to create the channel that would feed the airbox. I rounded the bottom side of the duct and applied a few layers of BID to reinforce the duct. On the topside, I used epoxy/cabo to create a small fillet at the bottom of the ramp. While all of that was setting up, I used some leftover fiberglass to create the front and back of the air channel. Then that was wrapped with BID as well.

After everything had cured, I began sanding, filling, sanding, filling sanding, priming, sanding, filling, sanding, priming… You get the idea. Eventually, it was time to paint. Before that, I did a test fit just to make sure the new duct didn’t interfere or hit anything on the engine.
I was going to paint it myself, but I figured that I would have the guy who painted the lower nose after the front gear sheared off take care of that task. Couple days later, the cowling was done.
Now it was time to figure out how to interface the duct channel with the airbox. When I started all of this, to allow the duct channel to be able to move in and out of the airbox and also move left/right and front/back, I was thinking of using baffle material as a sleeve. But the number of parts and complexity became too much. Add to that, there would be very little left/right and front/rear motion because of where this interface is located. And that it didn’t need to be perfectly airtight. So I decided to use flexible baffle material to make the interface as airtight and simple as possible.
I mounted the new airbox, installed the cowling (as far as it would go) and marked the airbox where the duct channel hit it. Then I cut a rectangular opening on the top of the airbox. Put the cowling back on, see where it hits, enlarge the opening, repeat about a half dozen times that now the duct channel slips inside the airbox opening. To be honest, this is probably good enough. I have about 1/4″ gap on the sides and 1/8″ on the front and rear. For now, I’m going to fly with it like this. Then once I’m certain there’s no contact between the NACA runner and the airbox, I’ll revisit the interface again.
One thing that was bothering me about this setup is water. I remember Malcolm telling me about a guy who put an induction air scoop on the bottom of the cowl (Lycoming engine, as I recall). One day he was trying to takeoff on a wet runway and the engine kept losing power during the takeoff roll. After a number of attempts, he gave up. Turned out that water was being kicked up by the nosewheel was being ingested into engine significantly reducing power. He ended up moving the intake duct off to the side didn’t have any further problems.
So I’m curious if I fly through some really heavy rain will I run into any problems. I asked a couple IA’s and they said if I flew through rain heavy enough to affect the engine performance that I had would be having other more significant issues before the engine became a problem. Okay… but where to get a more expert opinion?
George Braly is an engine guy who really knows engines. He’s one of the three guys who started GAMI and Tornado Alley Turbo. We had a chat unrelated to Velocity’s almost 20 years ago. So I reached out and asked him. He said that he had run some calculations at one point and that heavy rain shouldn’t be able to introduce enough water as to affect engine operations. He also wasn’t a fan of NACA ducts. But that donkey was already out of the barn. But his feeling about the water was good enough for me… Kinda.
I remember my old IA telling me how the intake on a Cessna Caravan works. The air intake is actually at the back of the engine. The air enters a duct just behind the prop. Travels all the way to the back of the engine and then makes a 180 degree turn and enters the turbine inlet. If they are taking off from an unimproved runway or in situations where lots of… non-air material is entering the duct, they can open a door at the 180 turn so that heavy material will continue out the back while the (lighter) air makes the 180 degree turn into the engine.
So here’s what I’m thinking: The airbox slopes away from the engine intake. I’ll drill some holes at the lowest point in the airbox. Any excessive water will drain out the airbox while the lighter air will make the 180 degree turn into the engine intake. I’d really like a door that I can open, but that’s a long way to run that cable. And I’ve already got three control levers besides the engine controls in the cabin (heated air damper, oil cooler damper and parking brake) so I don’t one more to have to find a place for.
Finished airbox painted the same color as the engine.

Installed on the engine.

Cowling installed


I was able to go up the other day. Unfortunately, because of the Saharan dust cloud I couldn’t get over 2,500′ so I had to pull the power back and descend to 2,000′ with the power pulled back so I don’t have a good “apples to apples” comparison flight (normally when I takeoff the power stays all the way in until I hit cruising altitude). But looking at a past flight with the OAT 15F cooler and the engine oil cooler damper closed (providing more cooling air for the cylinders and induction), my #2 CHT hit 412F on that flight. On my latest flight the OAT was 15F hotter, the oil cooler damper was open and my #2 CHT only hit 397F. I’m think that with the damper closed that I would have dropped that temp at least 10 to 15 degrees.
So for now, I’m calling this a win. Once this dust clears out I’ll be able to get some additional data.